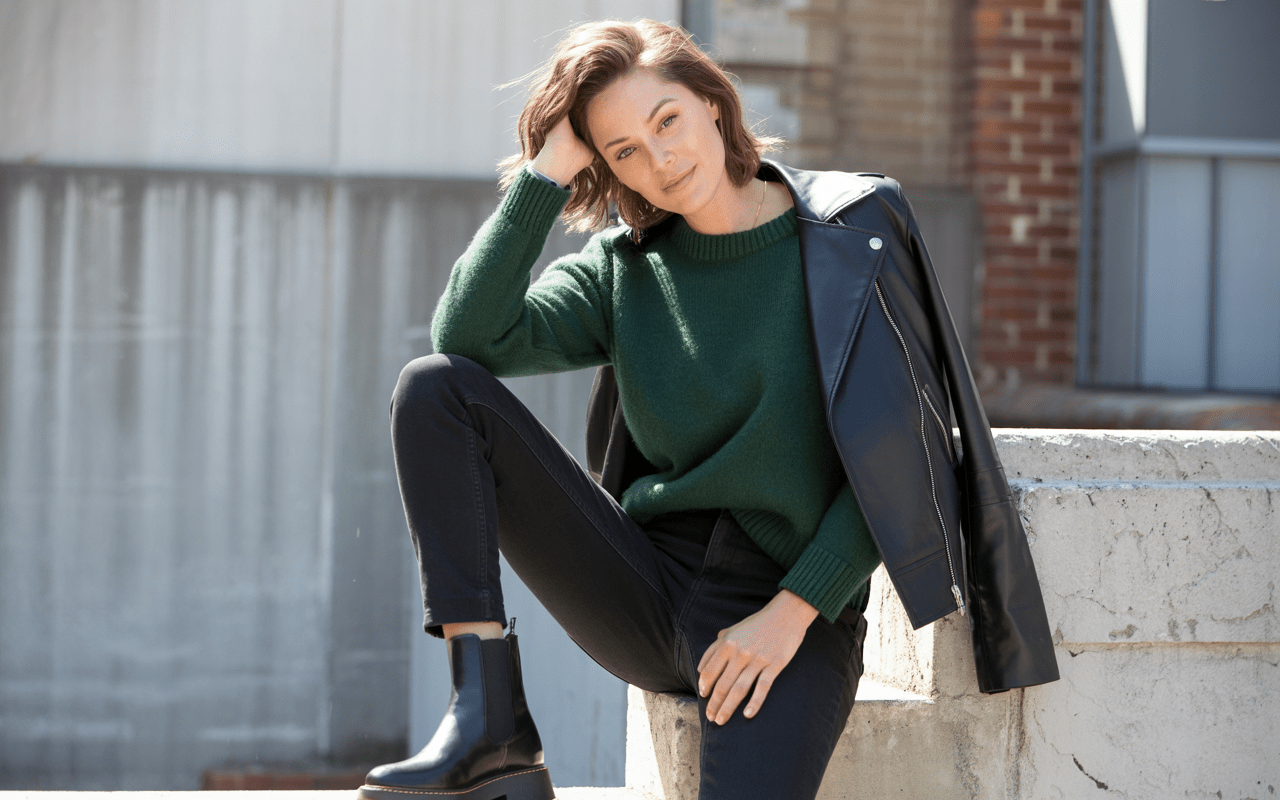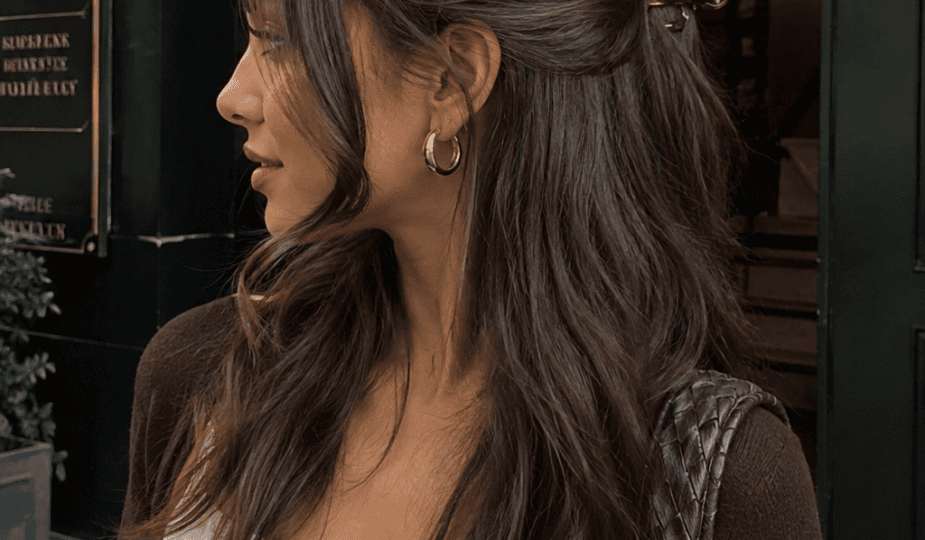
We have all stood in front of the bathroom mirror on a Tuesday morning, holding a hair tie, staring at a mop of bedhead, and wondering why adult life requires so many decisions. You want your hair out of your face so you can actually eat your lunch without consuming half your tresses, but pulling it all into a topknot feels a little too “I gave up three days ago.” Enter the half-up half-down hairstyle: the undisputed MVP of hair styling.
I used to think half-up styles were strictly reserved for primary school picture days or Victorian period dramas. Then I had a massive styling mishap at a friend’s outdoor wedding where a sudden gust of wind turned my sleek blowout into a hot, sticky mess of lip gloss and tangled strands. In a desperate dash to the venue restroom, I grabbed two bobby pins from my clutch, twisted the front sections back, and prayed. Not only did it save my sanity, but three people asked me which salon I went to before the night ended.
1. The Effortless Twisted Crown
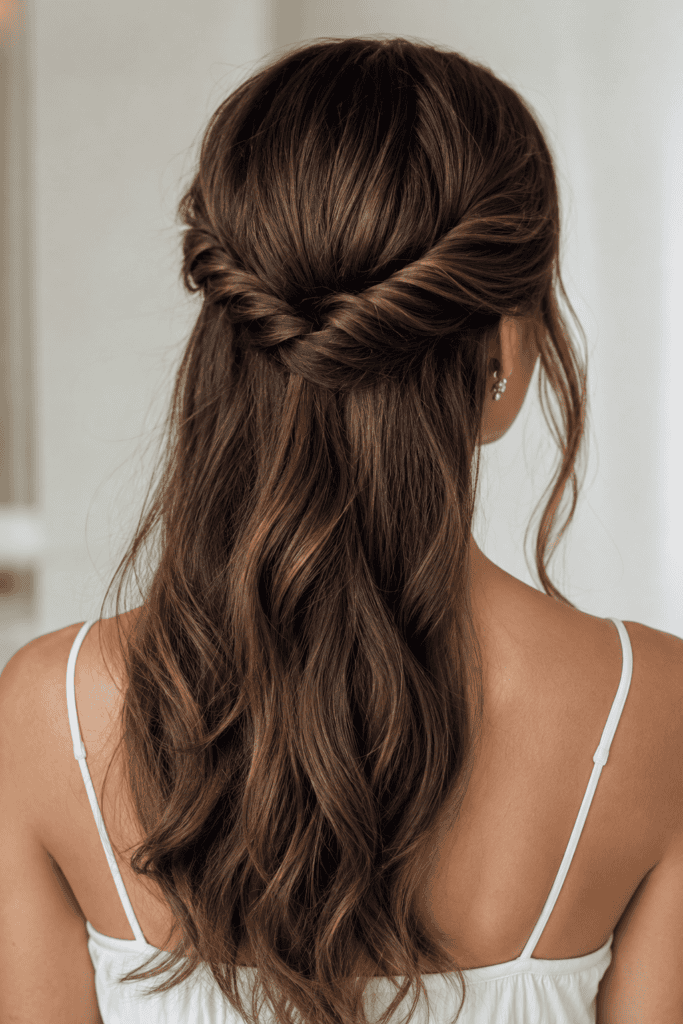
If you can twist two sections of hair, you can master this look in under three minutes. It adds instant romantic texture to any hair type, and it works exceptionally well when you have zero time to wash your hair before running out the door.
I love this style because it covers a multitude of sins, including uneven textures and bedhead. You simply take two front pieces, twist them back away from your face, and pin them together where they meet at the back of your head.
- Best hair length: Medium to long
- Key tool: Mini claw clips or bobby pins
- Styling time: 3 minutes
To keep this from looking like a strict Victorian crown, gently pull on the edges of the twists to fan them out before pinning. This technique, known as pancaking, adds soft volume and makes the style look intentionally relaxed rather than painted on.
2. The Sleek High-Pony Split
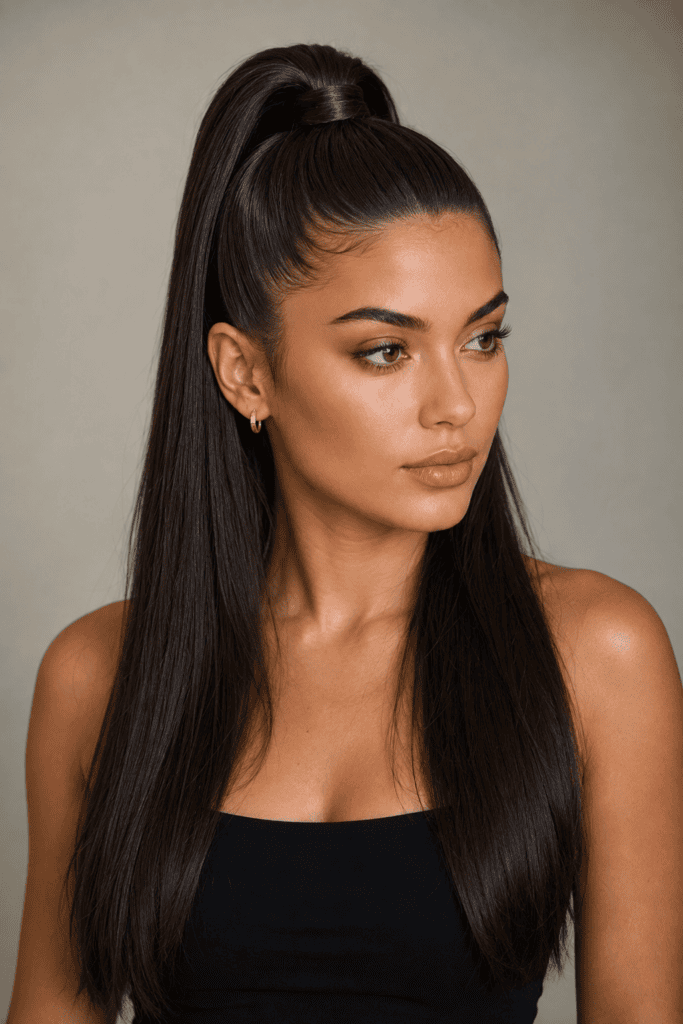
Who hasn’t struggled with getting a clean ponytail without those annoying side bumps popping up? This sharp, lifted variation solves that problem while giving your cheekbones an instant, temporary lift.
By separating the top third of your hair and pulling it into a tight, high ponytail right on the crown, you leave the rest flowing smoothly over your shoulders. It creates a striking contrast between structure and softness that looks incredibly modern.
- Best hair length: All lengths (even shoulder-length lobs)
- Key tool: Boar-bristle brush and strong-hold hair gel
- Styling time: 5 minutes
Apply a tiny drop of smoothing serum or light hair gel to your roots before brushing the top section up. Secure it with a small elastic, then wrap a tiny strand of hair around the band to hide the elastic completely for a sleek finish.
3. The Mini Topknot with Loose Waves
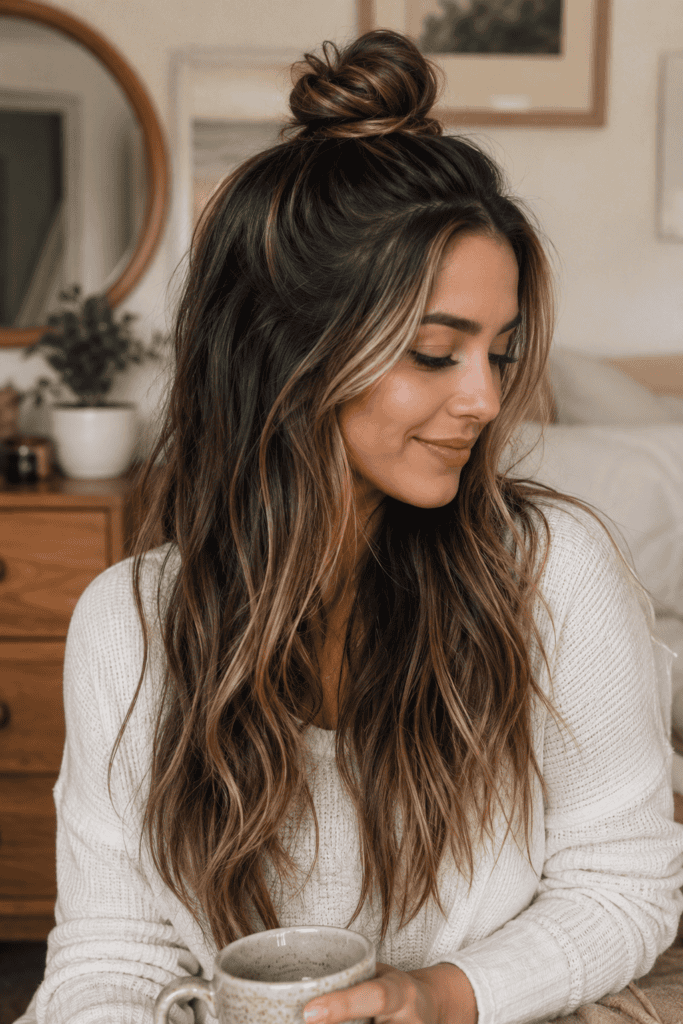
This style reigns supreme for casual coffee runs and lazy Sunday brunches. It takes the messiness of a standard topknot and grounds it with soft, flowing lengths underneath.
I tried wearing this look to a formal dinner once thinking I could pull off “cool-girl nonchalance,” but I forgot to pin the bun securely and it slowly slid down the side of my head during dessert. TBH, it was a valuable lesson in anchoring your topknots properly 🙂
Step 1: Section off the hair from your temples up to your crown.
Step 2: Twist the gathered section into a loose, round bun.
Step 3: Secure with two bobby pins crossed in an 'X' shape at the base.
Step 4: Use a 1.25-inch curling iron to add loose, soft waves to the bottom layer.
4. The Chunky 90s Tendril Half-Up
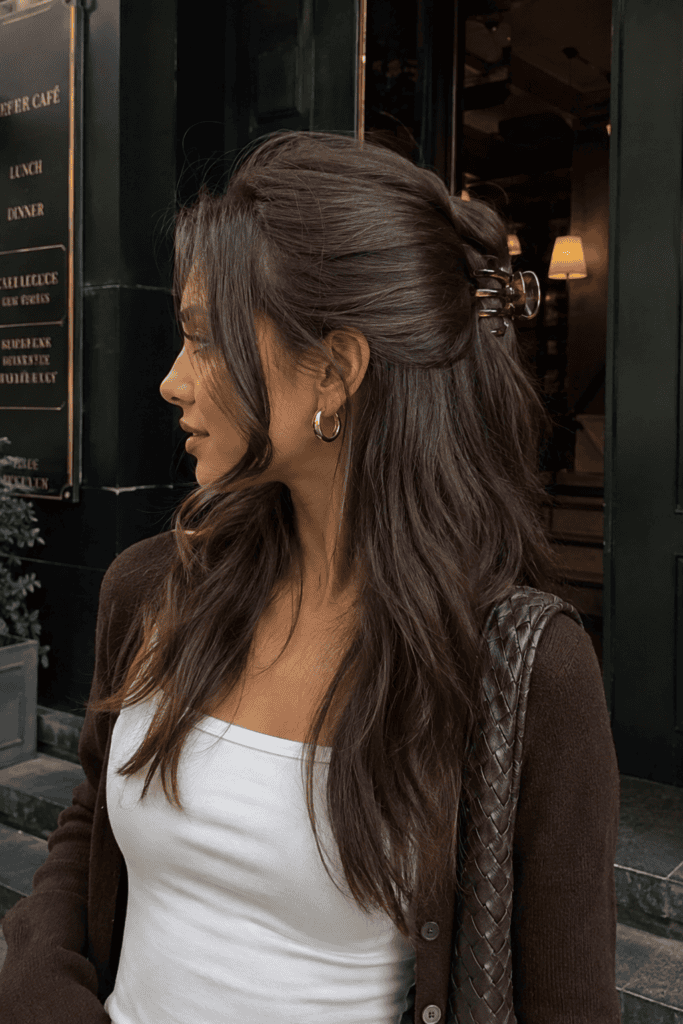
The 90s nostalgia trend shows no signs of slowing down, and this particular iteration brings back the best parts of the decade without the blue eyeshadow.
By leaving two distinct, thick face-framing pieces out in front, you pull the rest of the top half into a casual claw-clip arrangement. The face-framing tendrils soften your jawline and make the entire look feel laid-back and deliberate.
- Best hair length: Shoulder-length and longer
- Key tool: Medium claw clip
- Styling time: 2 minutes
If your front tendrils fall completely flat, run a straightener through them in a gentle ‘C’ shape bent inward toward your chin. This subtle curve frames your facial features without looking like a stiff pageboy cut.
5. The Dutch Braid Crown Integration
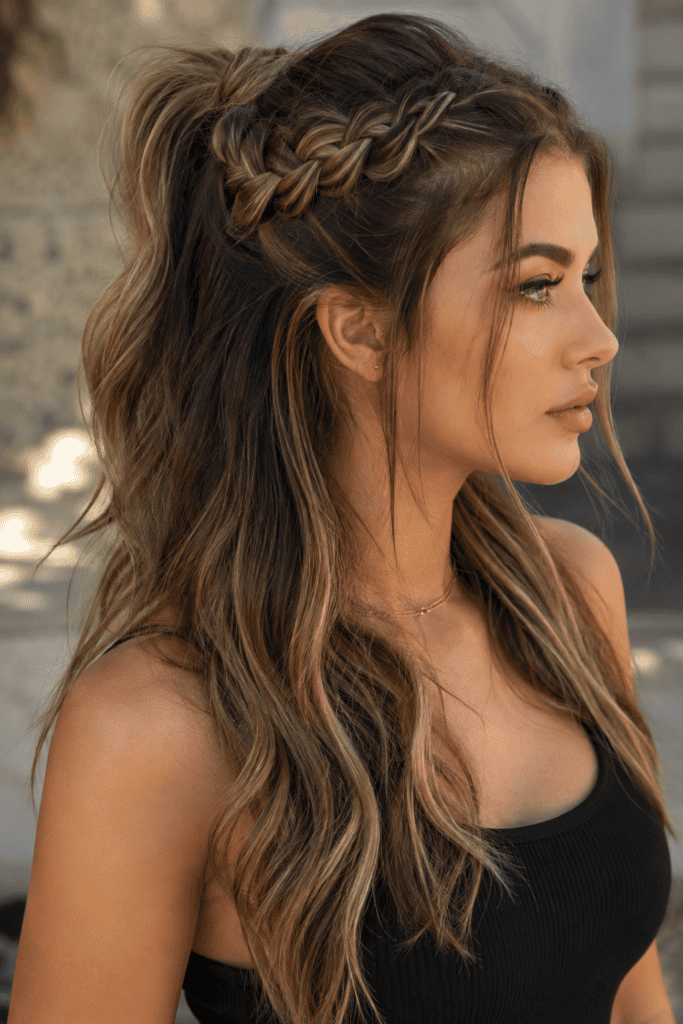
When you want a style that survives a stormy day or an intense afternoon of running errands, braids are your absolute best friend.
A single or double Dutch braid running along the hairline and merging into a half-up ponytail locks your strands in place while adding rich, three-dimensional texture across the top of your head.
- Hair Type Compatibility: Thicker, coarser hair textures love this look because the braids hold securely without sliding out.
- Fine Hair Solution: If you have finer strands, spritz a healthy dose of dry texturizing spray onto your roots before braiding to add much-needed grip.
- Finish: Secure the braid behind your ear with a clear micro-elastic, leaving the lower half free to flow natural or curled.
6. The Tailored Pearl-Barrette Stack
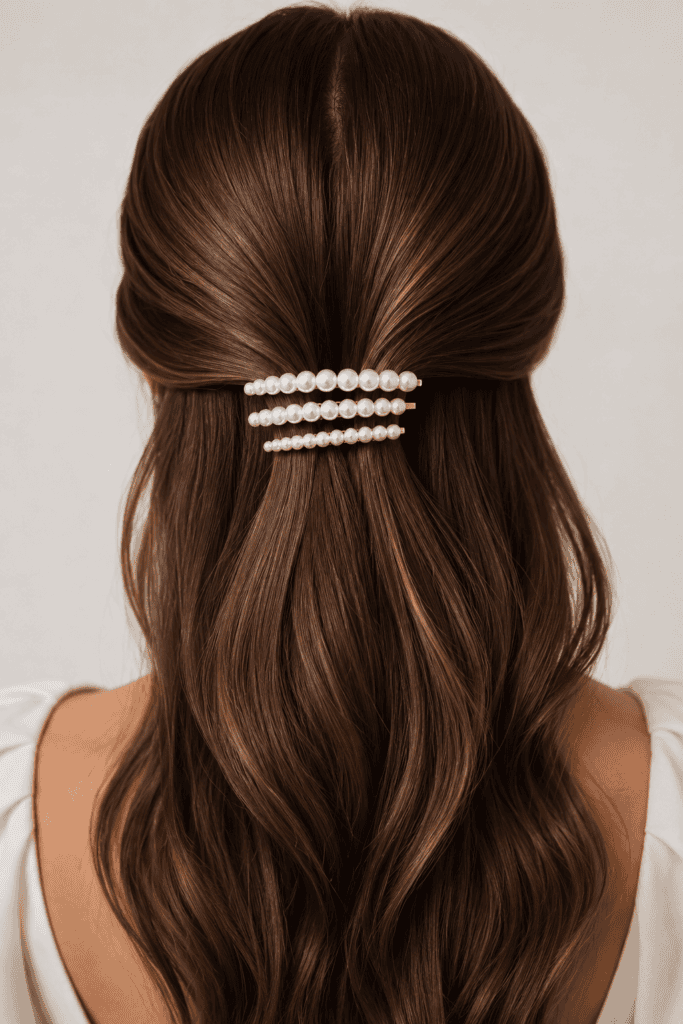
Sometimes you do not need a brand-new styling technique; you just need better accessories. A clean, classic half-up gather becomes instantly striking when anchored with intentional hair jewelry.
I keep a small velvet tray of oversized pearl pins and minimalist metal slides on my vanity for mornings when my hair refuses to cooperate with hot tools.
- Step 1: Comb your hair smooth and create a clean center part.
- Step 2: Pull back a two-inch section from each side above the ears.
- Step 3: Secure them at the back of your head using a small, clear elastic band.
- Step 4: Slide two or three overlapping pearl barrettes directly above the elastic to hide it and create an artful stack.
This setup looks refined, takes under two minutes, and instantly elevates a basic crewneck sweater or casual blazer.
7. The Boho Half-Up Fishtail
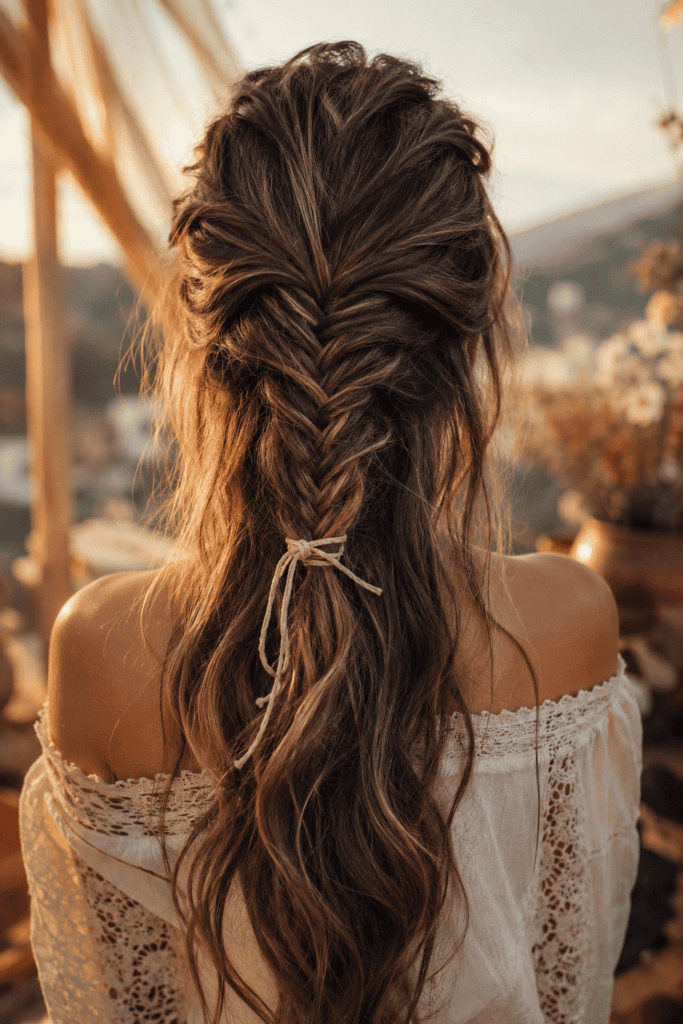
Fishtail braids look extraordinarily complicated, which makes them brilliant for convincing people you spent an hour on your hair when you actually spent four minutes.
Instead of braiding all your hair, gather just the upper crown section and craft a loose fishtail braid down to the mid-lengths.
+------------------------+-----------------------------------------------------+
| Feature                | Detail                                              |
+------------------------+-----------------------------------------------------+
| Difficulty Level       | Moderate                                            |
| Ideal Hair Texture     | Wavy, textured, or second-day hair                  |
| Key Technique          | Splitting hair into two sections (not three)        |
| Recommended Accessory  | Clear elastic + suede cord tie                      |
+------------------------+-----------------------------------------------------+
Once you tie off the end of the braid with a clear band, gently pull the outer loops apart with your fingers. This gives the fishtail a wider, softer appearance that looks soft and romantic rather than tight and restrictive.
8. The Bow-Tied Vintage Flip
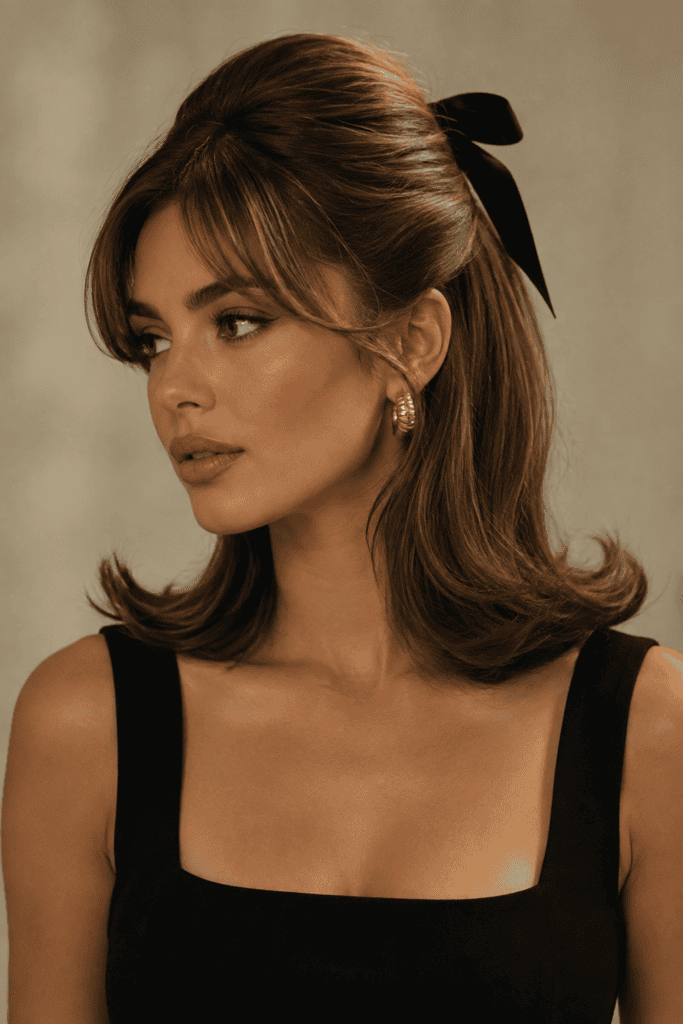
Retro hair details are having a massive resurgence, and this 60s-inspired look brings just the right amount of volume and charm to your everyday outfit rotation.
I attempted this look for an evening event last autumn and accidentally went full Pageant Queen because I teased the crown way too hard. A little restraint goes a very long way here.
- Gently tease the crown area using a fine-tooth tail comb to create subtle height.
- Smooth the top layer over the teased section so no messy tangles show through.
- Gather the side sections behind your head and tie them with a black velvet ribbon.
- Use a round brush or curling iron to flip the ends of the bottom layer outward.
The outward flip at the ends gives the silhouette a playful energy that balances the volume at the top perfectly.
9. The Bubble Ponytail Half-Up
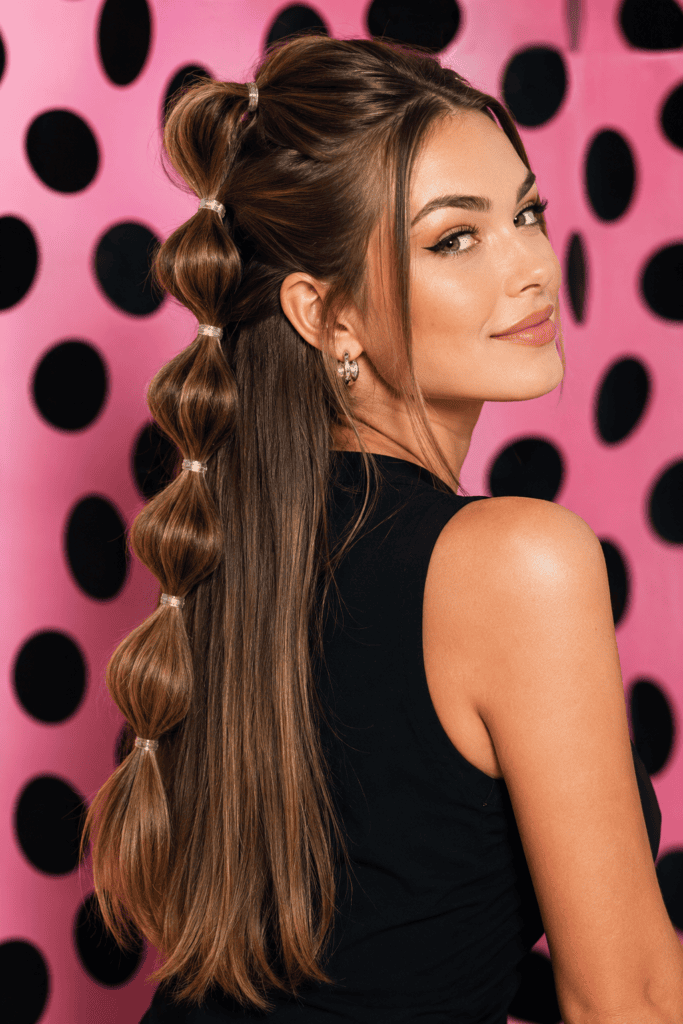
Why settle for a plain half-up ponytail when you can add geometric interest with simple mini-elastics?
The bubble ponytail technique takes a standard half-up gather and transforms it into a fun, modern style that stays completely secure all day long.
- Base setup: Gather the top section of hair into a high half-up ponytail.
- Adding bubbles: Place another small elastic two inches down the ponytail shaft.
- Creating volume: Hold the second elastic and use your thumb and index finger to gently pull the hair between the two bands outward in all directions.
- Repeat: Add a third elastic two inches below that one and repeat the puffing technique until you reach the ends.
This look works insanely well on medium-to-long straight hair that usually slides out of traditional braids or intricate twists.
10. The Crossed Bobby Pin Lattice
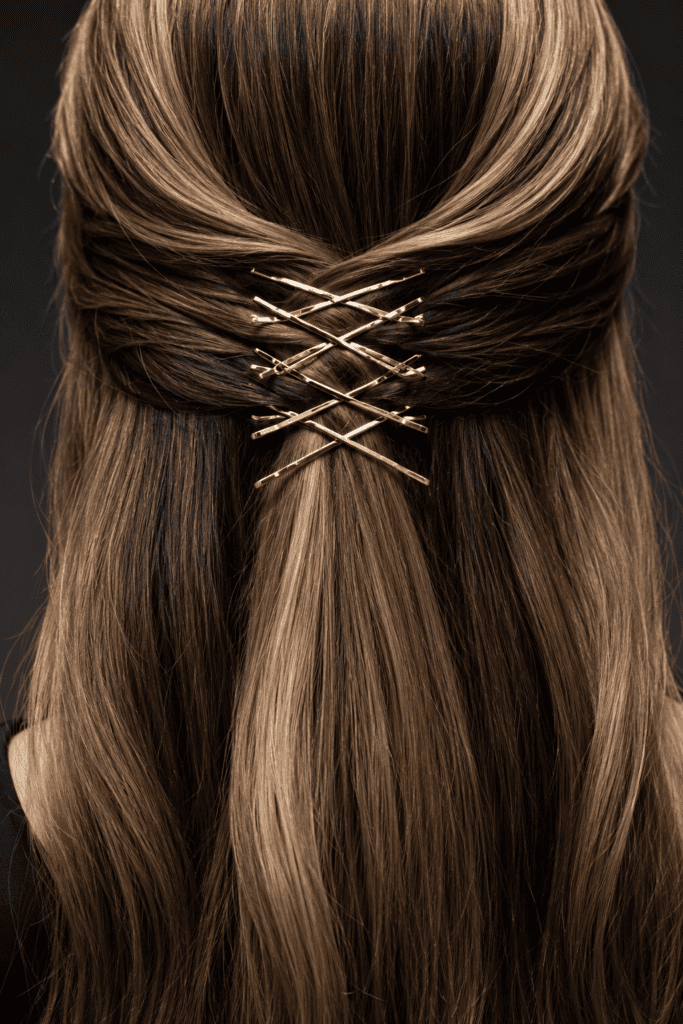
Ever bought a pack of fifty bobby pins, lost forty-eight of them in a week, and wondered where they go? I used to hide my bobby pins as deep inside my hair as possible, but this style turns them into the main event.
Instead of hiding your hair pins, you use exposed, colorful, or metallic pins to create an eye-catching geometric pattern across the back of your head.
Step 1: Smooth your side sections flat against your head, pulling them back above your ears.
Step 2: Cross the right section over the left section at the back of your head.
Step 3: Slide one bobby pin diagonally downward across the crossed strands.
Step 4: Slide a second bobby pin diagonally in the opposite direction to form a clean 'X'.
Step 5: Repeat directly below the first 'X' to create a sleek lattice effect.
Using gold, silver, or bright enamel pins against darker or lighter hair creates a stark, beautiful contrast that looks like custom architectural jewelry.
11. The Half-Up French Roll
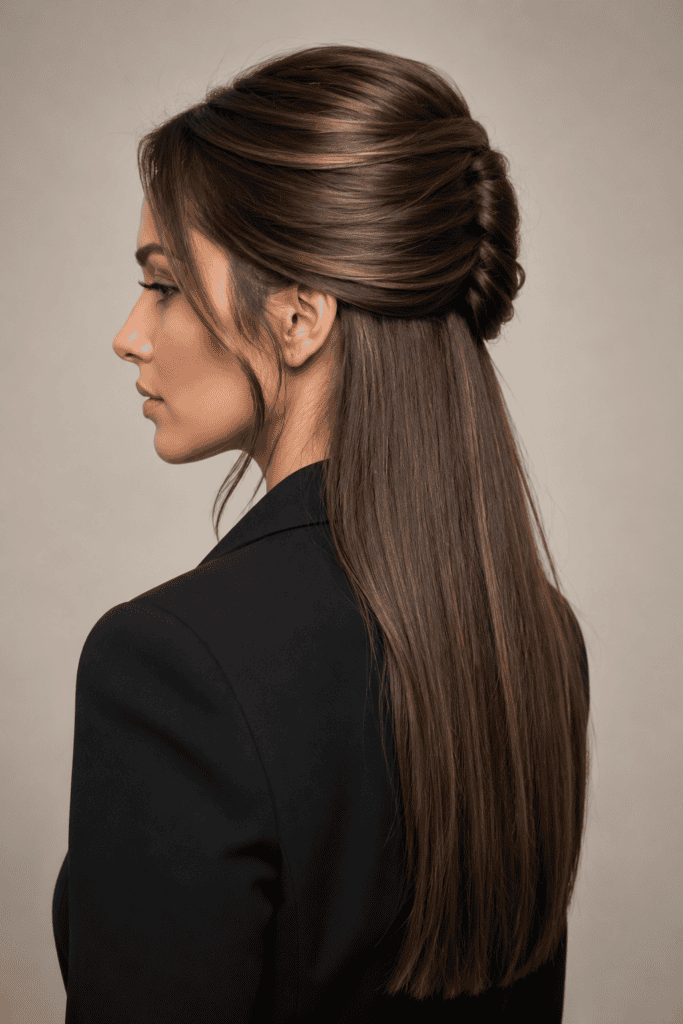
For those days when you need to look polished, authoritative, and put-together for an important meeting, this sophisticated variation delivers every single time.
It adapts the classic French twist into a lighter, half-up format that keeps your hair secure without feeling overly stiff or aging.
- Sectioning: Gather the top half of your hair and pull it back toward the center.
- The Twist: Roll the gathered hair inward toward your scalp, creating a neat vertical seam.
- Securing: Anchor the roll using French hair pins pushed directly into the base of the twist.
- The Finish: Leave the lower half of your hair smooth and straight to balance the structured roll above.
I love pairing this look with tailored blazers or crisp button-down shirts. It pulls your features upward and looks stunningly refined from every side angle.
12. The Messy Claw Clip Gather
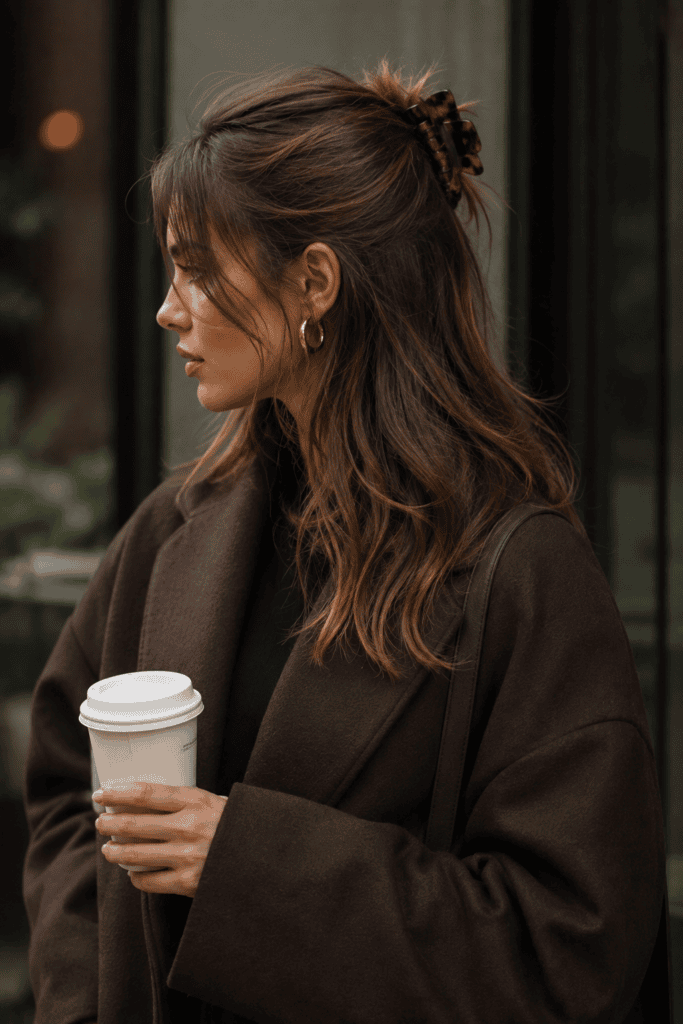
If you only have thirty seconds before heading out the door, this is the ultimate solution. It is the reigning queen of low-effort, high-reward styling.
IMO, the key to making a casual claw clip look intentional rather than sloppy lies entirely in the placement and hair texture.
- Spritz a bit of sea salt spray through your lengths for touchable grip.
- Rake your fingers through your hair—do not use a brush—and gather the top section loosely at your crown.
- Twist the gathered section once, flip it upward, and snap an acetate claw clip directly over the twist.
- Pull a few short baby hairs down around your ears and temples to keep the frame soft.
The raw, brushed-through texture gives this look an off-duty model vibe that pairs seamlessly with oversized coats, denim jackets, and casual knitwear.
13. The Half-Up Space Buns
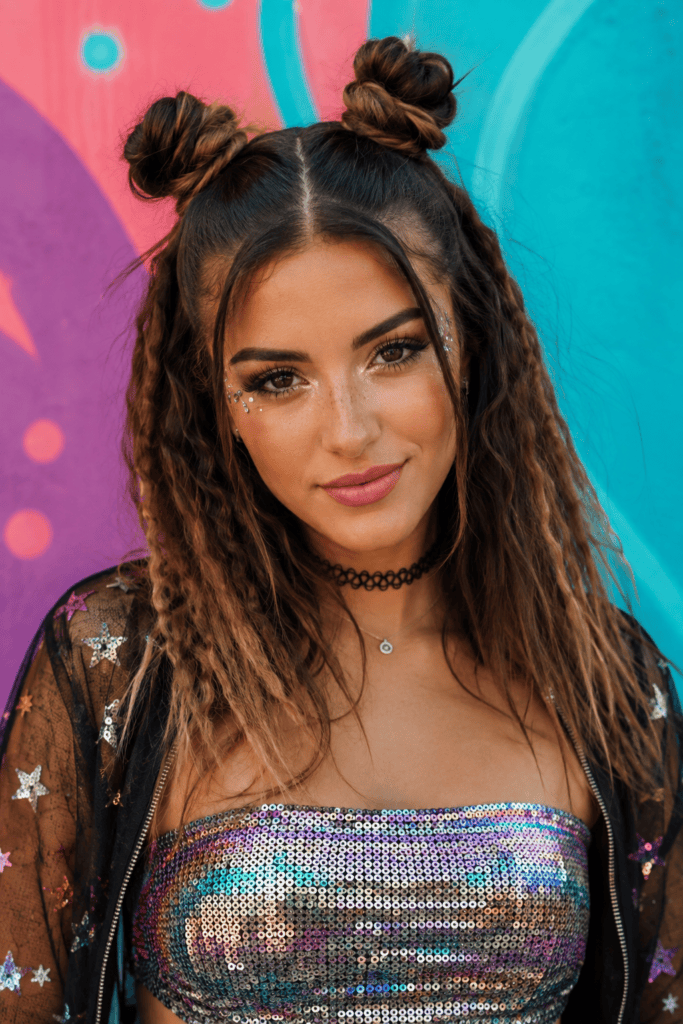
Who says half-up styles have to stay serious? These double mini-buns bring a playful, energetic twist to festival season or weekend outings.
By splitting the upper section of your hair down a clean middle part, you create two distinct topknots on either side of your head while leaving the bottom lengths flowing free.
- Symmetry Check: Make sure your center part is straight using the pointed tip of a rat-tail comb.
- Securing the Base: Tie each top section into a high mini-pigtail before twisting into a bun. This keeps them from sagging or shifting throughout the day.
- Bun Construction: Wrap each pigtail around its base and pin firmly with small hairpins.
- Lower Layer Styling: Add flat-iron waves or crimped texture to the lower layer of hair to match the playful energy of the top.
It keeps hair completely out of your eyes while giving your entire outfit a youthful, street-style edge.
14. The Soft Ribbon-Woven Braid
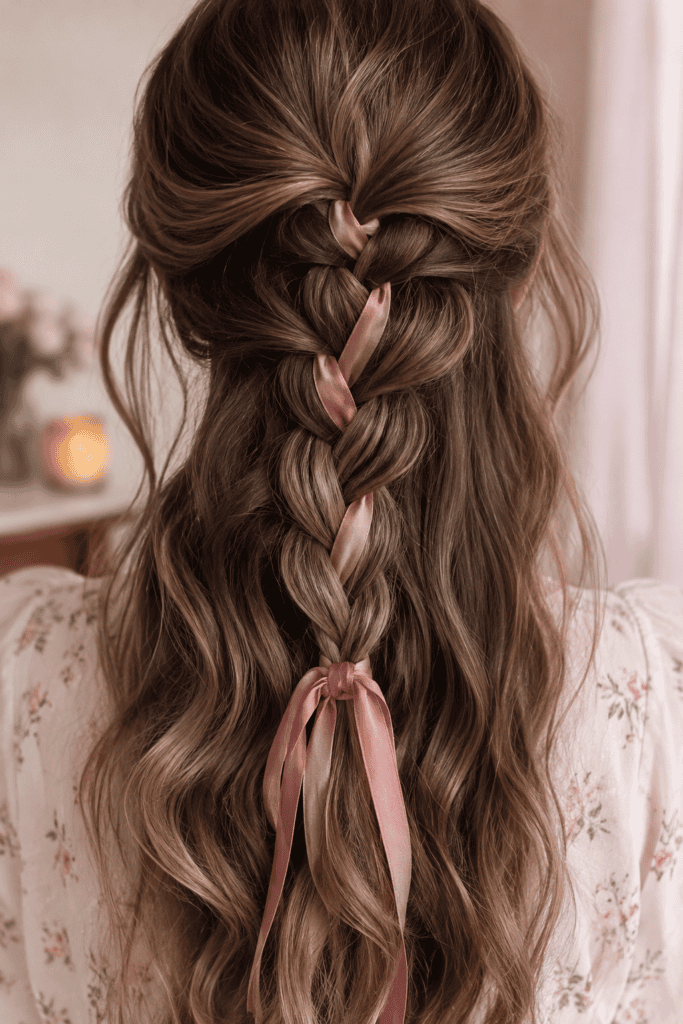
Adding a narrow fabric ribbon to a classic three-strand half-up braid introduces movement, color, and vintage charm without requiring advanced braiding skills.
I discovered this technique after picking up a spool of dusty rose silk ribbon at a local craft shop, and it immediately became a staple in my spring wardrobe routine.
- Tie a narrow silk ribbon around the base of a small central half-up ponytail.
- Divide the ponytail into three strands, letting the two ends of the ribbon merge into two of the hair strands.
- Plait a standard three-strand braid down to the ends, letting the ribbon weave naturally through the hair.
- Tie off the end with the excess ribbon, letting the fabric tails hang long over your unbraided hair below.
The ribbon weaves seamlessly through your strands, adding a touch of custom color that coordinates with your outfit or accessories.
15. The Triple-Twist Waterfall
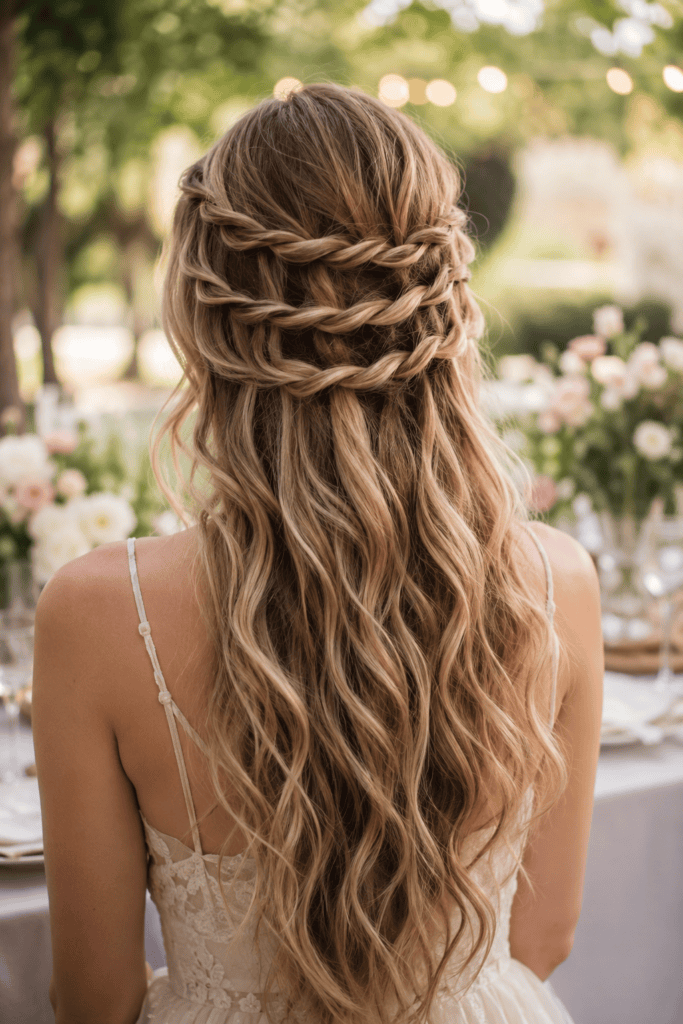
This ethereal, textured look works like a charm for wedding guests, garden parties, or special date nights where you want a soft, romantic silhouette.
It involves creating three small, parallel twisted sections on either side of your head and anchoring them sequentially at the back to create a cascading, tiered effect.
+------------------------+-----------------------------------------------------+
| Step                   | Action                                              |
+------------------------+-----------------------------------------------------+
| Top Tier               | Twist two high side strands back and pin in center. |
| Middle Tier            | Gather two strands directly below and pin underneath.|
| Bottom Tier            | Repeat with a third pair of strands for depth.      |
| Final Touch            | Gently loosen all twists to blend tiers together.   |
+------------------------+-----------------------------------------------------+
The overlapping tiers create breathtaking depth and dimension, especially on hair with highlights, lowlights, or balayage coloring.
Quick Product Checklist for Perfect Half-Ups
Having the right basic tools on hand makes these styles infinitely easier to execute when you are rushing to get ready in the morning.
- Clear micro-elastics: Essential for invisible holds that do not bulk up your styles.
- Texturizing spray: Adds grip to fresh, slippery hair so pins and twists stay locked in place.
- A lightweight hair oil: Tames flyaways around your part and adds shine to the free-flowing lower layers.
- Assorted claw clips: Great for effortless, low-tension styling that prevents hair breakage.
Mastering these styles comes down to practice, patience, and accepting that hair does not have to look perfectly symmetrical to look incredible. In fact, a few loose strands and slightly imperfect twists usually make the entire look feel far more stylish and effortless.
Which of these looks are you going to try out first? Grab a few pins, play around with your natural texture, and have fun testing these out in front of your own mirror. Until next time, keep your hair high and your styling stress low 🙂
Love,
Freya Weston