Your holiday outfit is sorted. Your gift list is (mostly) done. So why do so many people forget about their nails until the last possible minute? A great manicure pulls an entire festive look together, and it’s honestly one of the quickest ways to look party-ready without touching your wardrobe at all. It’s also one of the most overlooked, which is exactly why so many people end up scrambling for a design idea the night before a big event.
The good news is that festive nails don’t have to mean the same five red-and-green combinations you’ve already seen a hundred times this season. There’s a lot more room to play with color, texture, and detail than most quick roundups suggest, whether that means leaning into full glitter glam, going subtle with a single metallic line, or trying something hand-painted like tiny bows or a plaid accent nail.
This list rounds up 16 holiday and festive nail designs, ranging from quick five-minute options to slightly more detailed looks worth setting aside a proper hour for. Some lean into the classic Christmas palette, others skip red and green entirely, and a few are built specifically with New Year’s Eve in mind rather than Christmas itself.
1. Deep Cherry Red with Gold Foil Tips
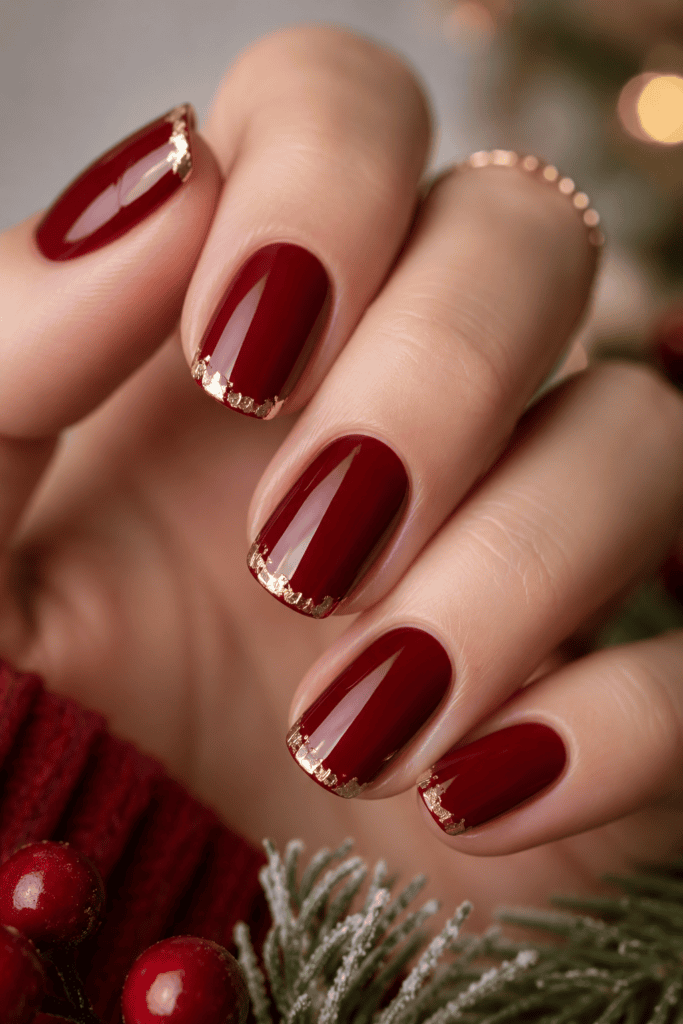
This one’s my go-to when I want to look pulled together without much effort. Paint your nails in a deep cherry red base, let it dry fully, then press gold foil onto just the tips. The foil catches light in a way that regular polish simply can’t replicate.
I’ve tried skipping the “let it dry fully” step and regretted it every single time. The foil smears and you end up with a muddy gold-red mess that looks nothing like the Pinterest photo you were chasing.
2. Oxblood with a Single Gold Accent Nail
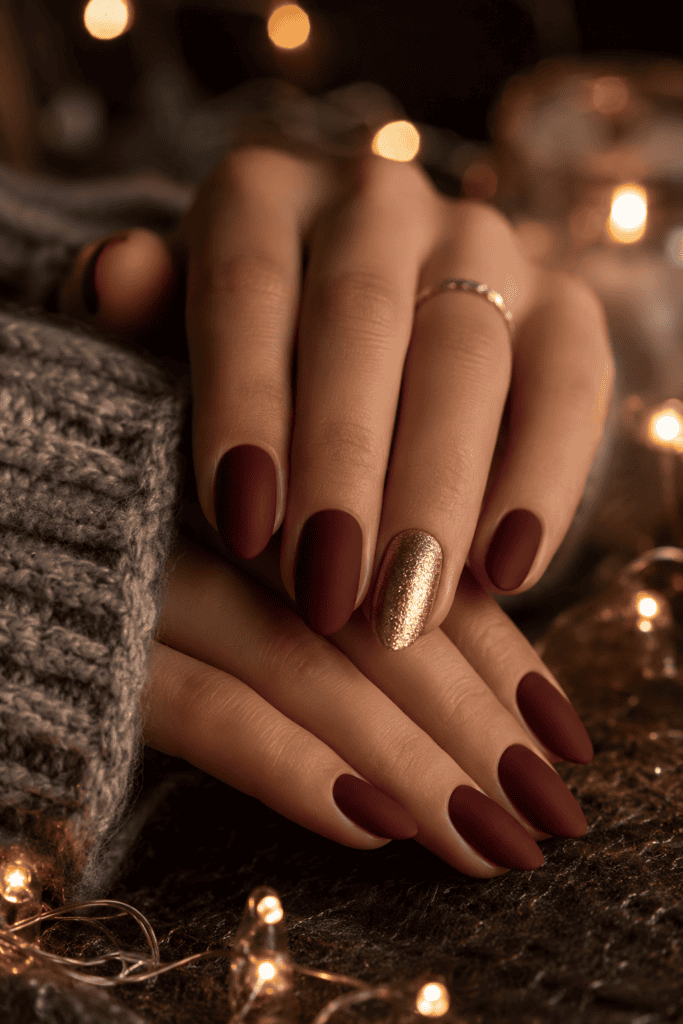
Why paint every nail the same when one accent nail does more work? Go oxblood red on nine nails, then make your ring finger a full gold shimmer. It’s dramatic without screaming for attention, and it photographs beautifully under string lights.
3. Candy Cane Red and White Swirls
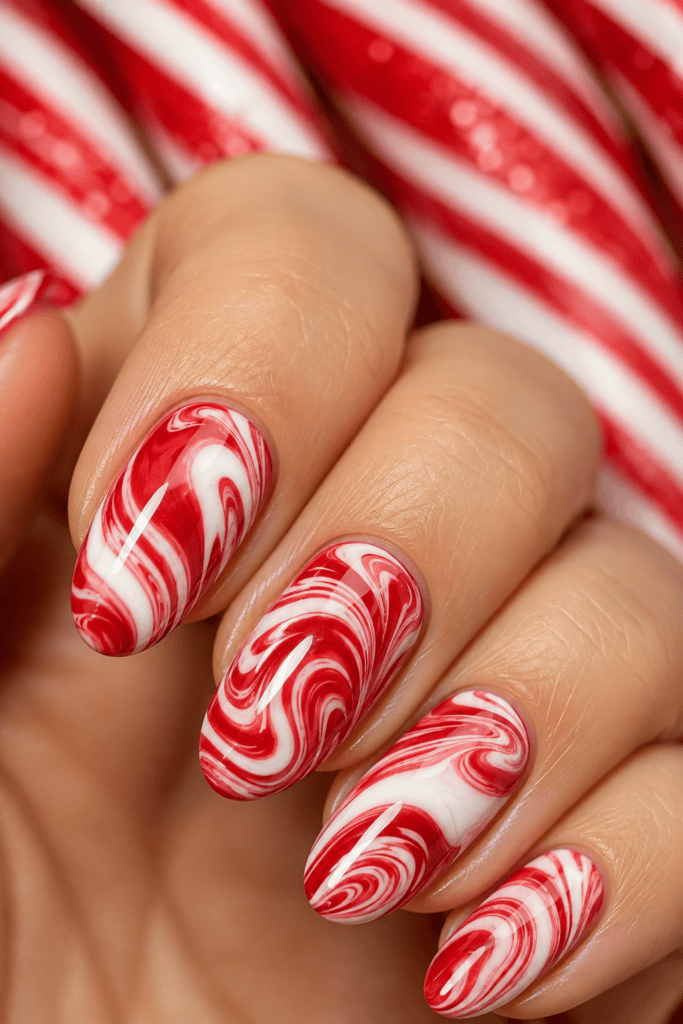
Grab a thin nail art brush and swirl white polish through wet red polish for a marbled candy-cane effect. It’s messier than it looks in tutorials, IMO, so practice on paper first before you commit to your actual nails. This design shows every bit of wear fast since the white and red contrast so much, so it’s better suited to a one-night event than a two-week stretch of parties. If you’re heading to multiple gatherings this month, save this one for whichever event matters most and go simpler for the rest.
4. Full Glitter Glam
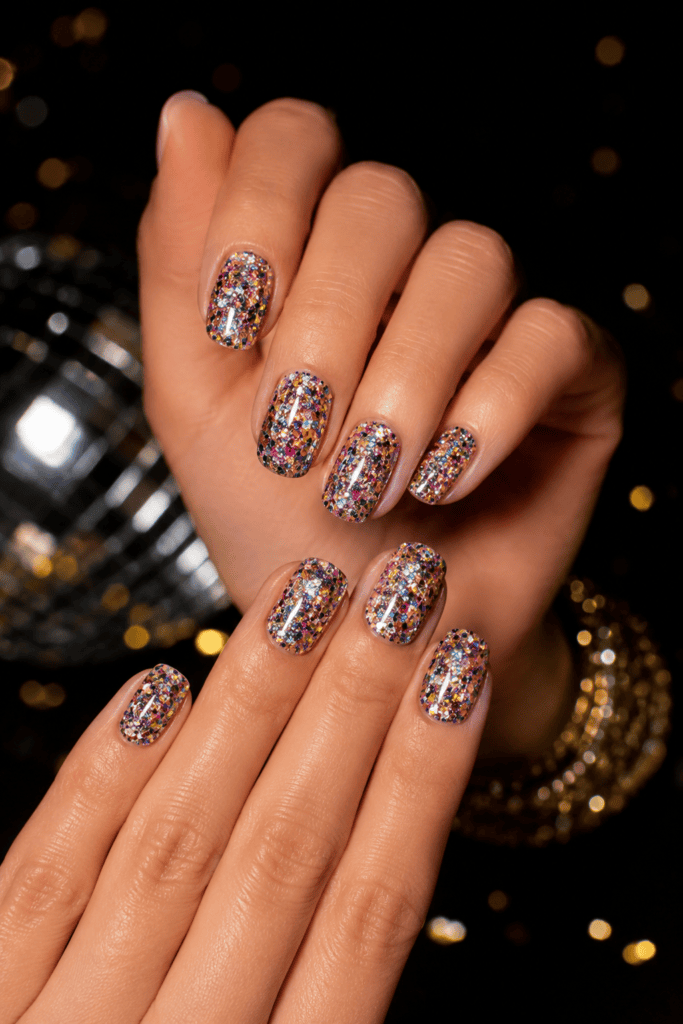
Skip the base color entirely and go full glitter polish across all ten nails. Chunky glitter formulas (not the fine-particle ones) give the most dimension and hold up better without chipping into a sad, sparse mess by day three.
One thing nobody warns you about: chunky glitter does not come off with a standard cotton pad and remover. You need the foil-wrap method, soaking a cotton ball in pure acetone, pressing it against the nail, wrapping foil around the finger, and waiting a solid ten minutes. I once spent forty-five minutes scrubbing at leftover glitter with a nail file, which just scratched up my actual nail underneath. Foil wraps, every time.
5. Glitter Ombre from Cuticle to Tip
Start sparse near your cuticle and pile the glitter on thicker toward the tip. This gradient effect looks intentional and expensive, even when you’re using a $6 drugstore glitter topcoat. I’ve genuinely fooled people into thinking I paid salon prices for this one, and the removal is far less painful than full glitter glam since there’s less product to strip off. It’s also more forgiving if your hand isn’t perfectly steady, since a gradient hides small inconsistencies that a flat, all-over glitter application wouldn’t.
6. Champagne Glitter for the Understated Sparkle Lover
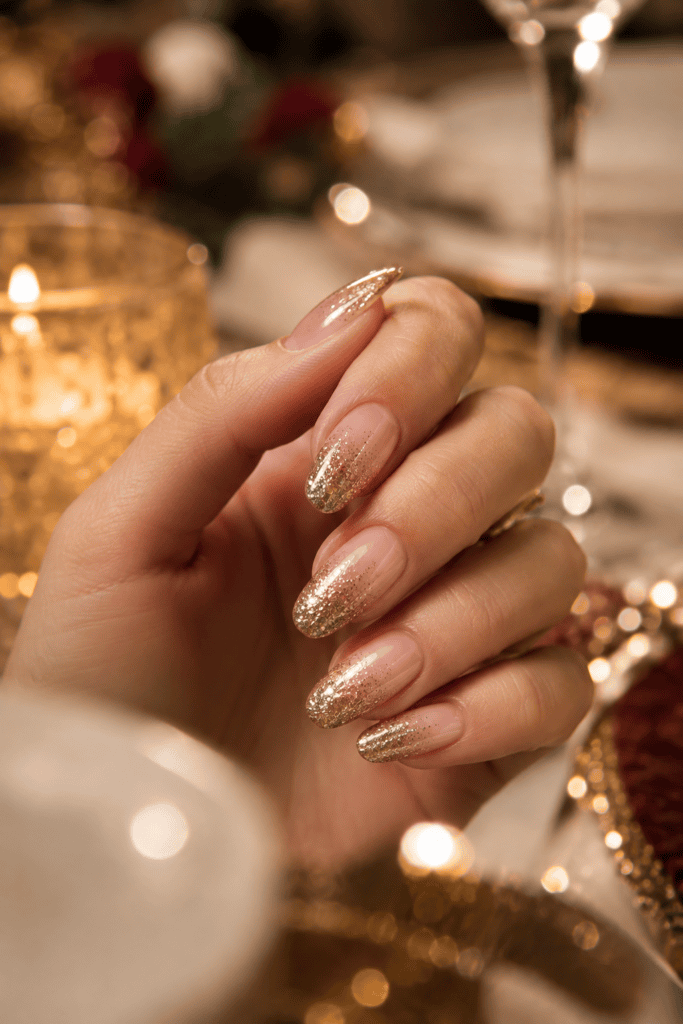
Not everyone wants a disco ball on their fingertips. A champagne-toned glitter gives you sparkle without the loudness, which makes it perfect for anyone whose workplace side-eyes anything too “extra” during the holidays.
7. Icy Blue Base with White Snowflake Accents
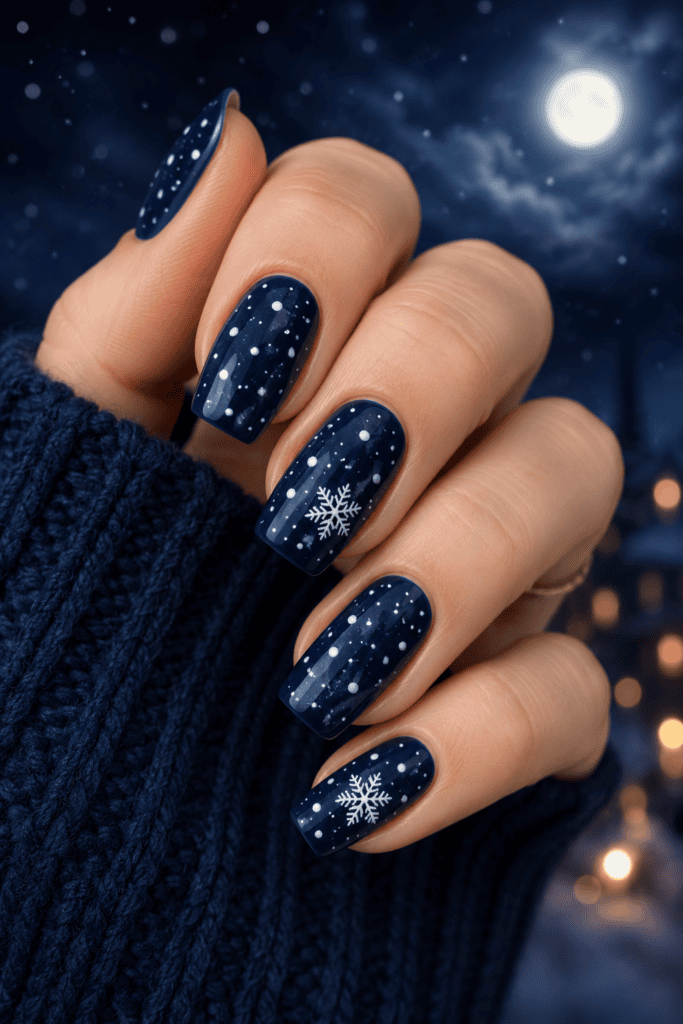
This is the design people compliment me on most every December. Paint an icy blue base, then dot on tiny white snowflakes using a nail art pen on just two or three nails. Leave the rest solid so the snowflakes don’t compete with each other for attention.
Snowflake designs get a bad reputation for being “too intricate for beginners,” but honestly, that reputation comes from people trying to freehand a perfect six-point snowflake with a regular polish brush. A dotting tool or fine-tip nail art pen changes everything, giving you way more control than a standard brush ever could.
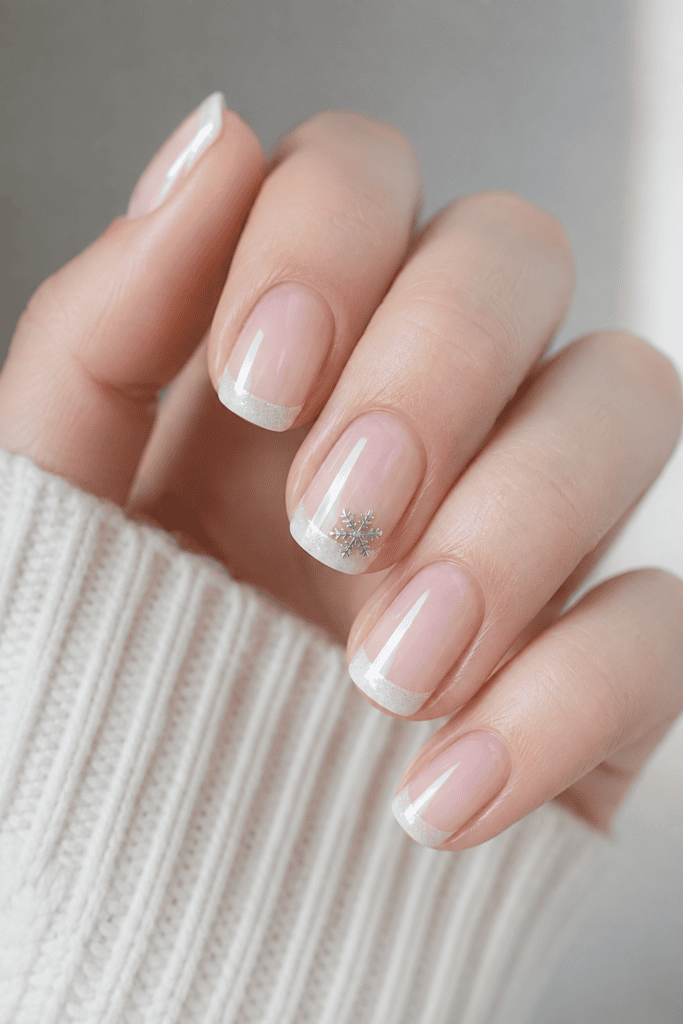
8. Frosted White Tips with Silver Snowflakes
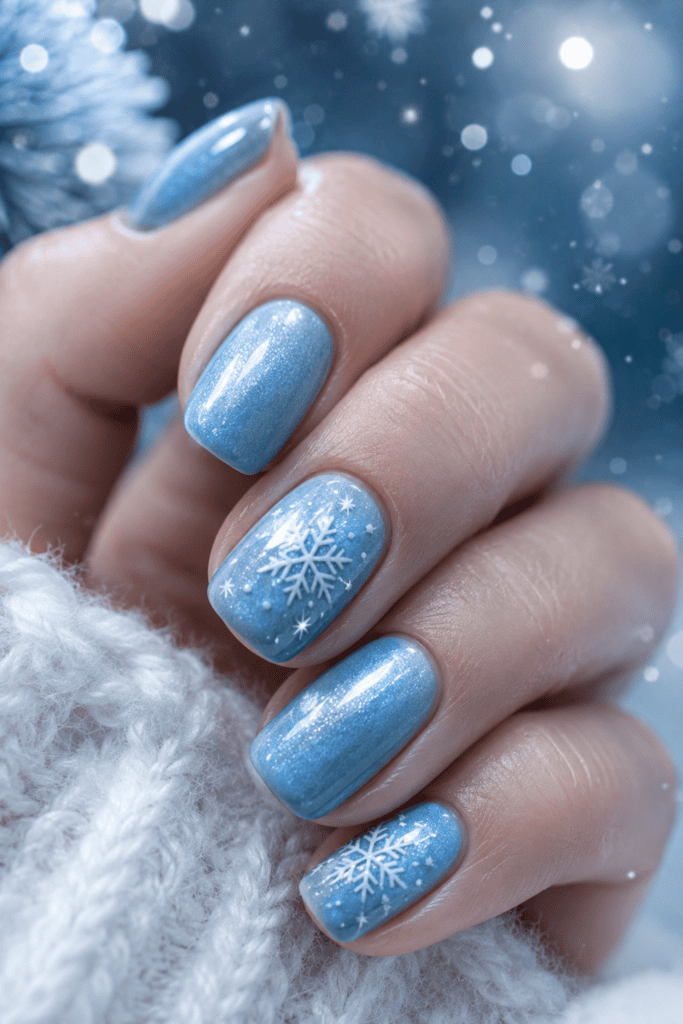
A twist on the classic French tip: swap the usual white tip for a frosted, slightly translucent white, then add a single silver snowflake near the tip line. It’s subtle enough to wear to work and festive enough that people notice.
9. Navy Sky with Constellation-Style Snowflakes
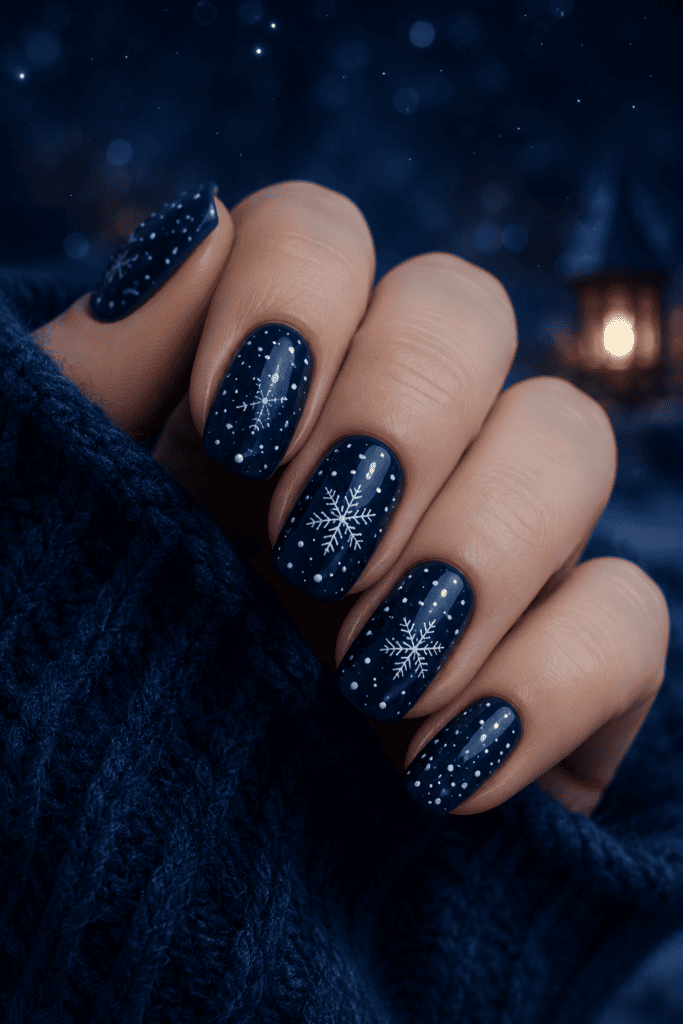
Navy polish as the base, then scattered white dots of varying sizes to mimic snowfall against a night sky, with one or two proper snowflake shapes mixed in. This one gets asked about constantly, and it’s genuinely one of the easier designs on this list to DIY. Start with simple dot clusters before attempting a full snowflake outline, and don’t stress if your first few attempts look more like asterisks than snowflakes. Mine did too.
10. Rose Gold Chrome
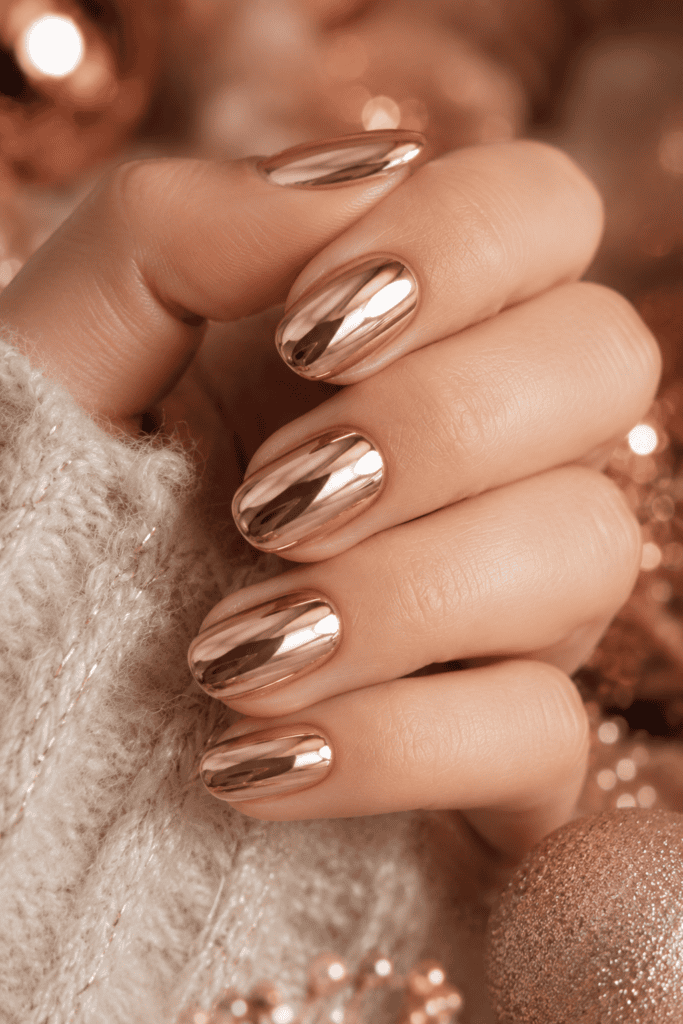
Chrome powder over a nude or pale pink base gives you that mirror-like rose gold finish that looks like actual metal on your nails. It requires a bit more patience during application, but the payoff is worth it. I’ve had this look last a full ten days without chipping, which is basically a miracle in nail-polish terms.
Chrome finishes need a specific chrome base coat, then the powder gets buffed on with a small sponge applicator rather than painted with a brush. Skip the sponge and try painting chrome powder on directly, and you’ll end up with streaky, uneven color instead of that mirror finish you’re after. Buff in small circular motions and don’t rush this part; it genuinely makes or breaks the final look.
11. Emerald Green Metallic
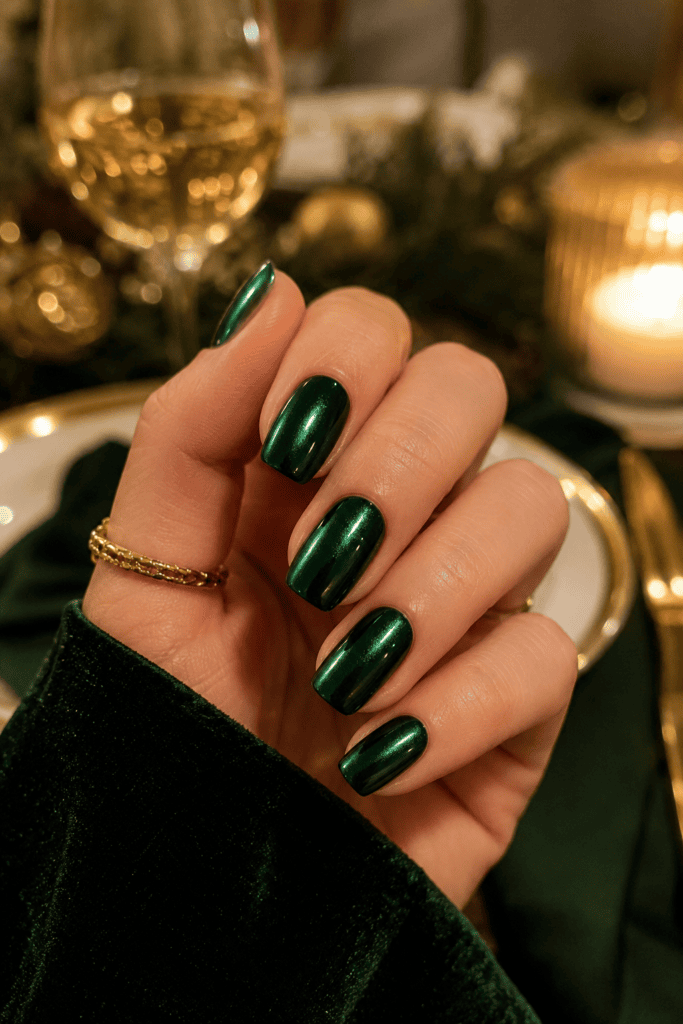
Green doesn’t get enough credit as a holiday color beyond the obvious Christmas tree associations. A deep emerald metallic polish feels rich and jewel-toned rather than costume-y, and it works just as well for New Year’s Eve as it does for Christmas dinner.
I switched from a bright kelly green to emerald a couple of years back and never looked back. Bright green metallic reads as “costume,” especially under warm indoor lighting, while emerald reads as intentional and expensive-looking even when the polish itself cost me about eight pounds from the drugstore.
12. Single Gold Line Accent
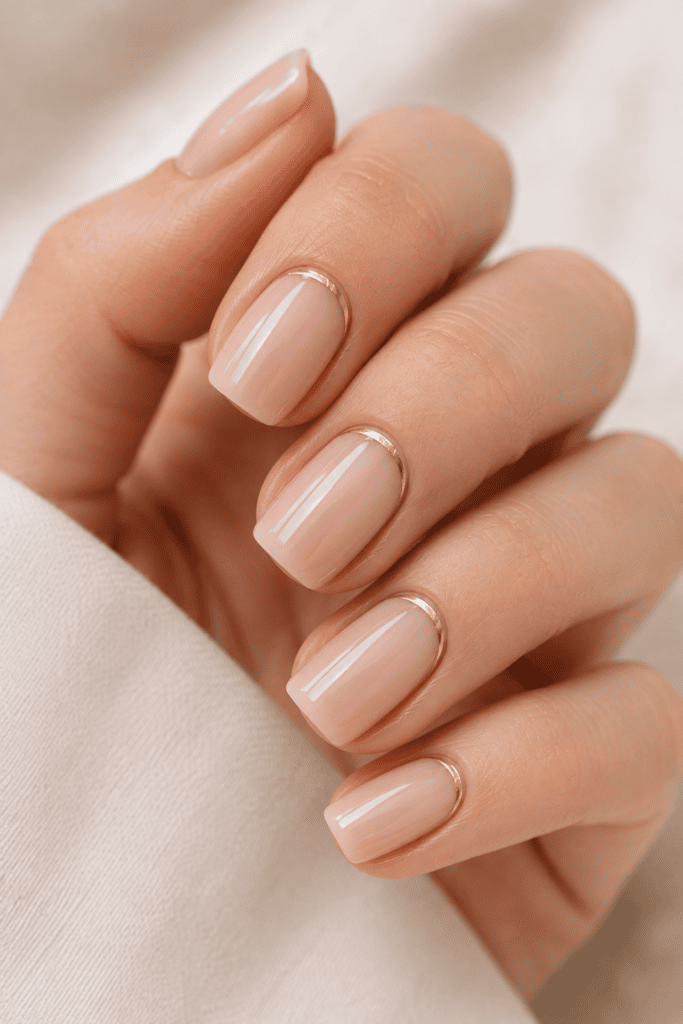
Paint a clean nude or soft pink base across all nails, then add one thin gold line near the cuticle on each nail. It’s minimal, it’s chic, and it doesn’t scream “I’m trying too hard,” which, let’s be honest, is sometimes exactly the vibe you want at a work holiday party.
13. Negative Space Baubles
Leave a small circle of bare nail near the tip, outline it with a thin gold or silver line, and you’ve got a subtle ornament shape without painting an entire bauble. This design relies on precision rather than color, so a steady hand (or a good nail art pen) matters more than your polish collection. It’s also genuinely the easiest to touch up if you chip a nail mid-party, since you’re only maintaining a single thin line.
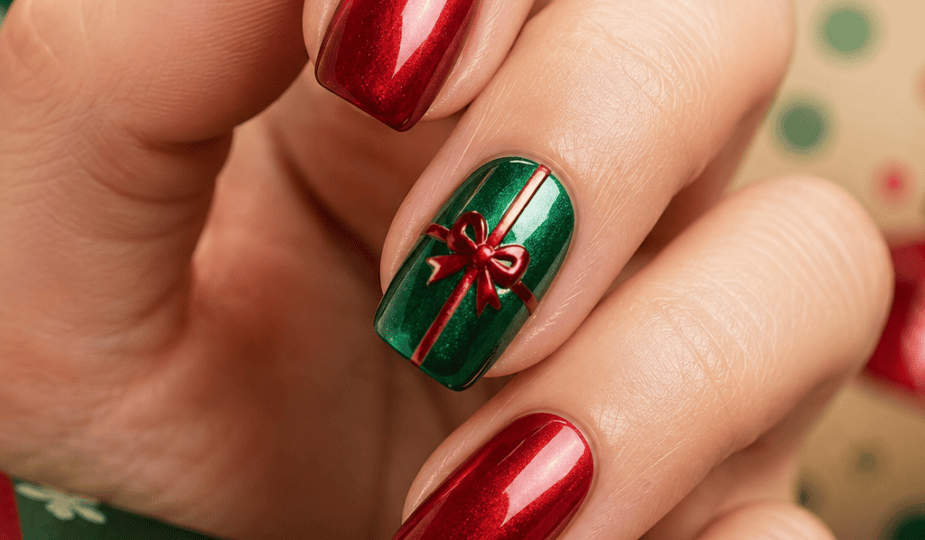
14. Mini Present Bows
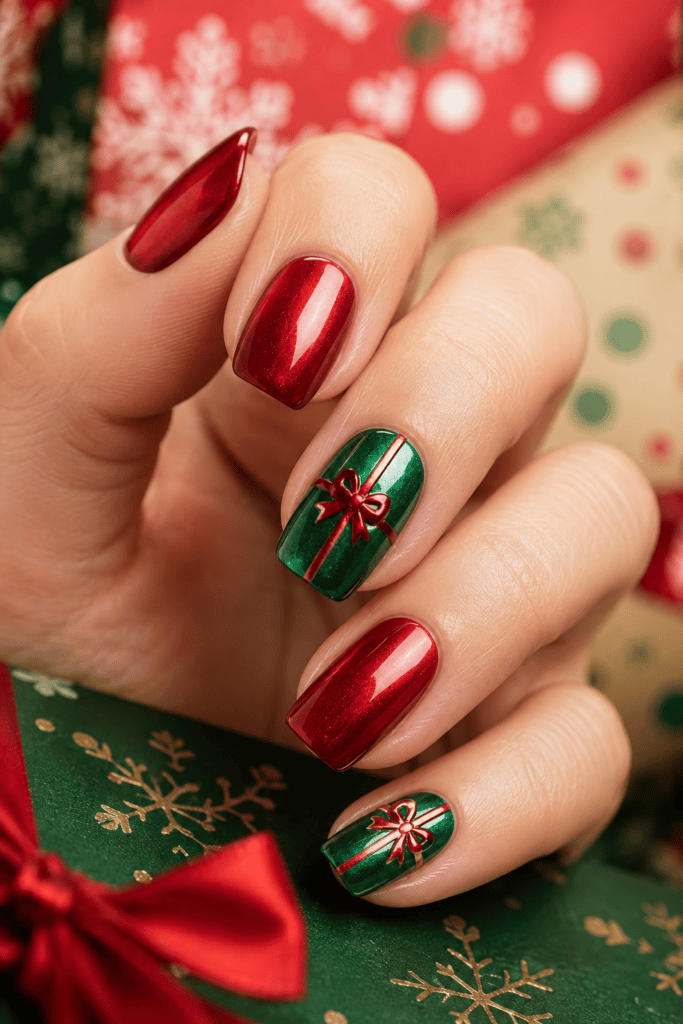
Paint tiny bow shapes on a red or green base using a fine detail brush. This is fiddly, not going to lie, and my first attempt looked more like a squashed spider than a bow. Practice the bow shape on paper before attempting it on your actual nail, and keep a cotton swab and remover nearby for cleanup.
15. Plaid Pattern Accent Nail
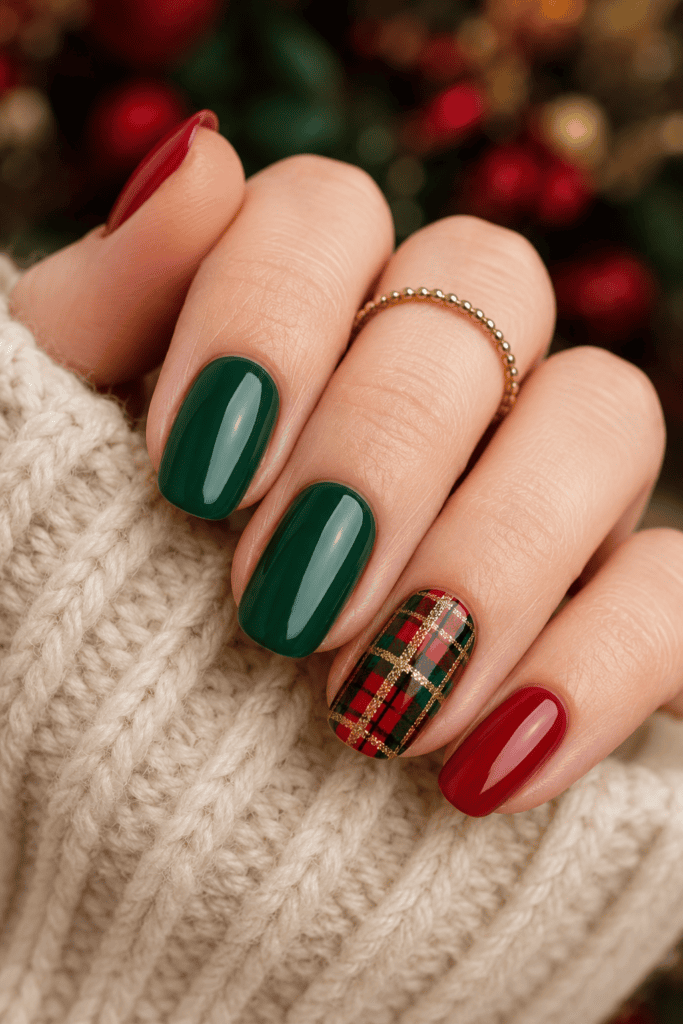
A red, green, and gold plaid design on just your ring finger while keeping the rest solid red or green feels festive without turning your whole hand into a Christmas sweater. Plaid is genuinely one of the trickier patterns to hand-paint, so a striping tool makes life significantly easier here. Budget at least fifteen extra minutes for this one nail alone if you’re attempting it for the first time.
16. Metallic Confetti for New Year’s Eve
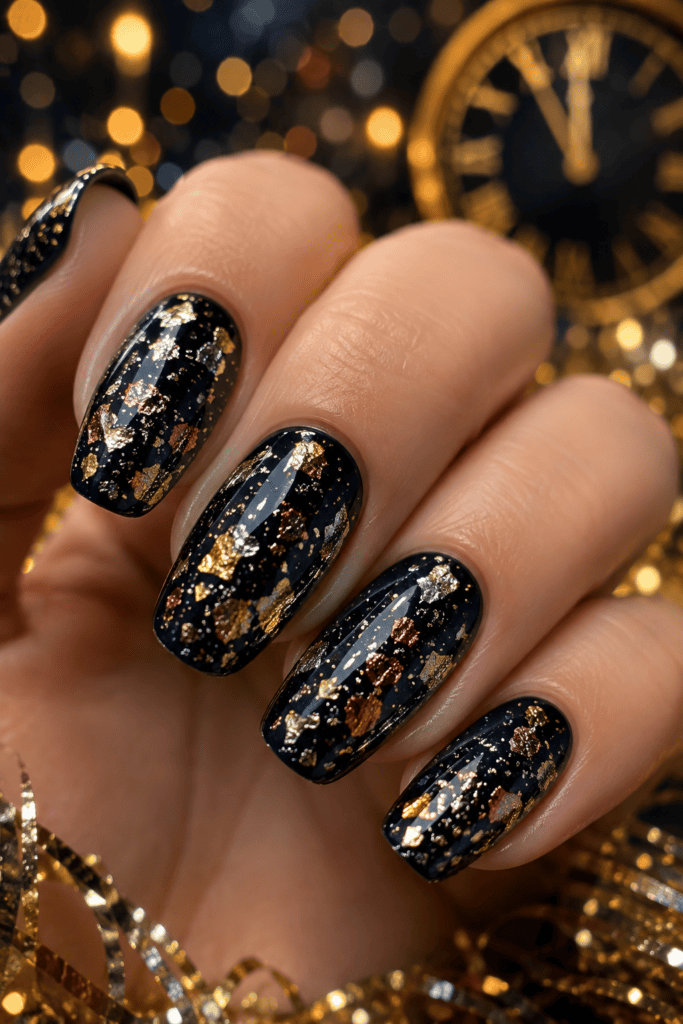
Scattered gold, silver, and copper foil flecks across a black or deep navy base create a confetti effect that feels celebratory without any specific holiday attached to it. This is my personal pick for New Year’s Eve because it doesn’t lean too “Christmas” if your plans stretch past December 25th. It’s also the easiest of the novelty designs here, since you’re just dabbing foil flecks onto wet topcoat rather than painting precise shapes.
How to Actually Make Any of These Last
A gorgeous design means nothing if it chips off by the second day of your holiday plans. Here’s what actually keeps festive nail art intact:
- Prep your nails properly—push back cuticles and lightly buff the surface before any polish goes on.
- Apply thin coats, not thick ones. Thick polish takes longer to dry and chips faster.
- Cap the tips with each coat, meaning you swipe polish over the very edge of the nail, not just the top.
- Use a proper topcoat, not just any clear polish, since dedicated topcoats have different chemistry built for durability.
- Reapply topcoat every two to three days if you’re going for the full two-week holiday stretch.
I skipped the tip-capping step for years because it felt like an unnecessary extra step, and TBH, my designs never lasted past day two. Once I started doing it properly, chipping stopped being a constant holiday complaint.
Final Thoughts
Sixteen designs is a lot of options, and that’s the point—festive nails shouldn’t feel like a one-size-fits-all situation. Whether you’re drawn to the classic red-and-gold combos, the icy snowflake details, or the bold plaid accent nail, pick whatever actually matches your holiday energy this year, not just what’s trending.
If I had to narrow it down to a top three for someone with zero time and zero patience this December, I’d say the deep cherry red with gold foil tips, the glitter ombre, and the single gold line accent. All three look intentional, none of them demand hours of your evening, and they’ll survive multiple parties without needing a full redo halfway through.