Finding a nail color that strikes the perfect balance between clean, chic, and sophisticated can feel like an impossible task. Bright stark white often looks like liquid paper, while classic sheer pink can start to feel a bit played out. Enter milky white nails—the ultimate “I have my life completely together” aesthetic that effortlessly elevates every outfit without screaming for attention.
Whether you are heading to a black-tie event or just running weekend errands in your favorite oversized sweatshirt, a soft, cloudy manicure offers that coveted, expensive-looking finish. If you are ready to swap out your go-to polish for something far more modern, these 15 milky white nail ideas deliver the ultimate clean-girl inspiration for your next salon visit or DIY manicure! 🙂
1. The Classic Semi-Sheer Milky Cloud
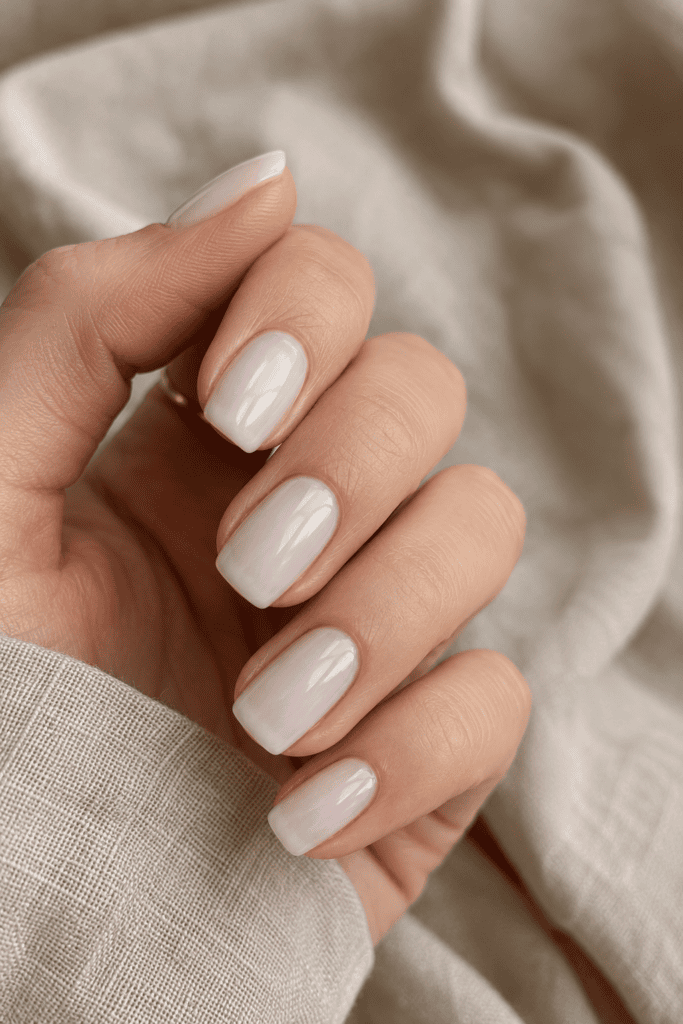
If you want to dip your toes (or rather, fingertips) into this trend, start right here. The classic semi-sheer finish mimics the look of a splash of cold oat milk in iced coffee. It softens your skin tone and hides slight nail imperfections without creating a heavy, chalky coat.
I wear this exact look when I want zero stress during weekly wardrobe fitting sessions. It matches literally every single OOTD you could possibly put together.
- The Vibe: Minimalist, fresh, high-maintenance without looking like you tried too hard.
- Best Polish Pick: Essie Marshmallow layered with one coat of Essie Gel Couture Top Coat.
- Pro Tip: Apply two thin coats instead of one thick coat to prevent streakiness.
2. Glazed Milky Donut Nails
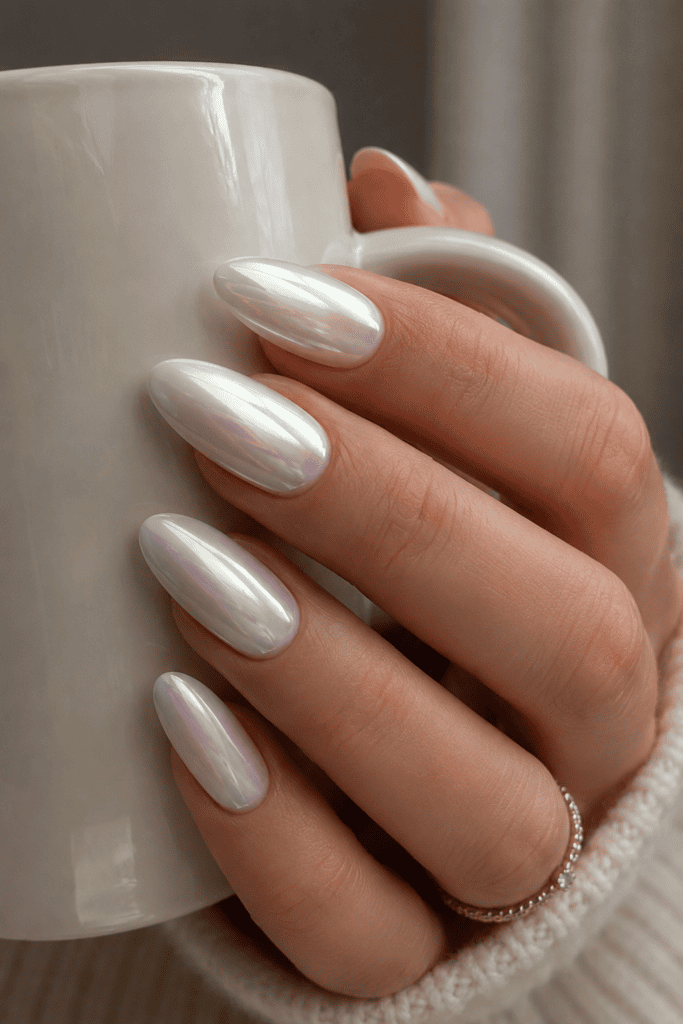
Yes, we are still talking about glaze, but hear me out! Adding a subtle chrome sheen over a milky white base takes the classic clean manicure and gives it a glossy, hyper-luxurious bounce.
I tried this look before a week-long fashion event last fall, and I lost count of how many people asked for my exact nail formula. It reflects light like liquid silk without looking like a full-on disco ball.
- Base Layer: Two coats of a semi-sheer milky white gel polish.
- Chrome Layer: A light dusting of pearl chrome powder rubbed gently into the cured top coat.
- Finish: Sealed with a high-shine, non-wipe top coat for maximum reflection.
3. Micro-French Milky Tips
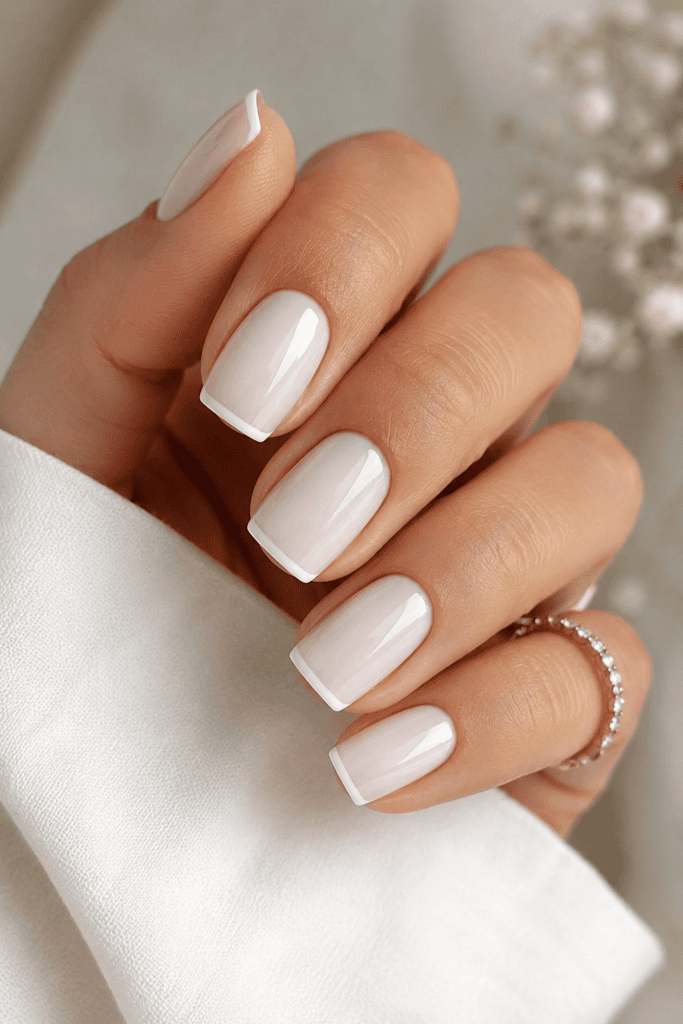
Do you love the look of a traditional French tip, but hate how harsh that stark white line can feel? The micro-French milky manicure solves that problem instantly.
Instead of a thick, opaque line across the edge, ask your nail tech for a whisper-thin tip over a soft milky base. The ultra-fine line lengthens your fingers instantly while keeping the overall aesthetic super soft and modern.
- Nail Shape: Looks best on short almond or tailored square shapes.
- Application: Paint the base with a cloudy, translucent white, then use a tiny detail brush to trace a paper-thin line along the edge.
- Why It Works: It gives your nails structure without looking like a throw-back to 2002.
4. Milky White with Gold Foil Accents
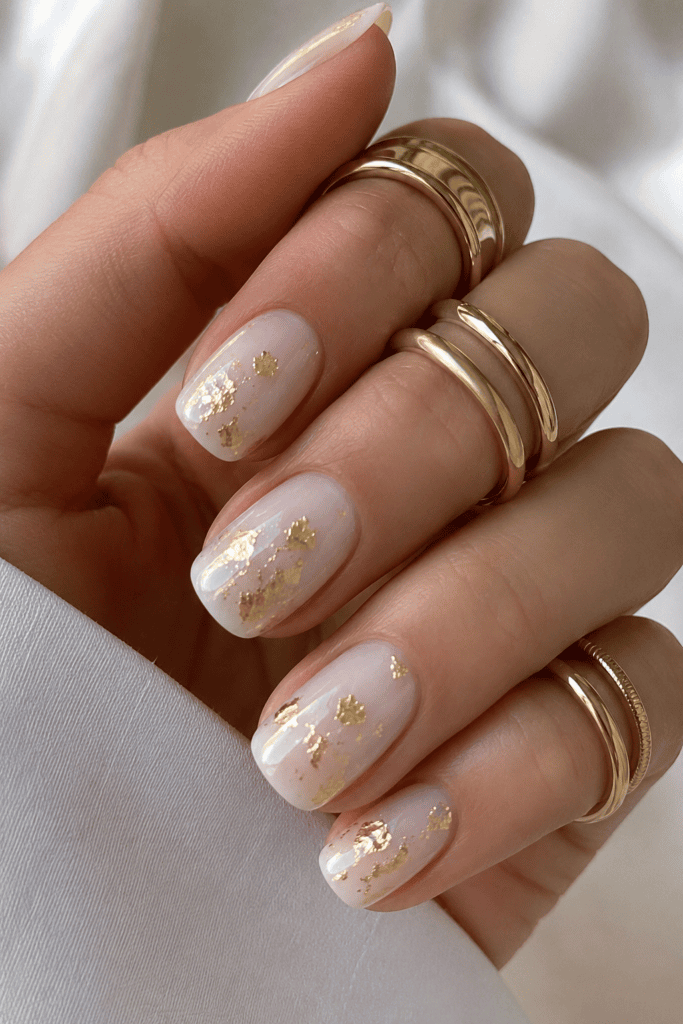
When you want your hands to look like they belong to someone who owns a yacht, add gold leaf. Organic, flecked pieces of gold foil pressed into a cloudy base instantly mimic luxury marble countertops.
I love styling this look alongside stacked gold rings and a classic cashmere sweater. You do not need gold on every single nail—placing subtle flecks on just two accent nails creates a far more tasteful, curated result.
- Foil Placement: Focus the gold flecks around the cuticle line or let them float diagonally across the nail center.
- Top Coat: Use a double layer of top coat to smooth down any raised foil edges completely.
- Wear Time: Expect at least two to three weeks of wear if you seal the edges properly!
5. Subtle Milky Ombré (Baby Boomer Nails)
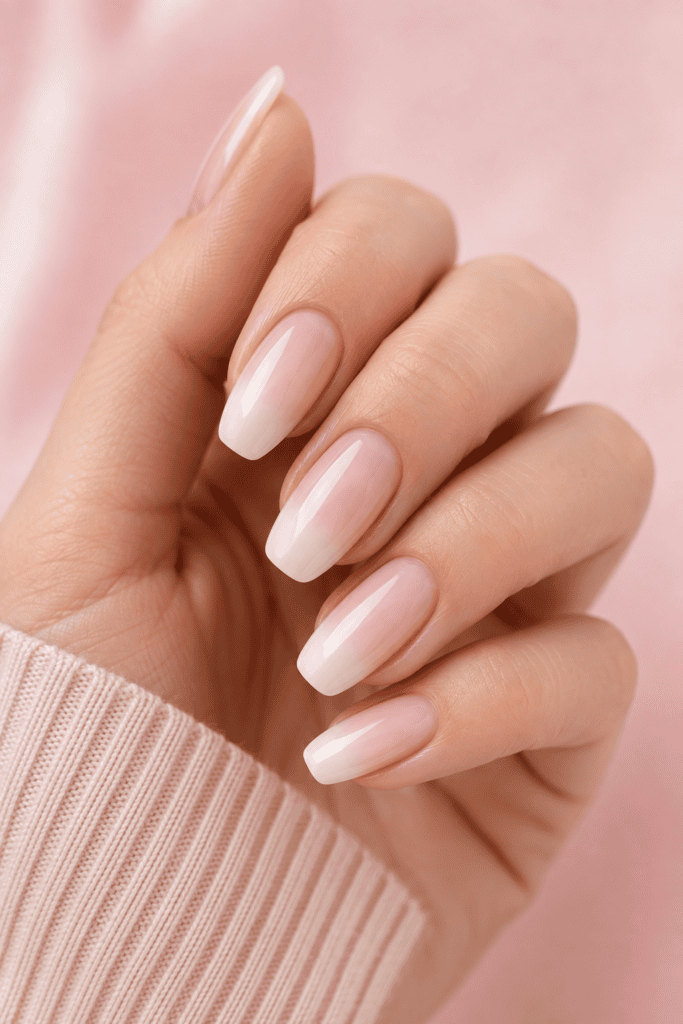
Ever wondered how to make your nail beds look instantly longer? A soft milky ombré—often called “Baby Boomer” nails in salons—fades a soft nude base into a creamy milky white tip.
Unlike sharp color blocks, this gentle gradient softens the transition between your natural nail bed and the free edge. IMO, this is the most flattering option if you have short nail beds and want an elongated silhouette.
- Step 1: Apply a sheer nude or blush pink base coat across the full nail.
- Step 2: Dab a soft milky polish onto a small makeup sponge and gently tap it from the middle of the nail to the tip.
- Step 3: Blend upward lightly to erase any harsh lines before curing or drying.
6. Milky Quartz Marble Design
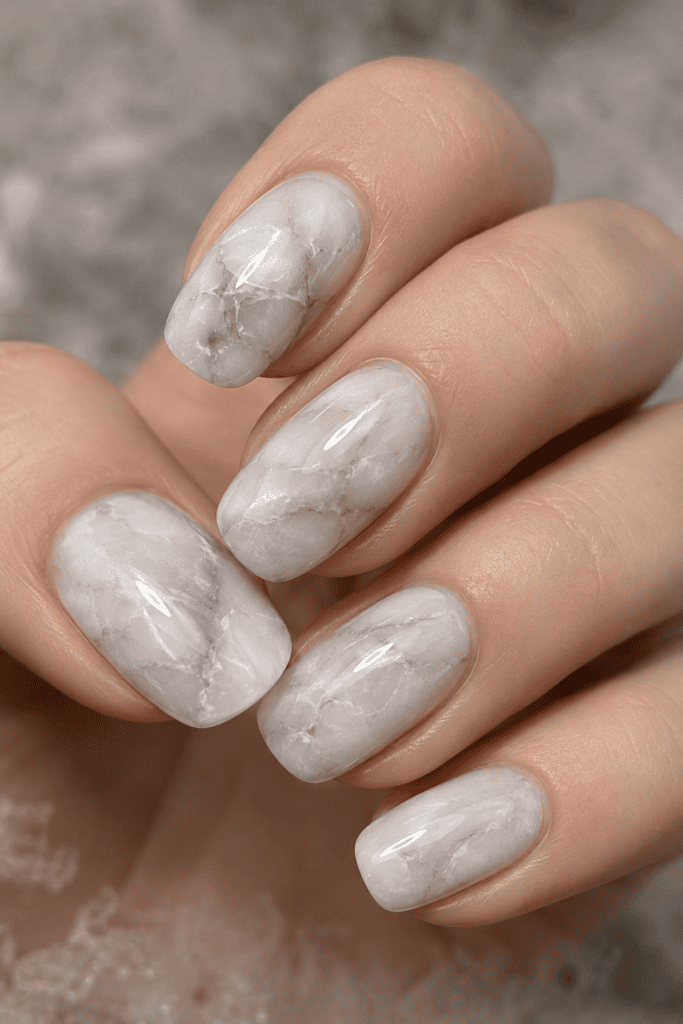
Real quartz crystals have incredible depth, cloudy ribbons, and delicate translucent layers. Recreating that texture on your nails produces an insanely high-end finish that looks like custom art.
I attempted this design at home last winter with a thin detail brush and a shot glass of rubbing alcohol. I ended up making a total mess on my right hand the first time around, but once you master the feathering technique, it looks incredible!
  HOW TO CREATE MILKY QUARTZ:
  [1. Base Layer]    ---> Apply semi-sheer milky coat (Do not cure/dry completely)
  [2. Detail Lines]  ---> Draw fine grey/milky veins using a detail brush
  [3. Soften Edges]  ---> Feather the lines outward using alcohol on a clean brush
  [4. Final Seal]    ---> Top with a glassy coat to lock in the dimensional depth
7. Pearlescent Milky Sheen
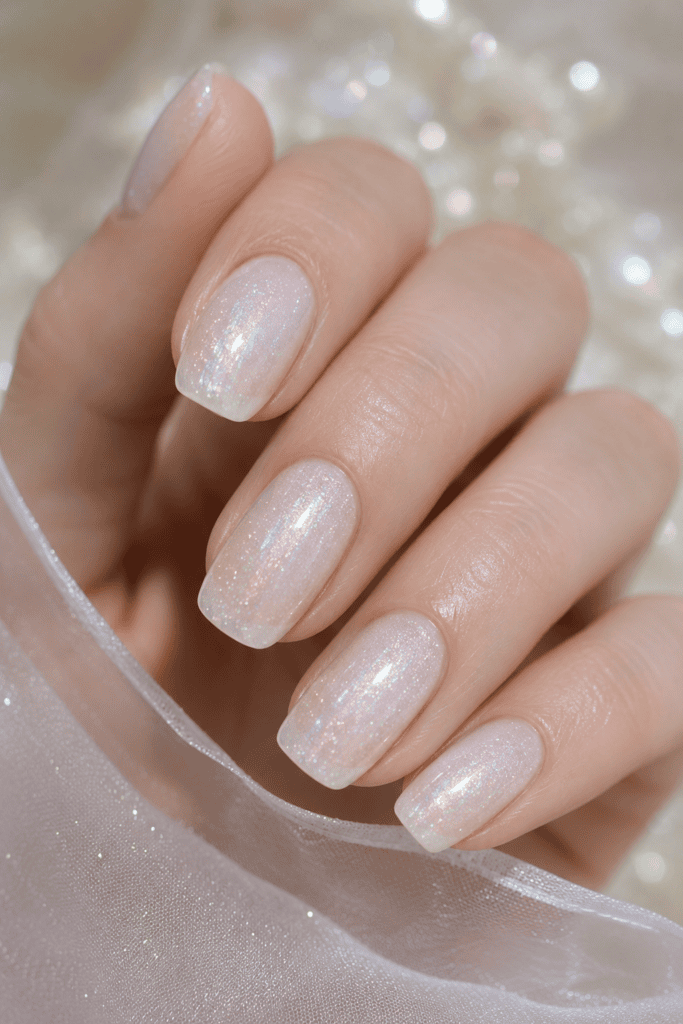
If chrome powder feels like too much work, opt for a milky polish infused with ultra-fine pearlescent shimmer. This single-step alternative provides a soft, mother-of-pearl glow every time your hands catch the light.
It offers a delicate, luminescent finish that hides subtle ridges in your natural nails beautifully.
- Best For: Quick at-home manicures when you do not have time for multi-layer nail art.
- Pairing: Complements neutral wardrobe palettes, cream blazers, and delicate pearl jewelry effortlessly.
- Formula Tip: Look for formulas labeled “iridescent white” or “opalescent translucent.”
8. Milky White with Minimalist Black Dots
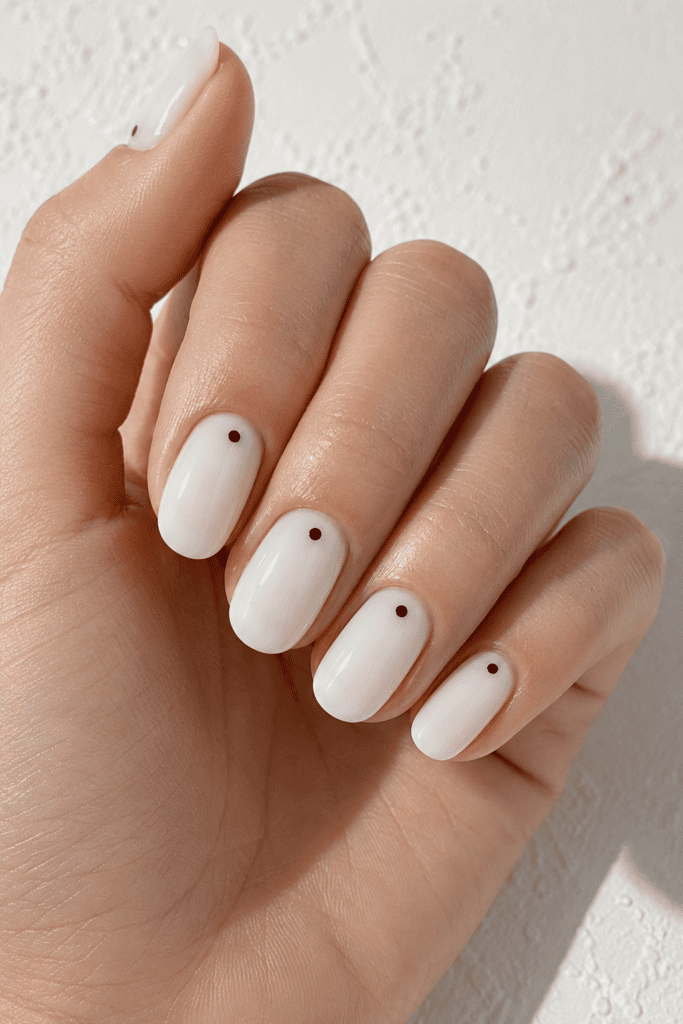
If your style leans a little more edgy, adding tiny black accents over a soft milky backdrop creates a sharp, graphic contrast. A single micro-dot placed right near the cuticle of each nail instantly adds an editorial, high-fashion touch.
I spotted this look during Paris Fashion Week a few seasons back, and I still return to it whenever my wardrobe feels a bit too plain. It takes less than two minutes of extra work, but makes your manicure look totally custom.
- Tool Needed: A wooden dotting tool or the flat end of a bobby pin.
- Placement: Place one tiny dot center-aligned right above the cuticle bed.
- Contrast Level: High style, low effort—the ultimate fashion-girl compromise.
9. Soft Matte Milky Finish
Who says expensive nails always have to shine? Swapping out your glossy top coat for a velvet matte top coat transforms a standard milky polish into something that looks like smooth, carved porcelain.
A matte finish gives off a soft-focus, frosted glass vibe that feels exceptionally fresh during the cooler months.
- Texture: Smooth, touchable, and completely non-reflective.
- Maintenance: Matte top coats tend to absorb oils and dirt faster than glossy coats. Keep alcohol wipes in your handbag to clean them off easily throughout the week!
- Color Tip: Works best over medium-coverage milky bases rather than ultra-sheer ones.
10. Milky Vanilla Latte Tones
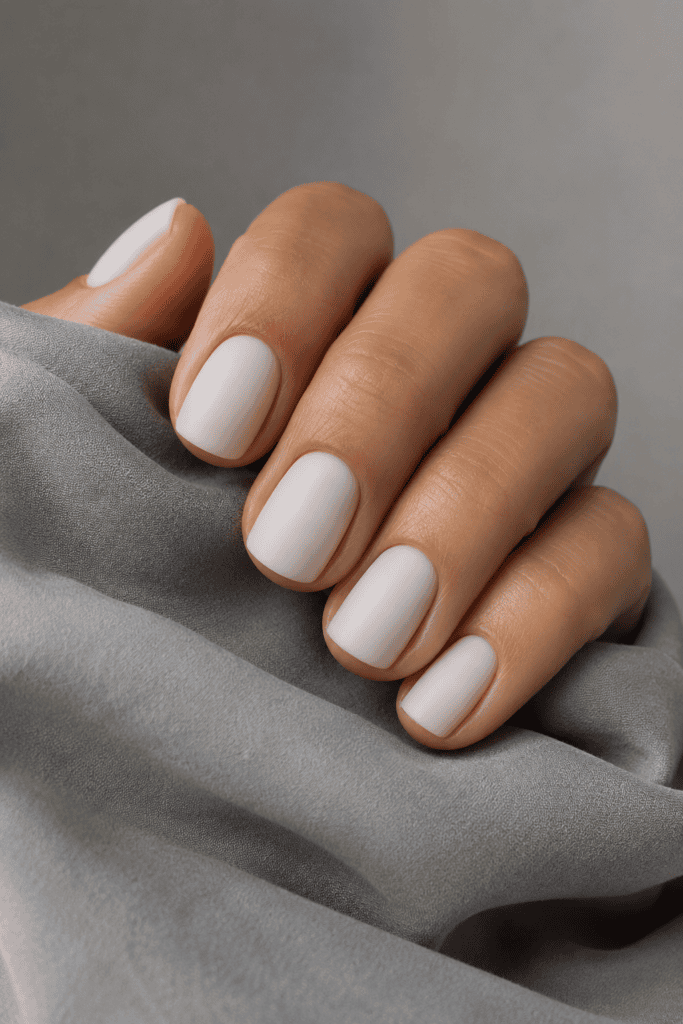
For anyone with warm undertones who feels like pure white washes them out, a milky vanilla tone is your best friend. This shade blends a splash of creamy warm ivory into a translucent base, creating a softer, richer tone that feels like warm vanilla cream.
I switched to warm milky tones last summer after realizing stark cold whites made my knuckles look oddly red in natural sunlight.
- Undertones: Warm, buttery, creamy yellow-white.
- Flattery Factor: Ideal for medium, olive, and warm skin tones.
- Styling Match: Pairs exceptionally well with linen button-downs, tan leather bags, and gold accessories.
       +-------------------------------------------------------+
       |   COOL MILKY WHITE    vs.    WARM MILKY VANILLA       |
       +-------------------------------------------------------+
       | • Bright blue undertones   | • Rich cream undertones  |
       | • Crisp, icy contrast      | • Soft, warm contrast    |
       | • Great for cool skin      | • Great for olive/tan    |
       +-------------------------------------------------------+
11. Milky Chrome Aura Nails
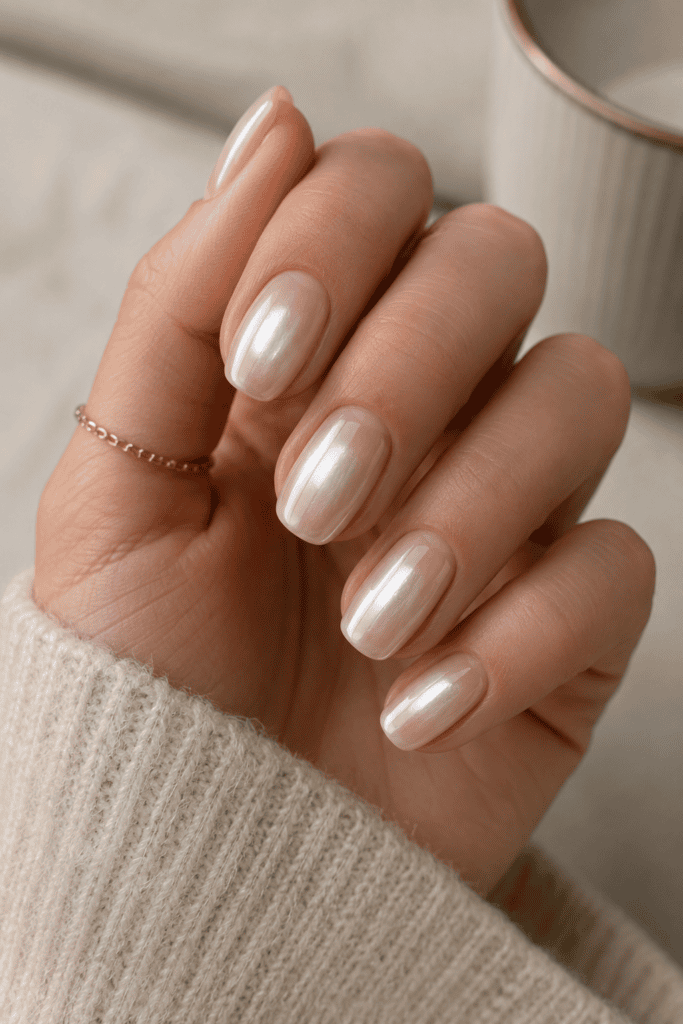
Aura nails have taken over every social feed, but the bright colorful versions can sometimes clash with your daily outfits. A milky chrome aura design keeps the trend grounded while still feeling modern.
This design features a soft, cloud-like center that gently glows outward into a darker nude or sheer blush base, finished with a subtle chrome veil.
- The Technique: An airbrush or tiny makeup sponge creates the soft central aura circle.
- The Look: Ethereal, futuristic, and deceptively subtle from a distance.
- Versatility: Gives you an on-trend look without sacrificing your ability to wear it to professional meetings.
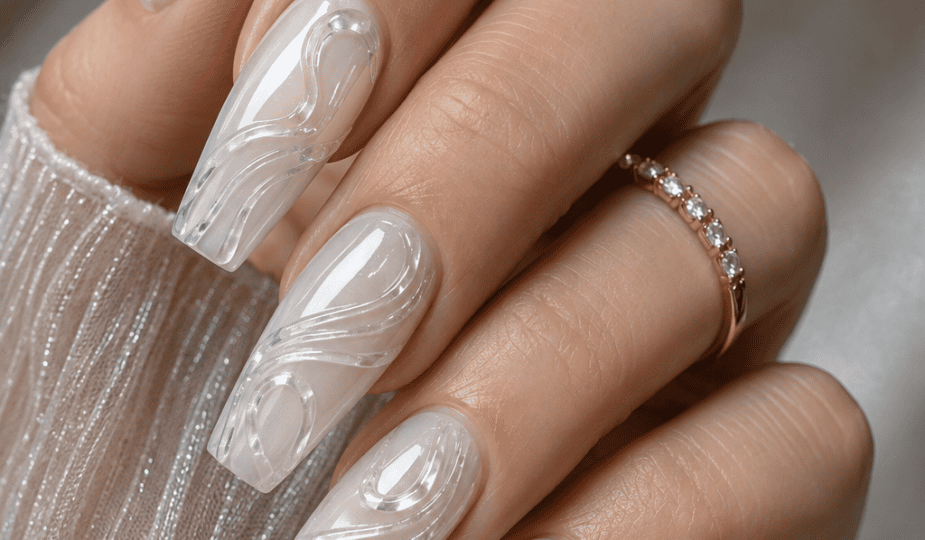
12. 3D Milky Gel Swirls
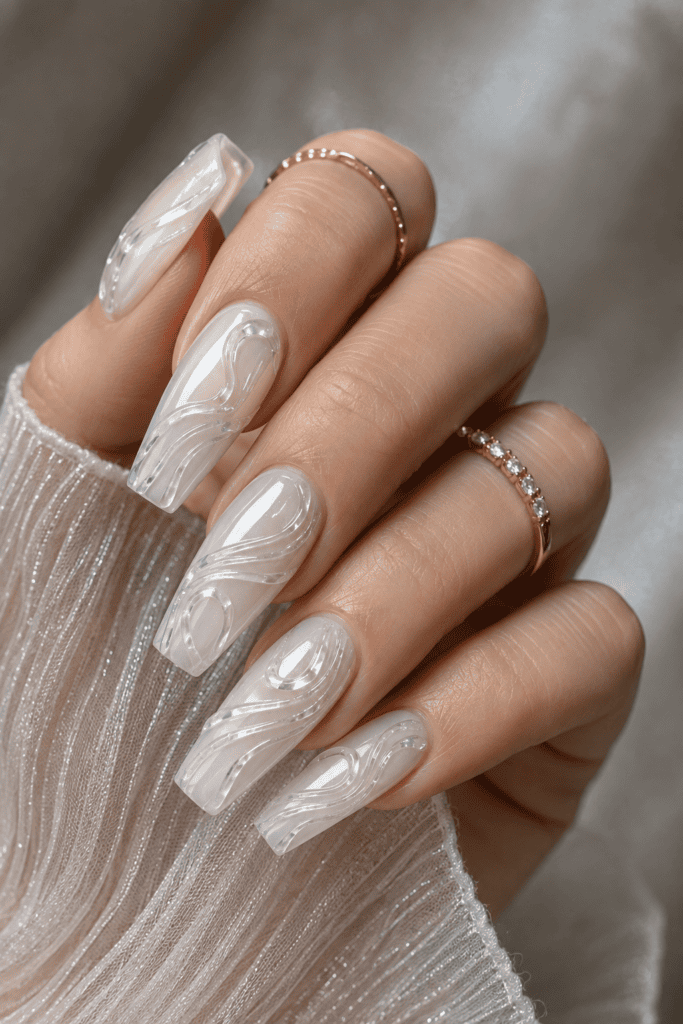
Why keep your nails flat when you can add real texture? Adding 3D clear gel swirls over a semi-opaque milky base creates a tactile, sculptural effect reminiscent of clear water droplets or blown glass.
I was nervous about 3D gel snagging on my favorite knitwear, but as long as your nail tech caps the curves smoothly, it glides over clothes without catching at all!
- Application: Paint your milky base, seal with top coat, then use a thick builder gel to pipe raised lines across the nail plate.
- Visual Effect: Catches overhead lights and creates stunning shadows across your nails.
- Best Shape: Looks magnificent on long coffin or tapered almond nails.
13. Milky Base with Silver Metallic Accents
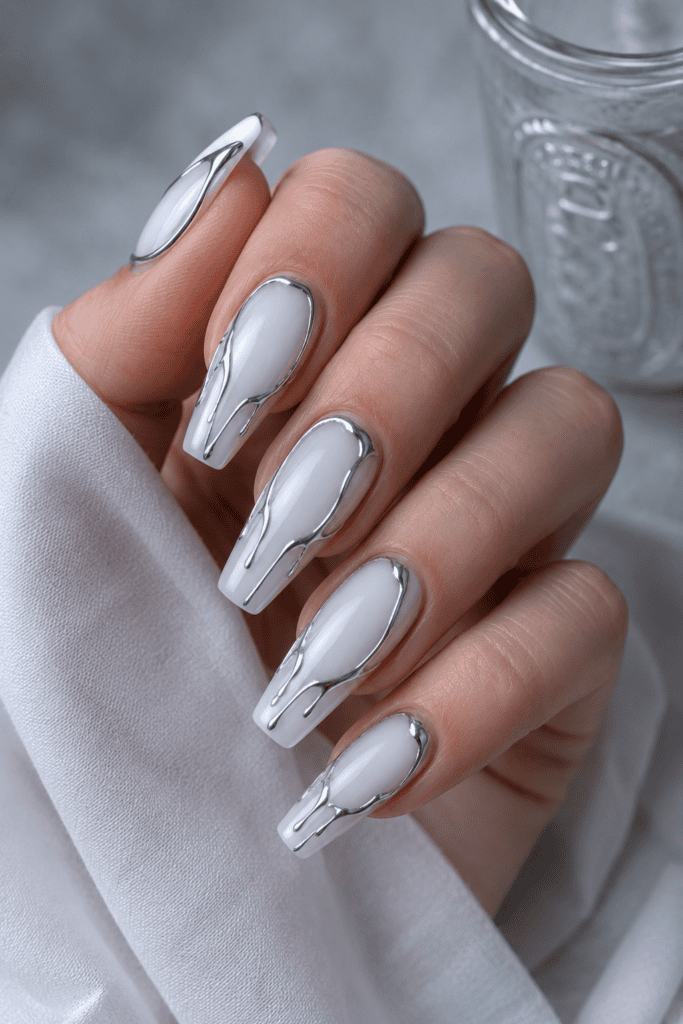
Gold gets a lot of love, but liquid silver accents against a cold milky white base feel unbelievably slick and contemporary. Thin, molten silver drips or fine molten framing around the edges give your hands a cool-toned, jewelry-like finish.
- Style Pairing: Wear this with silver rings, chunky hardware belts, and dark charcoal tailoring.
- Product: Chrome painting gel set over a fully cured milky top coat.
- Vibe: Sleek, futuristic, and effortlessly cool.
14. Milky White with Tiny Pearl Embellishments
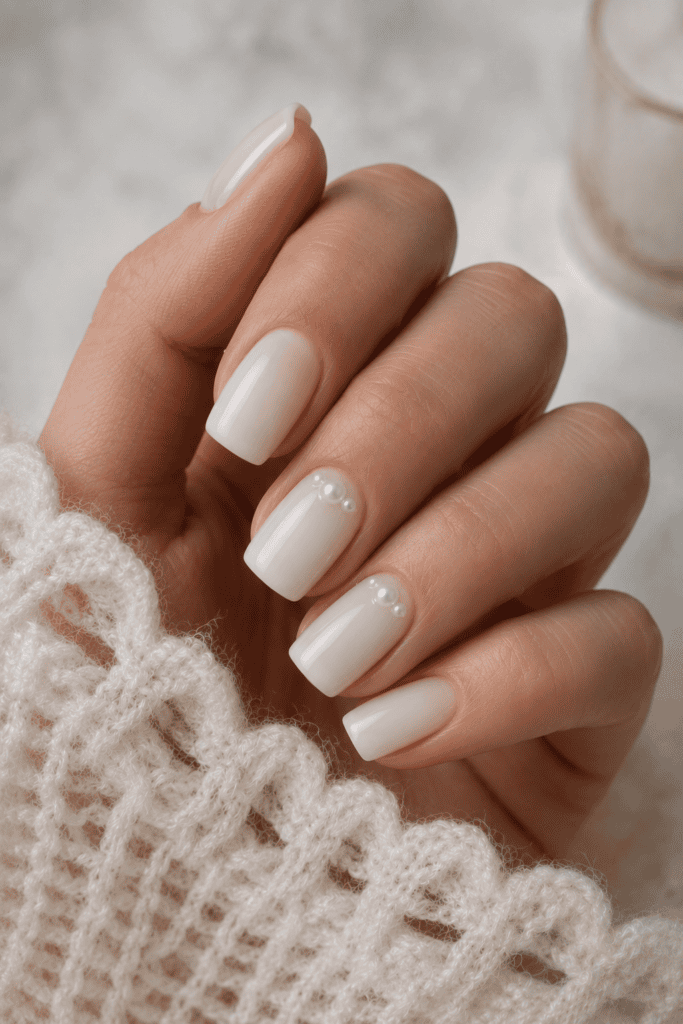
If you want a manicure that feels romantic, look no further than tiny flat-backed micro pearls. Securing one delicate pearl at the base of your accent nails adds textured elegance without feeling tacky.
I wore this set to a summer wedding last year and received endless compliments from guests who thought I spent hours at an avant-garde salon!
- Pearl Placement: Apply a tiny dab of nail glue or thick rhinestone gel right near the cuticle line.
- Longevity Tip: Encapsulate the base of the pearl with a fine liner brush dipped in top coat to lock it in place.
- Overall Vibe: Delicate, bridal-adjacent, and incredibly refined.
15. The Barely-There Milky Flush
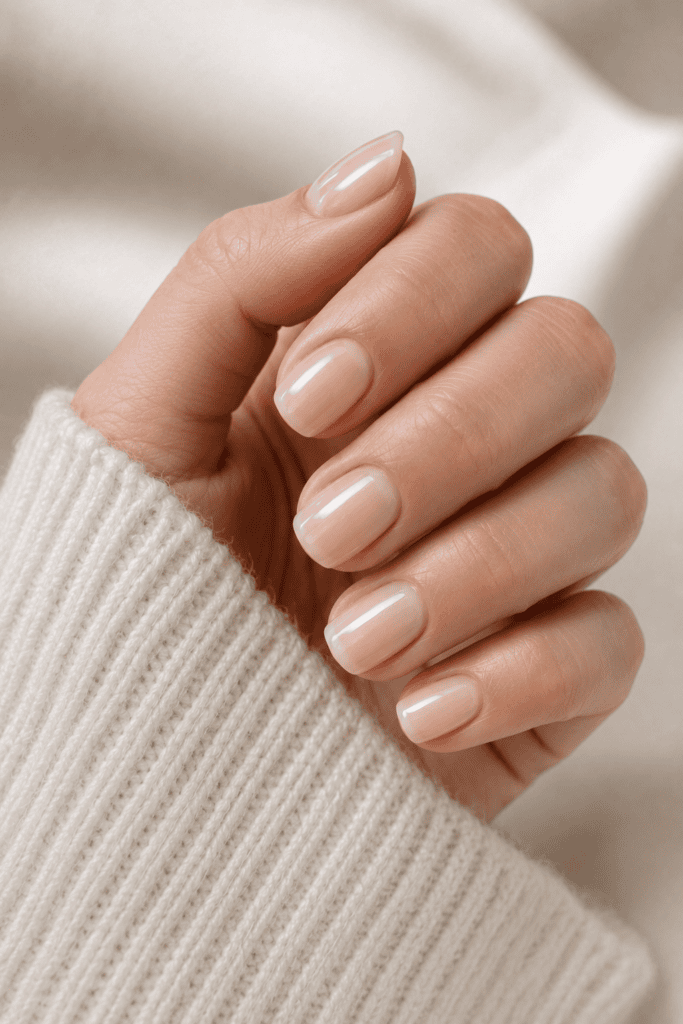
For the ultimate minimalist who hates obvious polish regrowth, this look combines a very light, sheer pink base with a faint milky top tint. The result looks like your natural nail bed, only healthy, glowing, and perfectly polished.
It provides just enough coverage to hide discoloration while keeping the free edge of your natural nail partially visible.
- Coverage: 20% color opacity for a super natural look.
- Regrowth: Virtually invisible—you can easily stretch this manicure to three weeks without anyone noticing the gap.
- Maintenance: Minimal upkeep required; just apply cuticle oil daily to keep the surrounding skin flawless.
How to Get the Look at Home Without Streaks
We have all been there: you buy a fresh bottle of sheer white polish, apply one coat, and immediately end up with patchy, streaky lines that look like a primary school art project gone wrong. Sheer light shades are notoriously difficult to apply smoothly, but these simple steps guarantee a salon-grade finish every time.
Master the Prep Work
You cannot achieve an expensive-looking manicure over rough cuticles and uneven nail plates. Spend eighty percent of your time prepping the canvas!
- Gently push back your cuticles using a wooden stick or cuticle pusher after a warm shower.
- Buff the nail plate lightly with a fine-grit buffer to smooth out any natural vertical ridges.
- Wipe each nail clean using a lint-free pad soaked in isopropyl alcohol to strip away natural oils.
Application Secrets for a Streak-Free Finish
- Use a Ridge-Filling Base Coat: A good ridge-filling base coat acts like a primer for your nails, filling in microscopic dips so light polish glides on evenly.
- Float the Brush: Do not press the polish brush flat against your nail! Keep your hand light and let the bead of polish float across the surface.
- Apply Three Thin Coats: Never try to achieve full opacity in one or two thick layers. Three ultra-thin coats will eliminate streaks while drying significantly faster.
- Cap the Free Edge: Run your polish brush along the tip edge of your nail on every single layer to prevent premature chipping.
  MANICURE PREP FLOW:
  [Clean & Shape] ---> [Buff Ridges] ---> [Dehydrate with Alcohol] ---> [Ridge-Filling Base]
Maintaining Your Clean-Girl Aesthetic
You spent time crafting the perfect cloudy manicure now you need to keep it looking fresh! Light polishes show dirt and wear much faster than darker shades, but a few simple habits will keep your hands looking like a luxury campaign all week long.
- Apply Cuticle Oil Daily: Massage jojoba-based cuticle oil into your cuticles every single night before bed. hydrated skin instantly elevates the look of any polish.
- Wear Gloves During Chores: Household cleaning products and hot dishwater will dull your top coat and cause sheer whites to yellow or lift quickly. Keep rubber gloves under the sink!
- Refresh Your Top Coat: Apply a fresh layer of quick-dry glossy top coat on day four to restore that freshly-painted shine and seal down any lifted edges.
- Avoid Staining Agents: Watch out for fresh denim dyes, spicy sauces (turmeric is the ultimate enemy of white nails!), and tinted hair products. If you get hair dye or sauce on your nails, wipe it off immediately with an alcohol pad!
Finding your signature shade of milky white might take a little experimenting, but once you hit that sweet spot between translucent and creamy, you will never want to paint your nails another color.