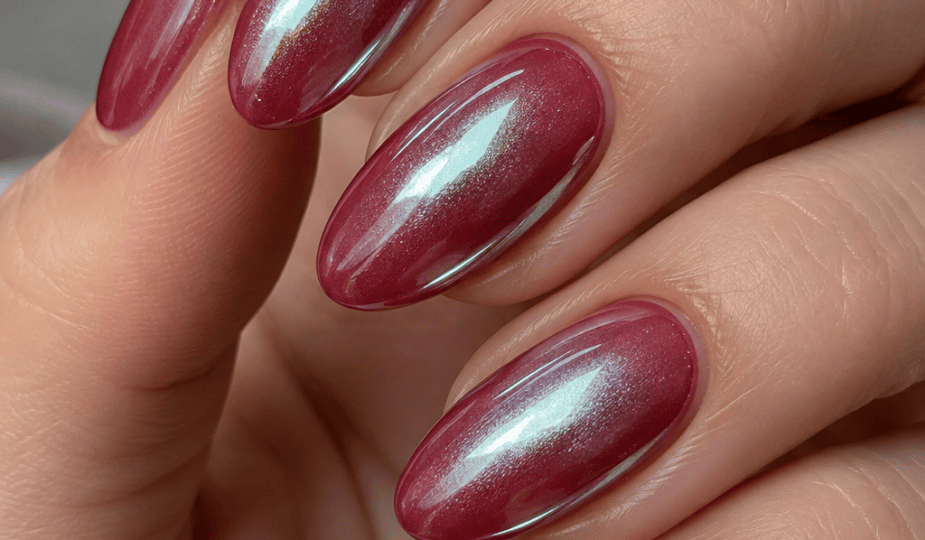
Ever ruined a favorite silk blouse because you couldn’t wait five minutes for your polish to dry? Freya Weston from thehousedrop gets it—she’s been there more times than she’d care to admit. But despite her tragic history with wet enamel, there’s one beauty shortcut she refuses to surrender: a vivid, jaw-dropping cherry red manicure.
For those chaotic weeks when a two-hour salon appointment simply isn’t in the cards, Freya turns to a deep, juicy crimson to do the heavy lifting. Cherry red acts like an instant real-life filter, instantly elevating an entire look even on sweatpants-and-messy-bun days. After testing dozens of designs to find the ones that deliver maximum drama with minimal effort, she narrowed down 15 killer cherry red nail ideas that transform a standard manicure into pure magic.
1. The Glossy Deep Cherry Monochrome
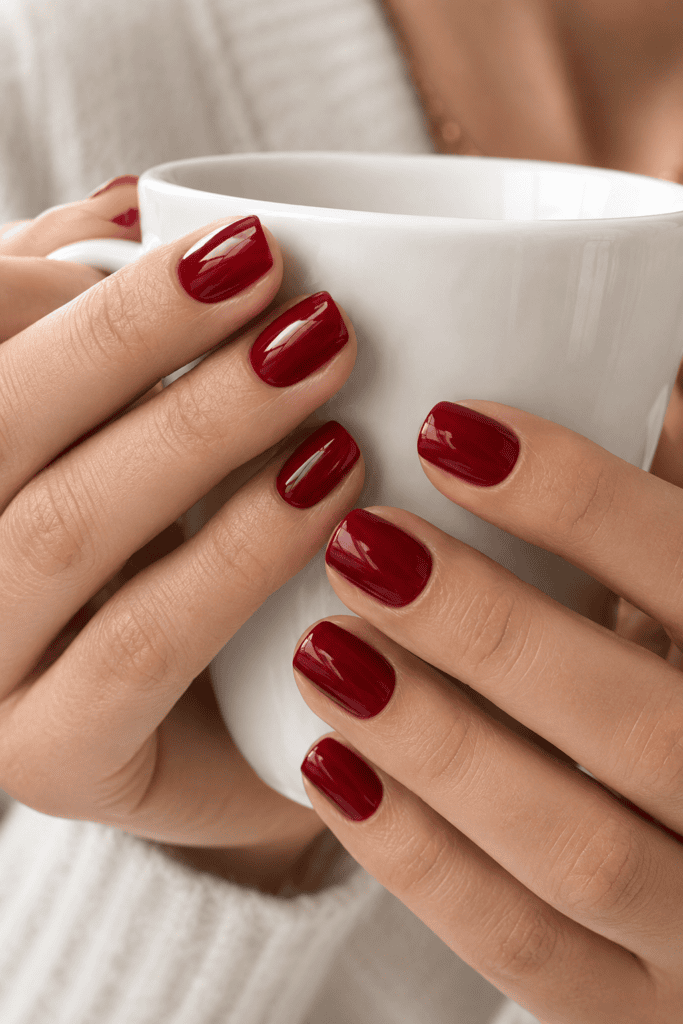
Sometimes you just need to keep things straightforward and let a rich color do the heavy lifting. I spent weeks searching for the absolute perfect formula before I found OPI’s Got the Blues for Red, which gives that exact ripe-cherry depth. It instantly creates a high-shine, rich finish that looks like you paid two hundred dollars at a high-end studio.
To pull off a plain monochrome shade, your secret weapon is all in the prep work.
- File your nails into a short, tidy squoval (square-oval) shape to keep the rich shade looking crisp rather than harsh.
- Apply a high-gloss gel topcoat and reapply a thin layer every three days to lock in that wet-look shine.
- Rub a daily drop of jojoba cuticle oil into your cuticles every night so the rich red shade doesn’t highlight dry skin.
Ever noticed how a dark crimson shade instantly makes your skin tone glow? It acts like an absolute magnet for compliments without requiring a single line of intricate nail art.
2. Micro Cherry French Tips
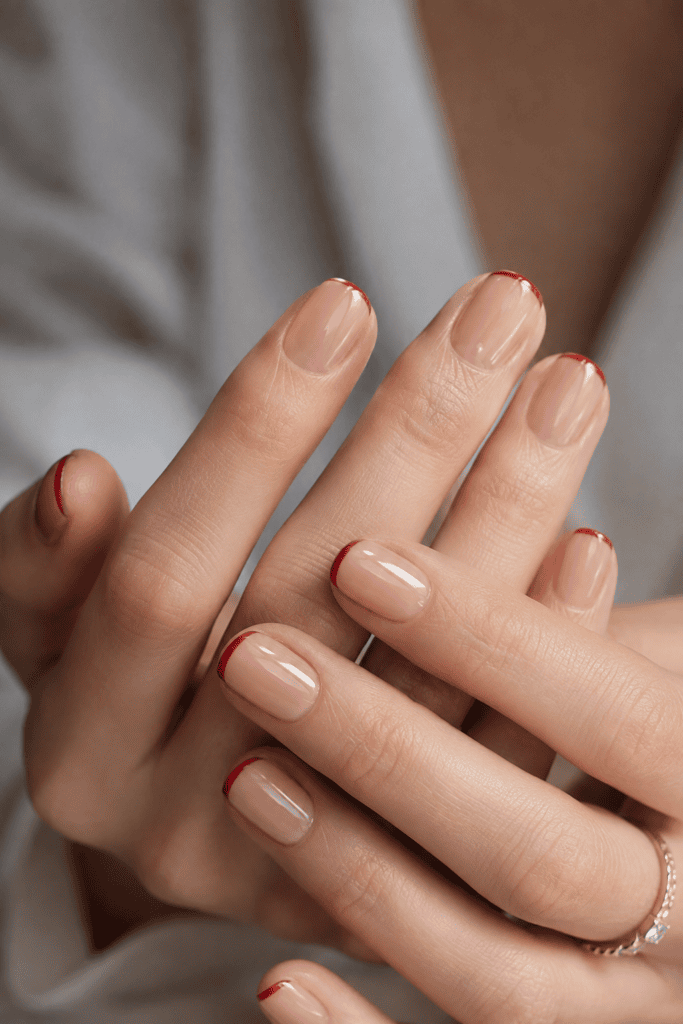
I used to hate traditional white French manicures on myself because they felt a bit too rigid for my everyday style. But swapping out that classic white stripe for a razor-thin line of cherry red completely changes the vibe. It offers a subtle nod to color while keeping your base fresh and clean.
You want to start with a sheer, skin-tone base like Essie’s Mademoiselle to give your natural nail bed a healthy, bare polish. Then, take a super-thin detail brush and trace a whisper-thin line along the top curve of your nail.
- Keep the red line ultra-thin— aim for less than two millimeters— so it looks deliberate and delicate.
- Match your base shade precisely to your skin’s undertone so the tips really pop.
- Wear this style to the office if you want something fun that still feels polished and professional.
TBH, this design saved my nails when I was growing out old acrylic damage 🙂 You get the fun pop of vibrant color right at the top while letting your natural nail rest underneath.
3. Chrome-Dusted Cherry Gloss
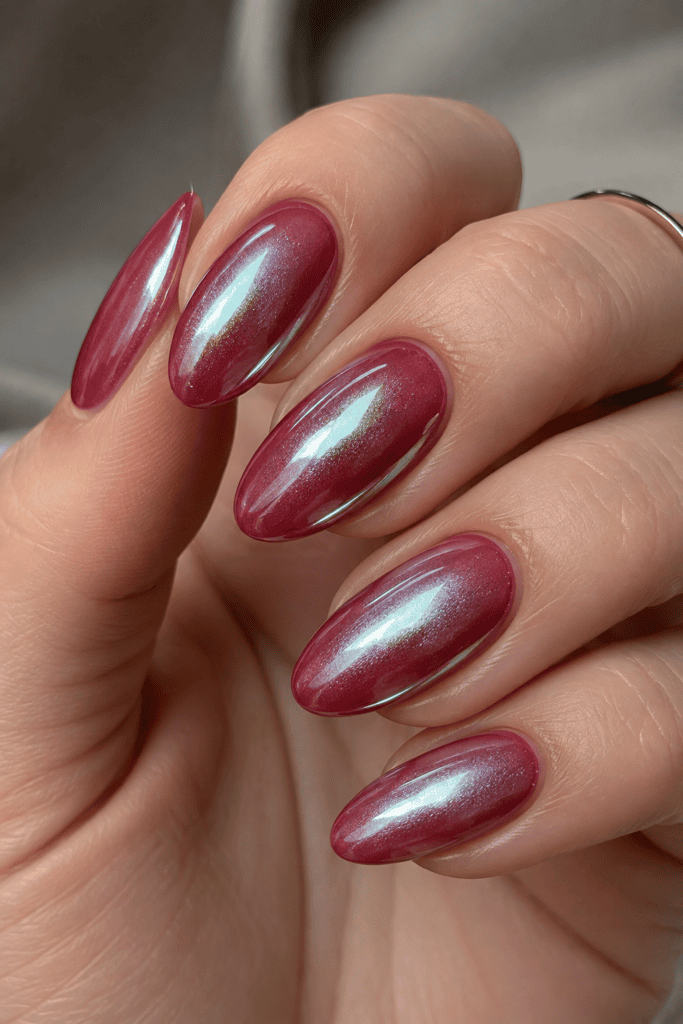
If you spent any time on social media this year, you know chrome powder took over the entire beauty world. But instead of laying silver chrome over a bare base, dusting a subtle pearl finish over deep cherry red creates an incredible glazed-donut effect. It gives your hands a liquid-metal look that catches the light every single time you move your fingers.
+--------------------------+-----------------------------------+-----------------------------------+
| Feature                  | Traditional Cream Red             | Chrome-Dusted Cherry              |
+--------------------------+-----------------------------------+-----------------------------------+
| Texture & Finish         | Smooth, high-shine lacquer        | Iridescent, metallic sheen        |
| Maintenance Level        | Low (easy touch-ups)              | Medium (requires non-wipe topcoat)|
| Best Nail Length         | Short to medium squoval           | Medium to long almond             |
| Lighting Impact          | Consistent color indoors/outdoors | Shifts dynamic light reflections  |
+--------------------------+-----------------------------------+-----------------------------------+
To create this look at home, apply your standard two coats of deep red polish and let them dry completely. Lightly rub an iridescent white chrome powder over the cured surface using an eyeshadow applicator before sealing everything in with a thick, glossy topcoat. The subtle shimmer softens the intensity of the dark red while adding an ultra-modern twist.
4. The Crimson Velvet Effect
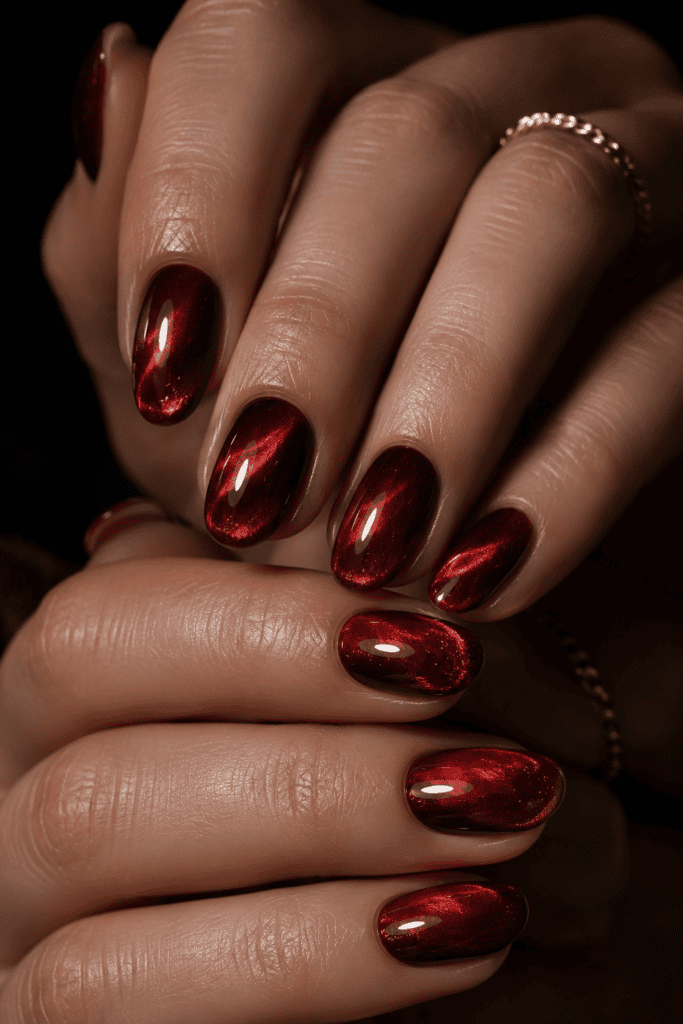
Cat-eye polish isn’t just for halloween or party season anymore. Magnetic velvet polishes contain tiny iron filings that shift around when you hold a small magnet near the wet coat. When you use a magnetic wand over a rich cherry red jelly base, it creates a plush, 3D texture that literally looks like crushed velvet fabric.
- Apply a dark red or black base coat first to give the magnetic polish maximum contrast.
- Hold the magnet diagonally half an inch away from your wet nail for ten seconds to pull the metallic shimmer into the center.
- Seal immediately with a fast-drying topcoat to lock that dimensional velvet depth into place before it spreads back out.
Do you ever find yourself staring at your own hands mid-conversation just to watch the light bounce off your nails? Because that is precisely what happens every single time I wear this plush velvet finish.
5. Negative Space Half-Moons
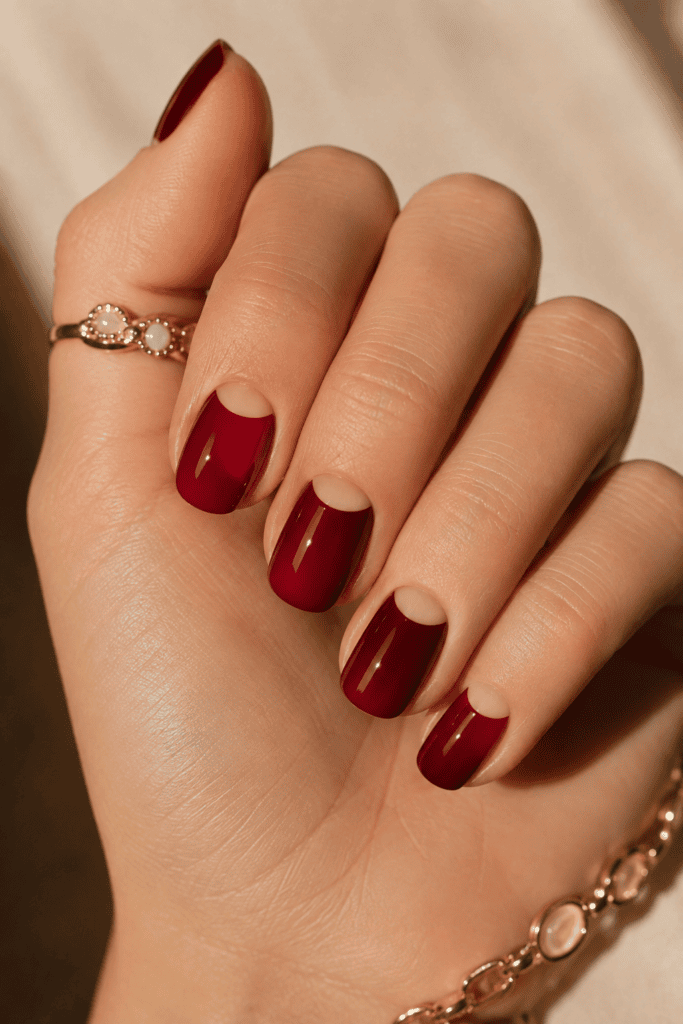
If you hate seeing noticeable nail growth after a single week, negative space designs are about to become your new best friend. By leaving the cuticle area bare in a smooth semi-circle (the “luna” or half-moon), your manicure grows out gracefully without showing that awkward gap at the bottom.
I tried doing this freehand once and ended up with crimson blobs all over my knuckles. Save yourself the stress and buy a pack of simple paper hole-reinforcement stickers from the office supply store.
- Stick the reinforcement sticker over the bottom curve of your clean, bare nail to protect the half-moon area.
- Paint two coats of rich cherry polish over the rest of the nail plate.
- Peel the sticker off carefully while the polish is still slightly damp to reveal a crisp, clean bare arc at your cuticle line.
This retro-inspired detail gives off an instant vintage vibe. It looks like you spent an hour with a master manicurist, even if you did it at your kitchen table in twenty minutes.
6. Cherry Red Jelly Nails
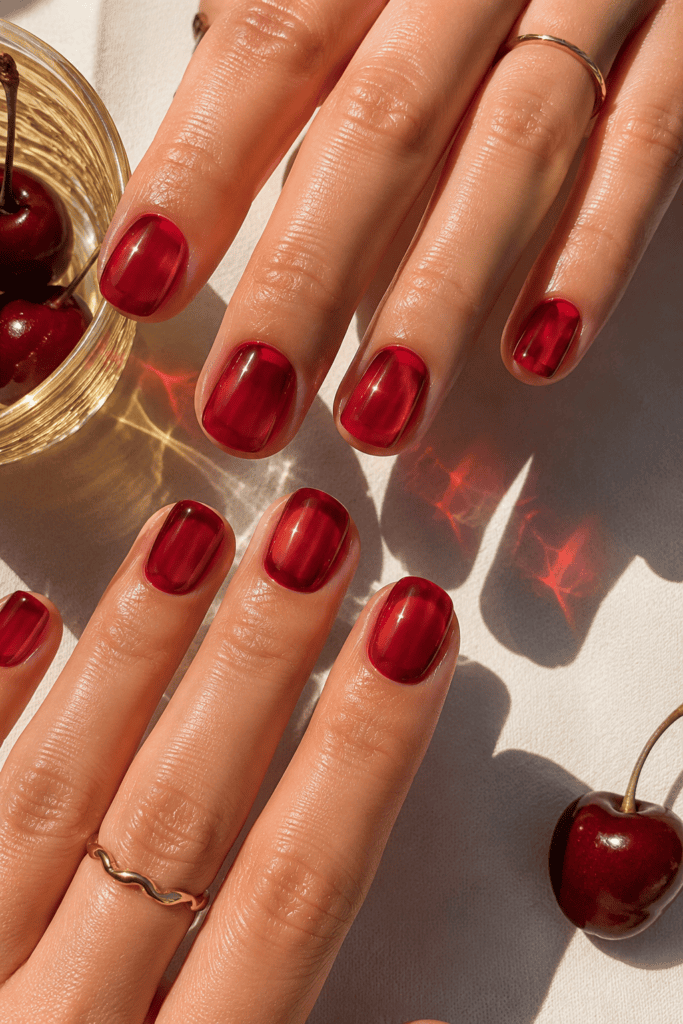
Jelly polishes are sheer, tinted formulas that let light pass right through them, mimicking the look of tinted glass or hard candy. A cherry red jelly shade gives your hands a sweet, fresh look that feels much lighter than a heavy cream polish.
I love wearing this finish during warmer months when heavy, opaque dark shades feel a bit too gloomy.
- Apply three thin coats of jelly polish rather than two thick ones to build an even color depth.
- Keep your natural nail tips clean and filed underneath, because the sheer formula shows your natural nail edge.
- Layer a high-shine, gel-like topcoat on top to enhance that glass-candy reflection.
IMO, this is the easiest way to wear dark red if you usually shy away from bold shades 🙂 It offers a soft wash of color that feels casual, playful, and completely fresh.
7. Matte Crimson with Glossy French Tips
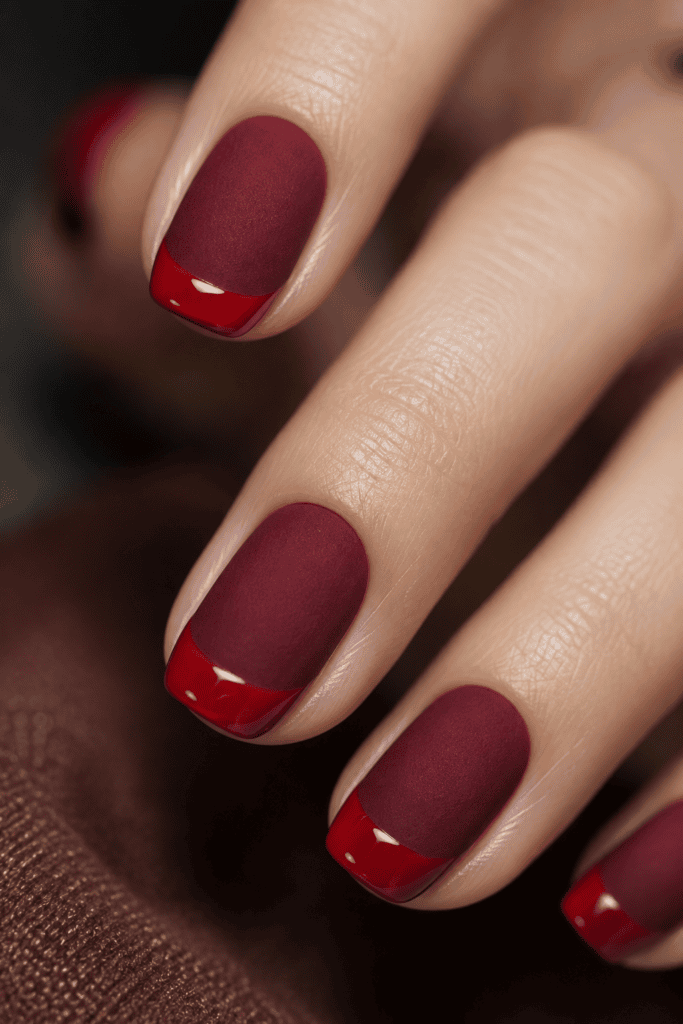
Can’t decide between a velvety matte finish and a high-shine polish? You don’t have to choose. Combining two contrasting textures in the exact same color creates a subtle, sophisticated design that always makes people look twice.
Start by painting your entire nail with your favorite cherry polish, then brush on a flat matte topcoat over every finger. Once that matte base dries down completely, take a high-shine topcoat and paint a thin French line across the edge of your nail tips.
- Contrast glossy tips against a velvet-matte base for a subtle, touchable texture difference.
- Use a striping tape line to keep the border between the matte base and glossy tip ultra-sharp.
- Avoid applying oil directly onto the matte area, as oils ruin the flat finish.
The contrast between the soft matte bed and the shiny edge creates a rich, tonal look that feels incredibly custom and expensive.
8. Little Red Heart Accents
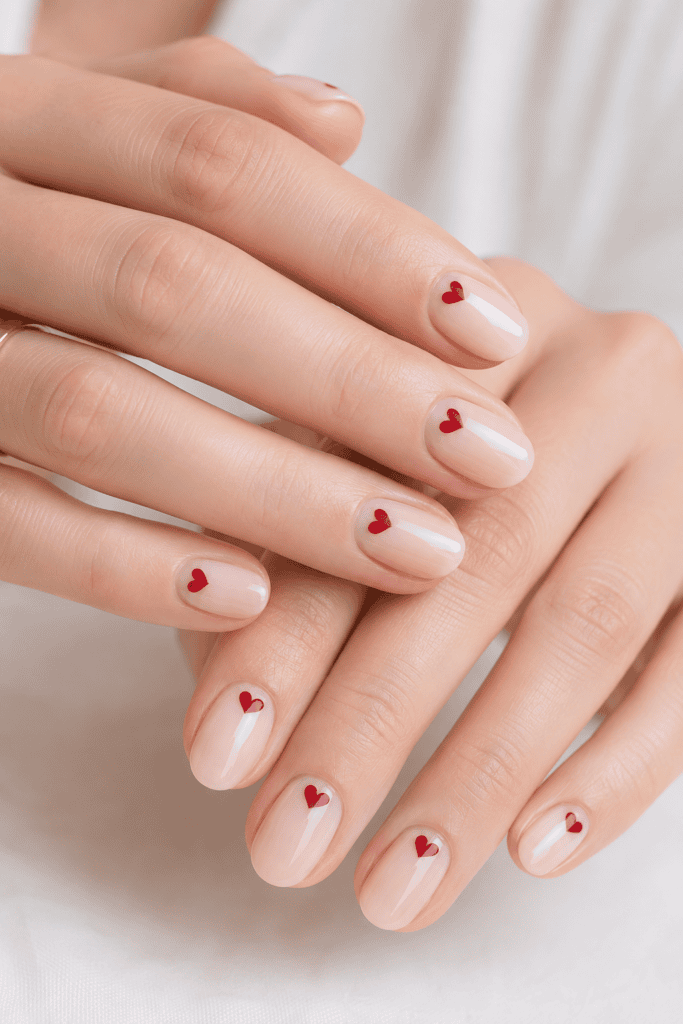
Adding small accent details to a nude nail base keeps your hands looking effortless while still giving you that satisfying pop of red. Painting a single, tiny red heart near the base of your ring finger adds just the right amount of playful energy without looking childish.
- Dot two tiny spots of red polish side by side on a bare nail using the end of a bobby pin or a dotting tool.
- Drag those two dots downward into a point using a fine toothpick to create a perfect heart shape.
- Keep the surrounding nails totally bare or sheer nude so your small heart drawing remains the main focal point.
Who says you need to wait until Valentine’s Day to wear heart accents on your hands? It works all year round whenever your daily wardrobe needs a playful touch.
9. Cherry Ombré (The Gradient Dip)
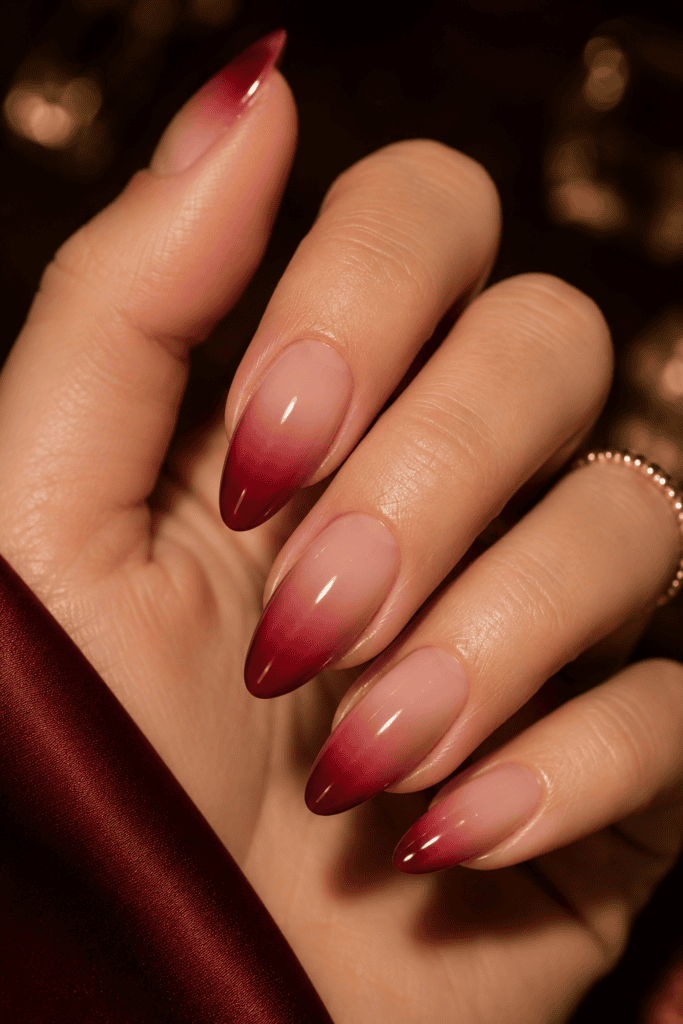
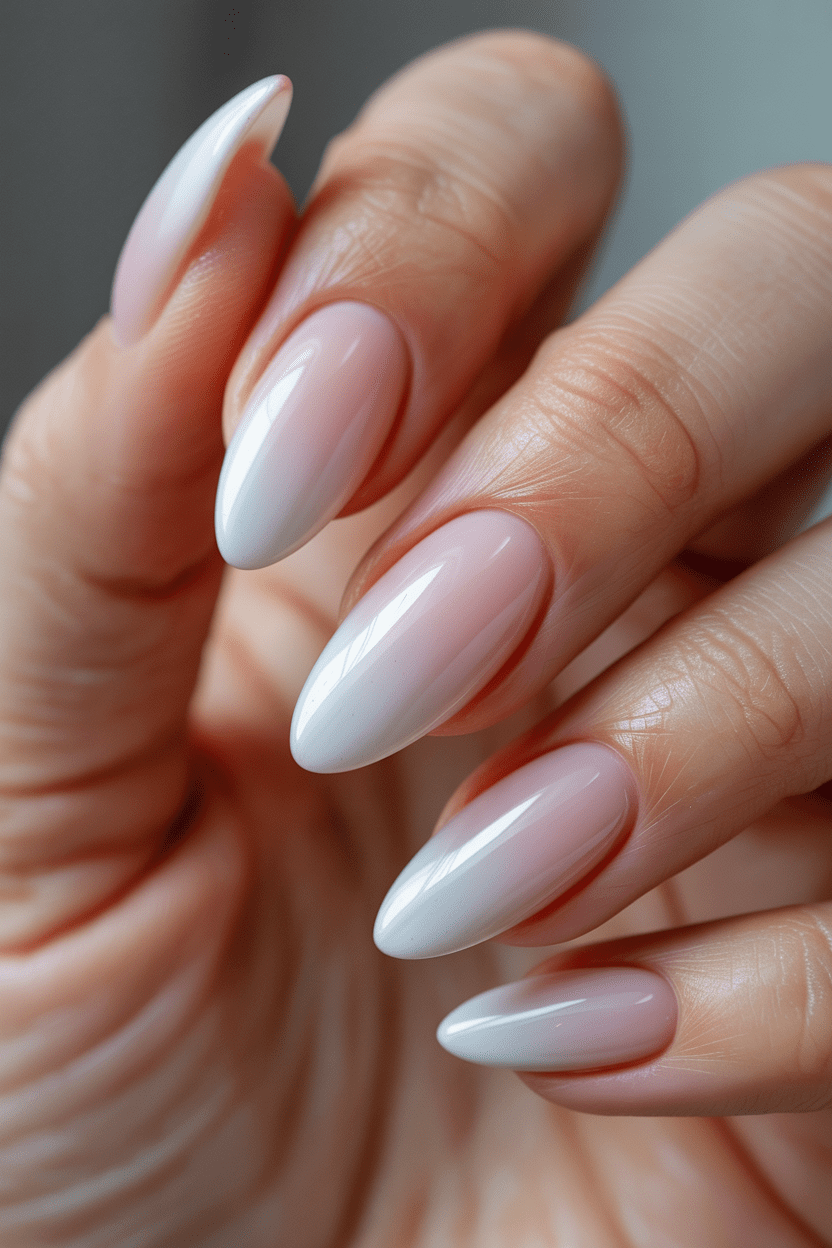
Gradient nails fade seamlessly from a soft nude base at the cuticle into a rich, deep cherry shade toward the tips. This visual trick physically elongates your fingers, making your hands look lean and elegant.
+-----------------------+------------------------------------------------------------+
| Gradient Step         | Action Required                                            |
+-----------------------+------------------------------------------------------------+
| 1. Base Preparation   | Paint nail with a clean nude polish and let dry completely.|
| 2. Sponge Application | Apply cherry polish to a makeup sponge edge.               |
| 3. Dab & Blend        | Dab sponge lightly onto tips, building color gradually.    |
| 4. Seal & Smooth      | Apply a thick topcoat to smooth out sponge texture.        |
+-----------------------+------------------------------------------------------------+
To master this at home without creating a massive mess, apply liquid latex guard around your skin first. Dab a inexpensive wedge makeup sponge lightly over your tips until you build up your desired color depth. Finish with a generous layer of plumping topcoat to blur out any harsh lines between the two shades.
10. Abstract Red Swirls
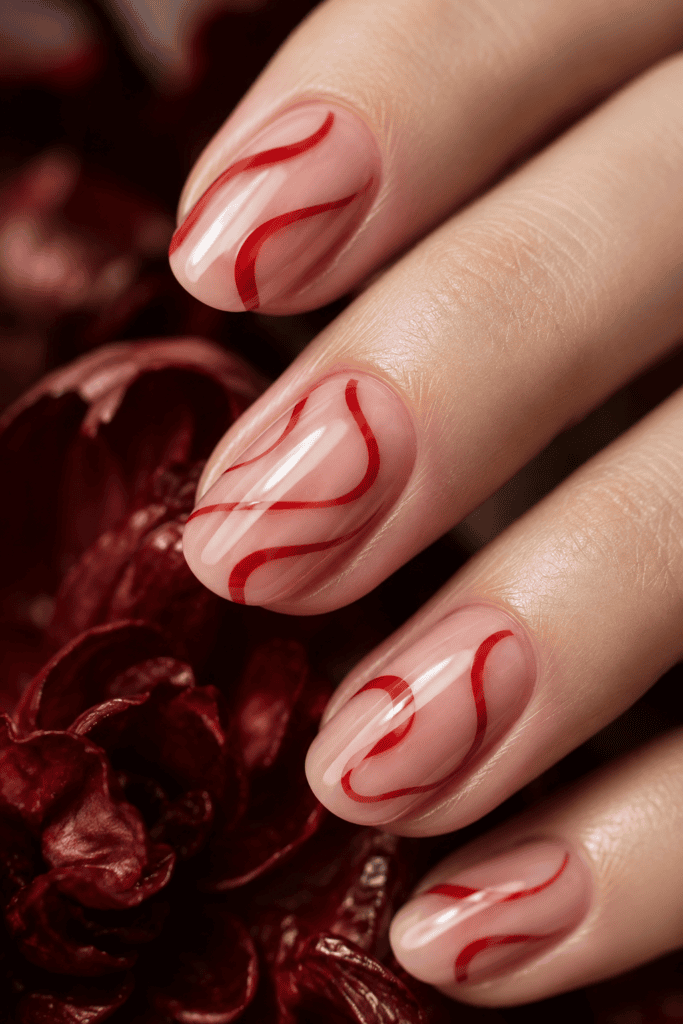
If you don’t have a steady hand for sharp lines, abstract swirls are your ultimate shortcut to artistic nails. Because the swirls are organic and fluid, there are zero mistakes—every wave and curve looks totally intentional.
I love layering dark cherry swirls over a sheer blush base like OPI’s Bubble Bath.
- Use a long, thin nail art liner brush dipped in cherry red polish to draw smooth curves across your nail.
- Vary the thickness of your lines—make some parts thick and taper the ends into thin tails.
- Limit the swirls to two accent fingers per hand if you want a clean, minimalist style.
Is there anything more satisfying than painting a shape that literally cannot be done wrong? Abstract lines let you enjoy nail art without stressing over perfection.
11. Red Tortoiseshell Accents
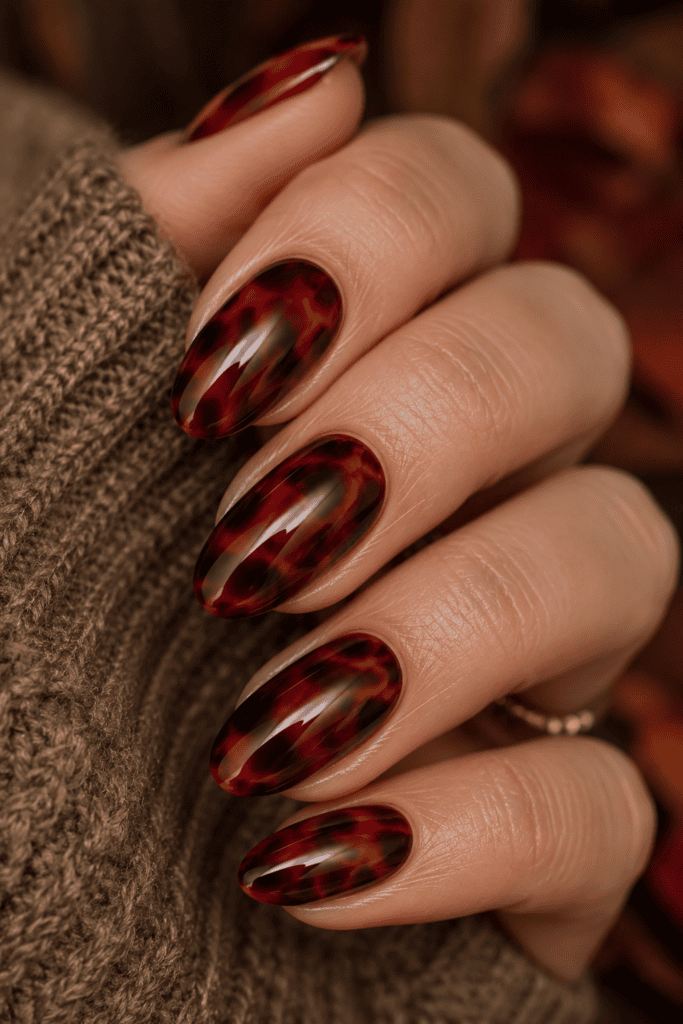
Classic brown tortoiseshell is a staple, but swapping out amber tones for deep cherry red takes this timeless pattern to a whole new level. It blends deep black patches with semi-translucent red jelly polish to create a rich, stone-like texture that looks like fine jewelry.
- Paint a thin layer of sheer red jelly polish over your nail as your background base.
- Dab irregular spots of dark brown or black polish onto the wet surface, letting the edges bleed slightly.
- Layer another coat of sheer red jelly on top to push the dark spots into the background and create deep dimension.
This pattern looks especially chic paired with a cozy cream cashmere sweater or a crisp black blazer. It brings a warm, rich tone to your fall and winter wardrobe.
12. Gold Foil & Deep Cherry
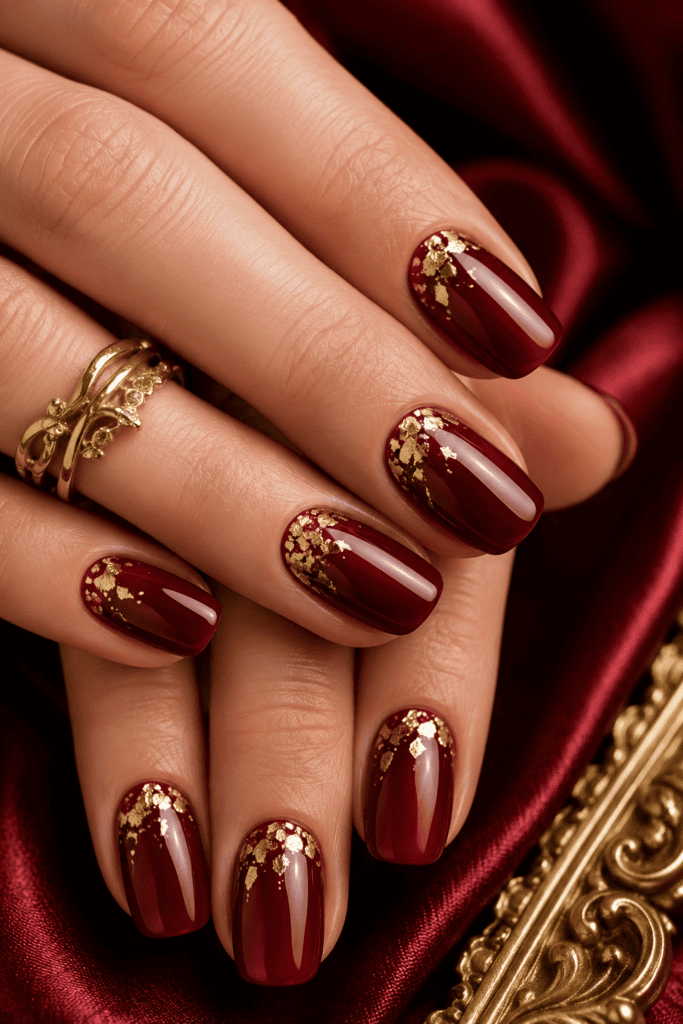
Gold and cherry red are a classic pairing for good reason. The metallic sheen of real gold leaf cuts through the dark depth of deep red lacquer, making your hands look instant royal.
Instead of covering your whole nail in foil, stick to tiny, broken flecks scattered near your cuticle or along one side of the nail plate.
- Apply your cherry polish and let it dry until it feels slightly tacky to the touch.
- Press small fragments of gold leaf foil onto the tacky surface using tweezers.
- Seal with two coats of clear topcoat to lock down the foil edges so they don’t catch on your clothes.
FYI, gold leaf foil costs less than five dollars online, but it instantly turns a ten-minute home polish session into a luxurious manicure 🙂
13. Minimalist Red Dot Nails
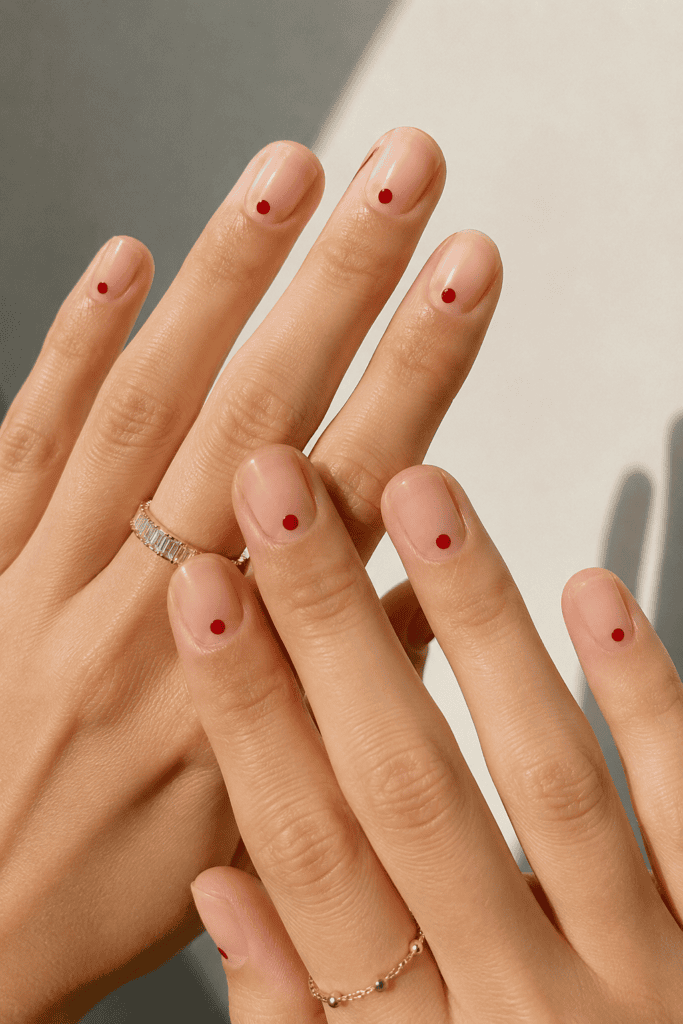
If you love ultra-clean beauty trends, this approach is the absolute pinnacle of minimalist nail design. You leave your entire nail bed completely bare—just clean, buffed, and sealed with clear shine—and place a single, perfectly round cherry red dot near the base of each nail.
- Dip the rounded tip of a dotting tool or hair bobby pin into a small pool of red polish.
- Press the tool straight down onto your nail plate just above your cuticle, then lift straight up.
- Cap the look with a clear, non-yellowing topcoat to protect the natural nail base.
This modern style takes less than ten minutes to complete, yet it looks like you stepped straight off a high-fashion runway. It is clean, modern, and absurdly easy to pull off.
14. Cherry Red Aura Nails
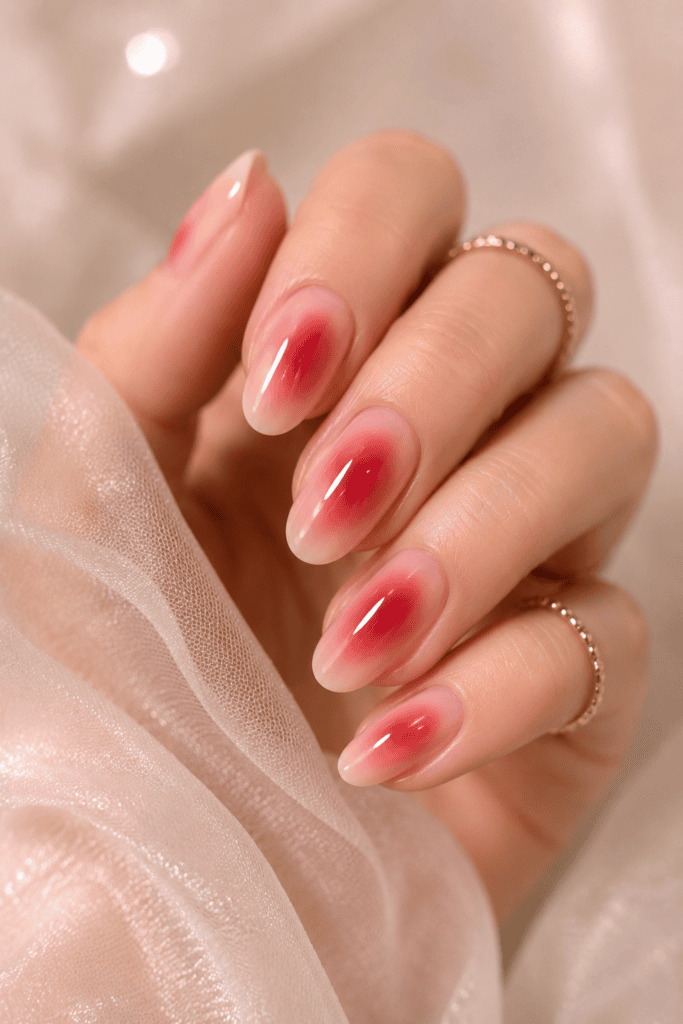
Aura nails use a soft, blurred gradient circle in the middle of your nail plate to mimic your personal energetic aura. A glowing cherry red aura surrounded by a soft pink or nude background creates an alluring, dreamy effect that feels totally modern.
To create this soft glow without an expensive professional airbrush gun:
- Apply a neutral nude or soft pink base coat over your entire nail and let it dry.
- Dab a small circle of cherry red polish onto the center of a soft makeup sponge.
- Lightly press the sponge onto the center of your nail, concentrating the red pigment in the middle while letting the edges fade into the nude background.
The smooth, airbrushed glow adds a mysterious, energetic twist to standard color blocking.
15. The Statement Cherry Feature Nail
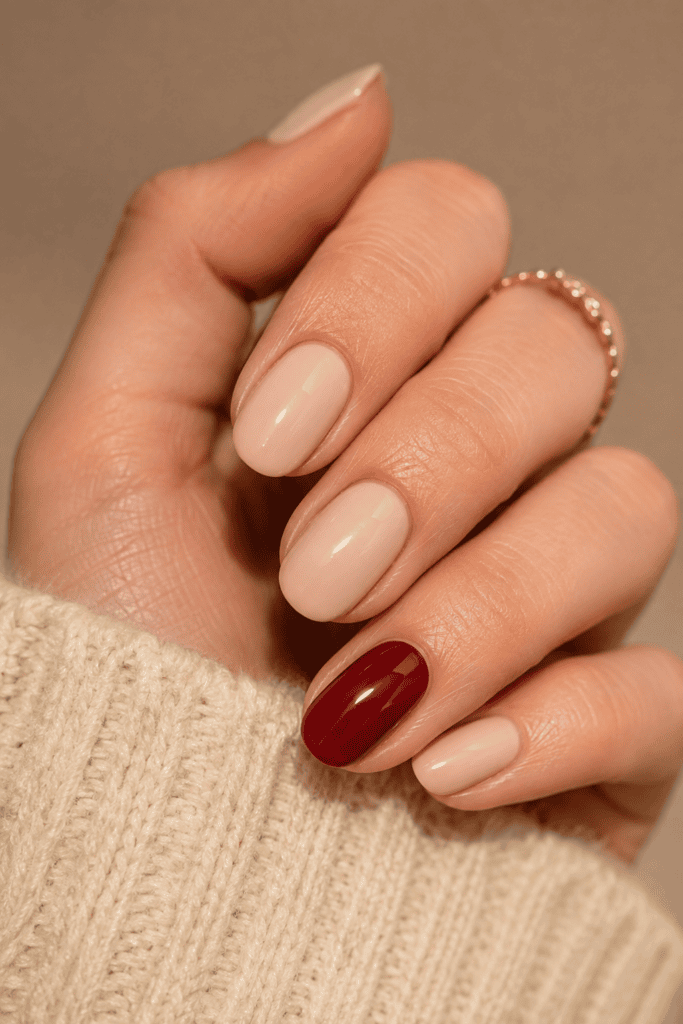
If you love a bold, dramatic red but worry it might feel overwhelming across all ten fingers, the feature nail trick is your best solution. Paint four fingers in a soft, neutral cream or sheer pink, then coat your ring finger in a deep, unapologetic cherry red.
+----------------------+------------------------------------------------------------+
| Styling Aspect       | Application Strategy                                       |
+----------------------+------------------------------------------------------------+
| Color Pairing        | Pair deep cherry with nude, beige, soft pink, or clean oat.|
| Accent Placement     | Apply color to ring finger or thumb for maximum balance.   |
| Maintenance Strategy | Keeps four nails neutral for fast touch-ups if chipped.   |
| Overall Style Vibe   | Balanced, tailored, clean, and understated.                |
+----------------------+------------------------------------------------------------+
This contrast pulls immediate attention to your hands while keeping the overall aesthetic soft, balanced, and easy to pair with any outfit in your closet.
How to Make Your At-Home Cherry Manicure Last
Nothing kills a sleek red manicure faster than a giant chip on your index finger three hours after painting them. Dark polish shows wear much faster than sheer nude shades, so getting your prep work right is non-negotiable.
Master the Prep Work
- Dehydrate your nail plate with a quick wipe of pure acetone or rubbing alcohol before applying your base coat to remove natural oils.
- Always use a dedicated base coat to prevent bright red pigments from staining your natural nails yellow.
- Cap the free edge of your nail by running your polish brush horizontally along the top rim to seal the tip against water damage.
Maintain the Shine
- Apply fresh topcoat every three days to protect the color layer from dulling or scratching during daily work.
- Wear household gloves when washing dishes or cleaning with chemicals to prevent the polish from lifting.
- Hydrate daily with cuticle oil to keep the skin around your dark polish soft, healthy, and neat.
Final Thoughts from Freya
At the end of the day, your nails should bring a little bit of joy every time you look down at your keyboard or reach for your morning iced coffee. You don’t need a three-hour appointment or a master’s degree in fine art to wear a deep, gorgeous red that turns heads.
Grab a great rich lacquer, pick your favorite look from this list, and give yourself a little luxury this week. Have you tried any of these bold red styles yet, or are you sticking to your safe nude polish routine? Let me know what you’re painting next—I’ll be over here trying not to smudge my index finger again!