Bad hair days happen to the best of us, but reaching for a sizzling hot tool isn’t always the answer—or the healthiest choice for your strands. Braids are the ultimate beauty cheat code: they instantly add structure, conceal second-day roots, and deliver a polished look without subjecting your hair to thermal damage.
Whether you need a two-minute style for running errands or an intricate updo for a formal event, there is a braid for every setting. Here are 15 versatile braided hairstyles to take your hair routine from casual to black-tie ready.
1. The Classic Three-Strand Side Braid
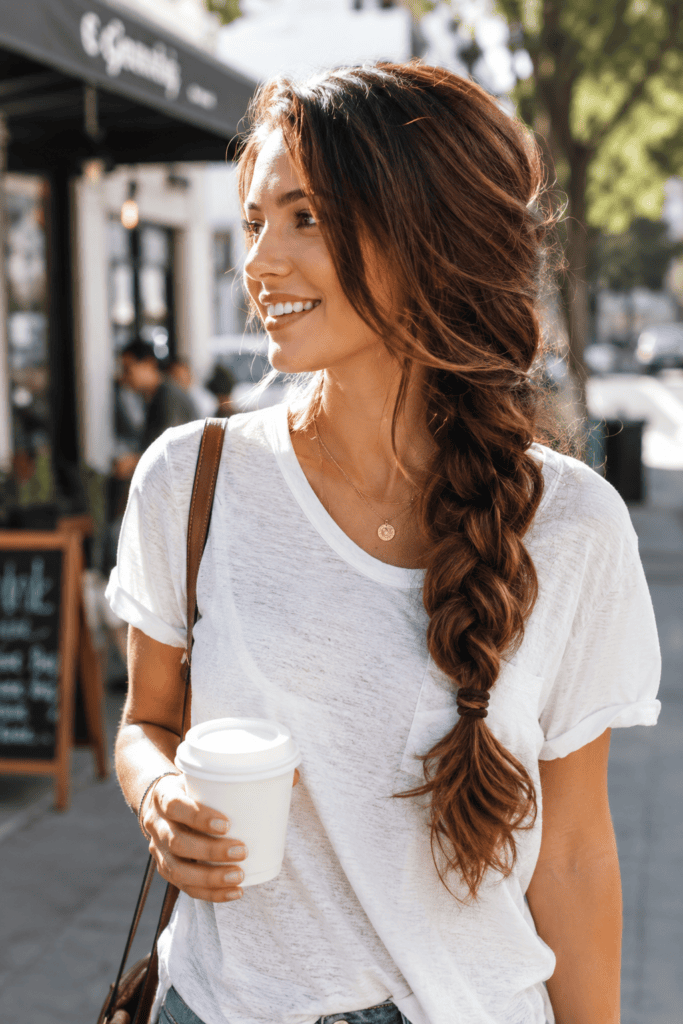
Who says basic has to look boring? I throw my hair into a loose side braid whenever I run out the door for an iced coffee run.
This style takes less than two minutes and keeps your hair out of your face without pulling on your scalp. It works best on medium to long hair lengths, especially when you want a relaxed, off-duty vibe.
- Gently sweep all your hair over one shoulder.
- Divide your hair into three equal sections and weave them loosely.
- Secure the end with a clear elastic band.
- Pancake the braid by pulling gently on the outer edges to create instant volume.
Freya’s Pro Tip: Spritz a dry texturizing spray through your strands before braiding. Freshly washed hair slips out of braids instantly, so you need that gritty texture to keep everything locked into place.
2. The Crown Milkmaid Braids
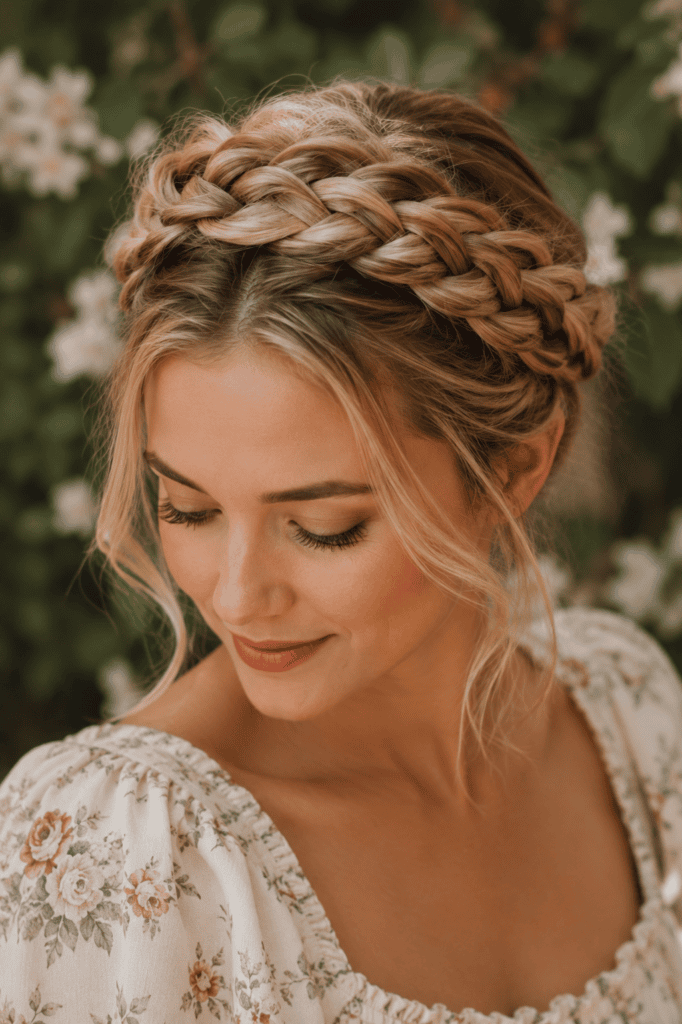
Have you ever tried hiding three-day-old dirty hair under a baseball cap, only to realize it ruins your entire outfit? Enter milkmaid braids, my absolute favorite savior for oily roots.
I wore this style to a weekend farmer’s market last month, and three strangers complimented my hair. They had no idea I skipped my wash routine for four days straight.
- Part your hair down the center into two equal pigtails.
- Braid each section from the base of your neck to the ends.
- Cross one braid over the top of your head like a headband and pin it down.
- Cross the second braid behind the first one, tucking the ends under, and secure with bobby pins.
3. The Trendy Bubble Braid
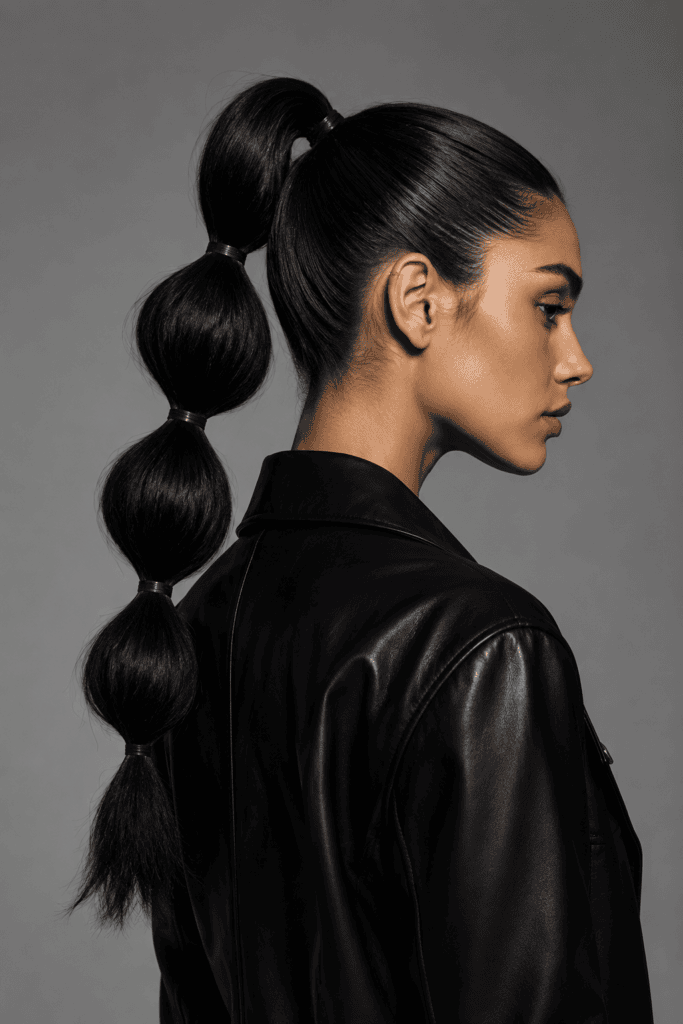
Okay, technically this style uses elastic placement rather than classic weaving, but it gives the exact visual impact of a high-fashion braid. TBH, this is the easiest hair hack on the list!
If you can tie a ponytail, you can master the bubble braid ponytail. It looks edgy, modern, and insanely cute with a simple white tee and leather jacket.
- Pull your hair into a high ponytail using a strong hair tie.
- Place another elastic band two inches down the length of the ponytail.
- Use your fingers to pull the hair between the elastics outward, creating a rounded “bubble.”
- Repeat this process every two inches down the length of your hair.
4. The French Braid Low Bun
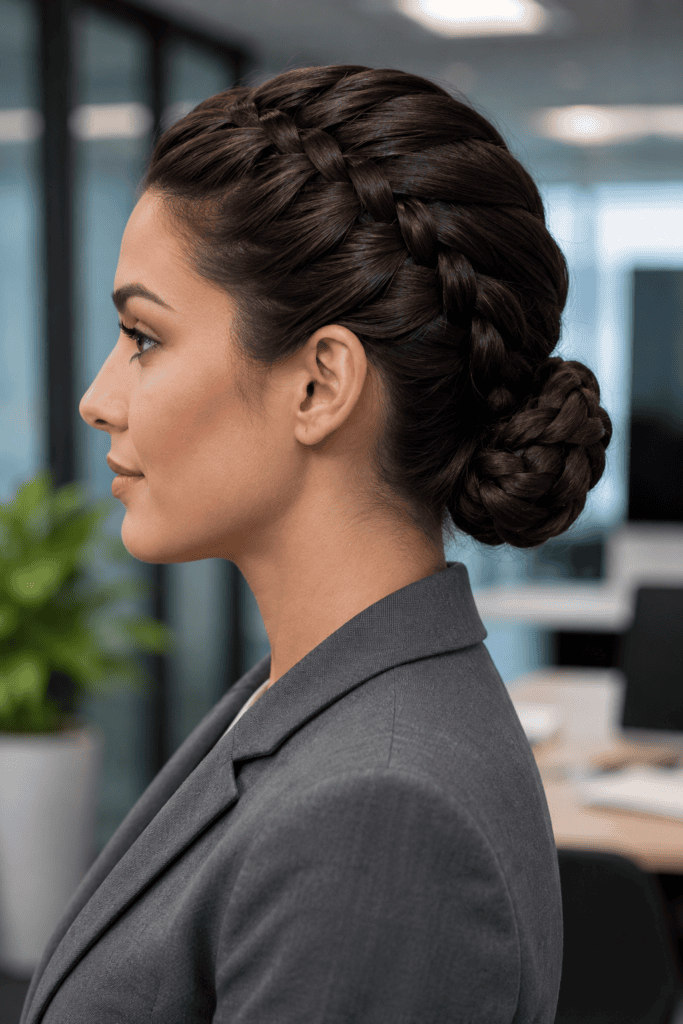
Boardroom meetings demand a hairstyle that says you mean business, but high ponytails give me a throbbing headache by noon. The French braid low bun solves both problems effortlessly.
This style combines the clean structure of a classic French braid with the tidy finish of a low chignon. It holds every stray flyaway in place from your 9 AM presentation through your 5 PM wrap-up.
- Start a classic French braid at the crown of your head, weaving downward toward your nape.
- Gather the remaining hair into a low ponytail once you reach the base of your neck.
- Twist the ponytail into a compact coil and secure it with a heavy-duty hairpin.
- Smooth down any baby hairs using a light touch of flexible hold hairspray.
5. The Sleek Fishtail Low Ponytail
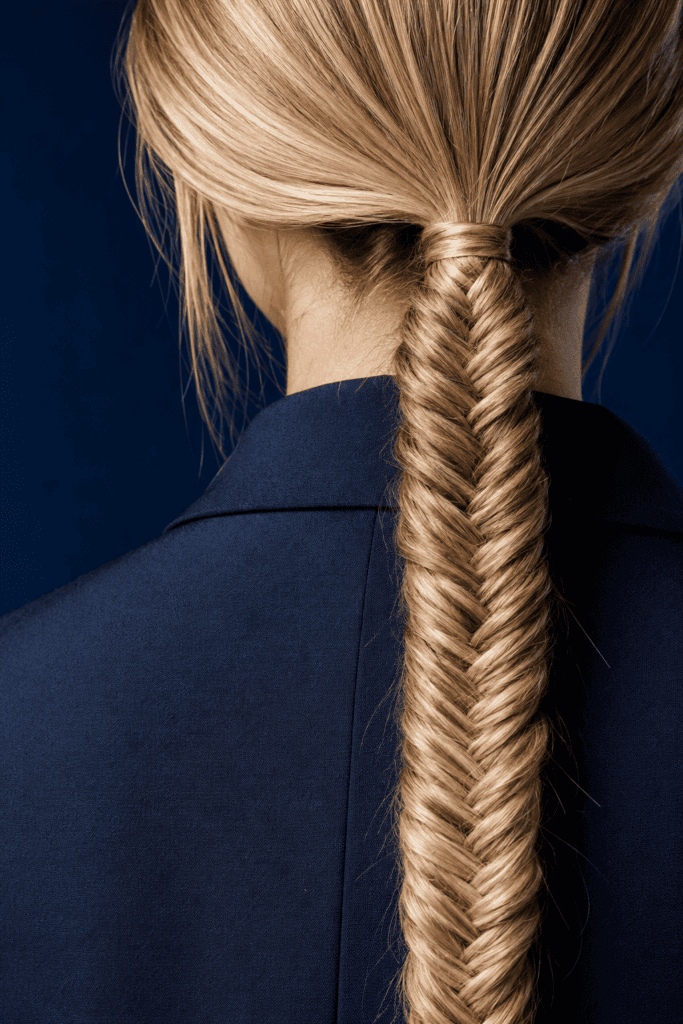
Why do people assume fishtail braids take an eternity to construct? Once you master the two-section rhythm, you can whip one out in under five minutes.
I love pairing a tight, precise fishtail braid with a structured blazer. It adds an unexpected texture to a corporate outfit without looking messy or unfinished.
- Secure your hair in a low ponytail at the nape of your neck.
- Divide the hair into two equal sections instead of three.
- Take a small piece from the outer edge of the left section and cross it over to the right section.
- Take a small piece from the outer edge of the right section and cross it over to the left section.
- Continue down the length, keeping the tension tight, and secure with an elastic.
6. The Side-Swept Dutch Braid
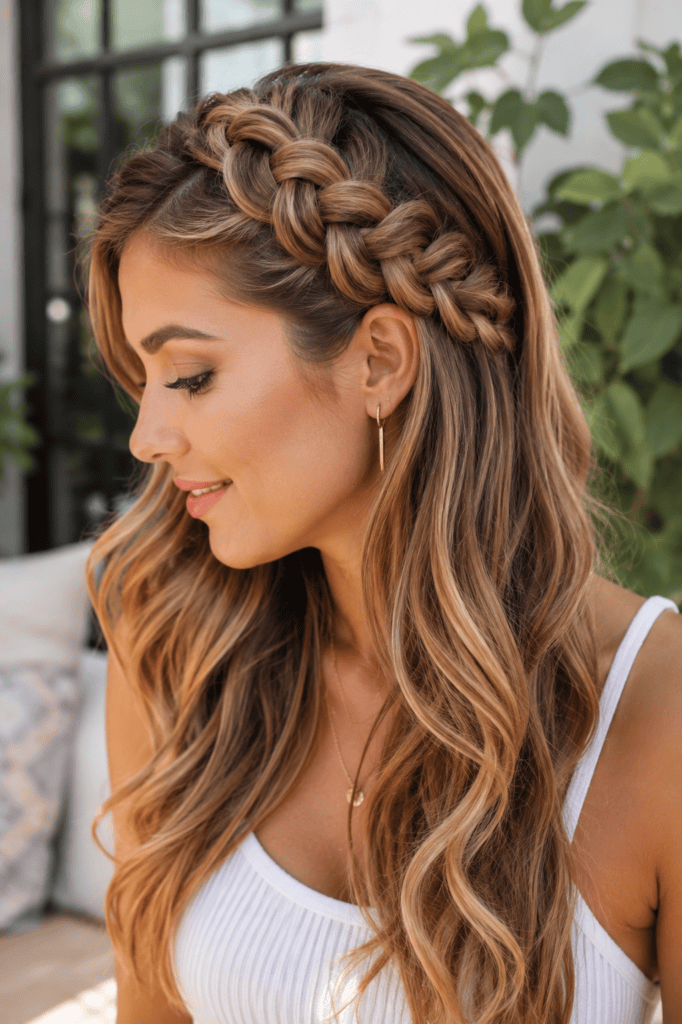
If you struggle with front pieces falling into your eyes while you work on a computer, this style will change your life. A Dutch side braid acts like a built-in headband.
Unlike a French braid, you weave the strands under rather than over. This creates a 3D braid that sits on top of your hair rather than flat against your scalp.
- Create a deep side part over your preferred eyebrow.
- Begin weaving three strands at the hairline, crossing the outer strands under the middle strand.
- Incorporate hair from the front hairline as you move toward your ear.
- Pin the tail hidden beneath the back layers of your hair.
7. Dual Boxer Braids (Double Dutch Braids)
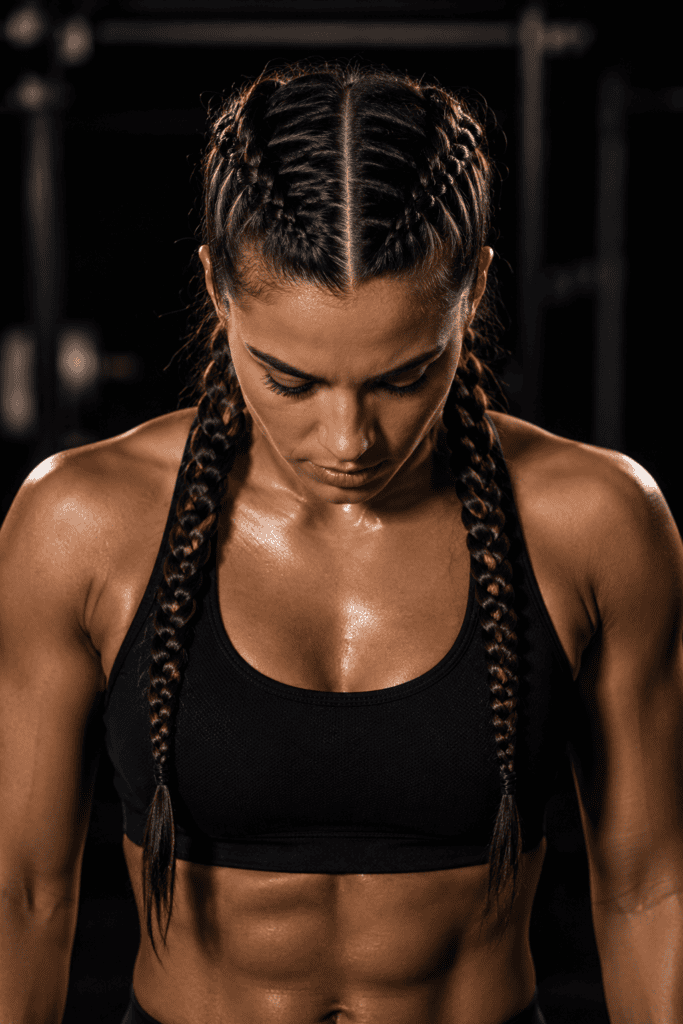
Ever finished a high-intensity cardio class only to find your hair tied in a chaotic knot? I destroyed so many hair ties trying to fix post-workout tangles before I committed to boxer braids.
These double Dutch braids hug your scalp tightly, locking every single layer into place. You can sprint, jump, or lift without feeling a single strand whip across your face.
- Part your hair down the absolute center from your forehead to the nape of your neck.
- Clip one side out of the way so you do not mix up the sections.
- Dutch braid the active side tightly from the front hairline all the way down to the ends.
- Repeat the exact same process on the second side.
- Use mini silicone elastics for a seamless, secure lock.
Freya’s Personal Mistake: I used to braid my hair loosely before hitting the gym because I feared scalp tension. Big mistake! Loose braids friction-rub against your sports bra and turn into a frizzy rat’s nest. Braid tightly for workouts, then loosen them up after your shower.
8. The High Ponytail Braided Hybrid
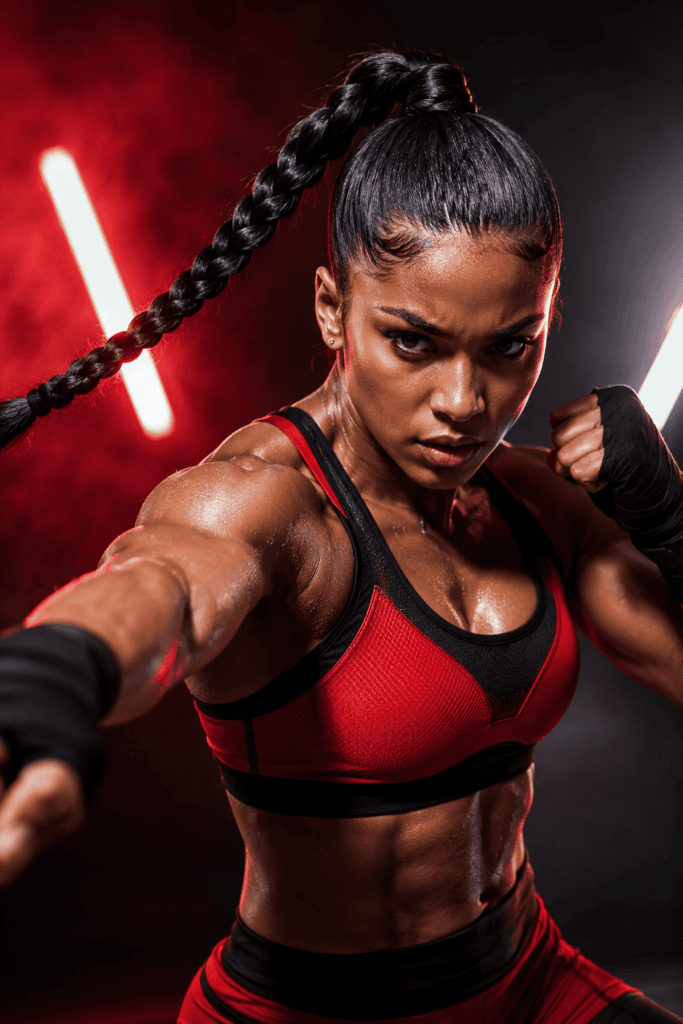
When you want the bounce of a high pony with the security of a braid, combine them into one power style. I wear this look when I want to feel sleek and athletic at the gym.
This style keeps your hair off your neck, which prevents that annoying sweat-trap situation during hot summer workouts.
- Slick your hair up into a high, firm ponytail at the crown of your head.
- Apply a small dime-sized drop of smoothing pomade around your hairline.
- Braid the ponytail tail tightly into a standard three-strand braid.
- Secure the bottom with a durable elastic.
9. Boho Accent Micro-Braids
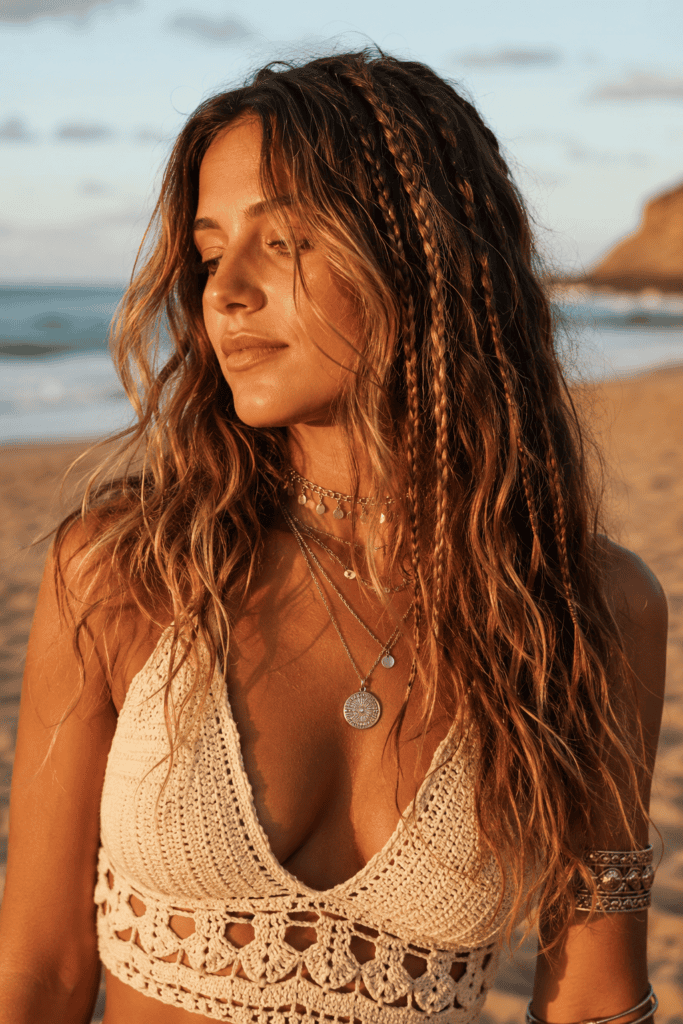
Are you looking for an easy way to give your beach waves a little personality? Micro-braids are the ultimate effortless festival look that requires zero precision.
I love sprinkling tiny braids randomly through air-dried hair. It creates that cool, “I just woke up in Malibu” aesthetic without trying too hard.
- Air-dry your natural hair texture using a sea-salt spray.
- Grab tiny, quarter-inch sections of hair at random spots around your head.
- Braid each tiny section straight down to the ends.
- Tie them off with tiny clear elastics, or tease the ends slightly so they hold naturally.
10. The Half-Up Pull-Through Braid
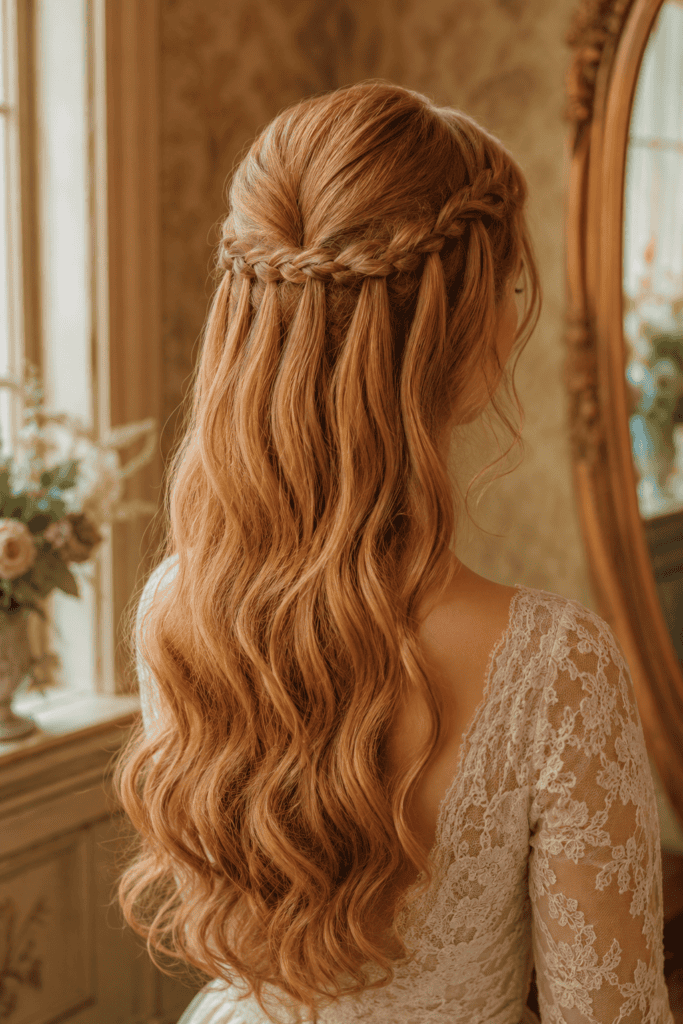
Pull-through braids look like intricate masterworks, but they actually require zero real braiding skills. If you know how to make tiny pigtails, you can pull off this volumetric style.
I wore this to an outdoor music festival last spring, and my photos looked like I hired a professional stylist. It creates incredible depth, especially if you have highlights.
- Section off the top half of your hair and tie it in a pony.
- Section off a second pony directly underneath the first one.
- Split the top ponytail in half, wrap the halves around the bottom ponytail, and tie them together below it.
- Repeat this overlapping process three to four times down the length.
- Pancake each section aggressively to create massive volume!
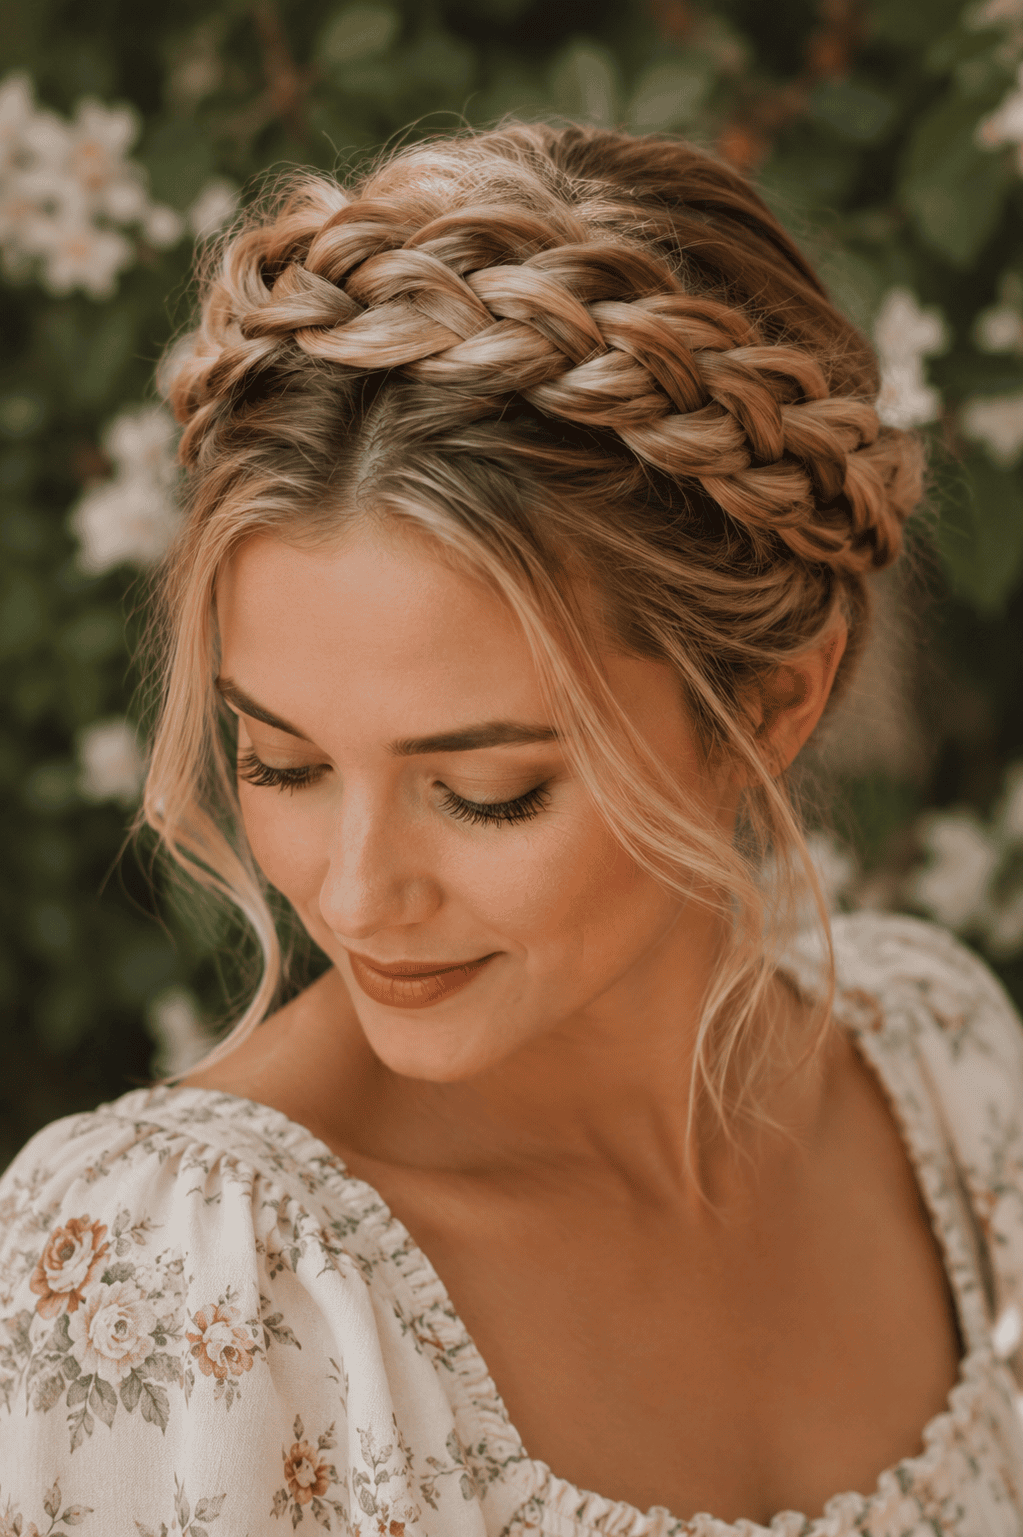
11. The Dutch Crown Braided Updo
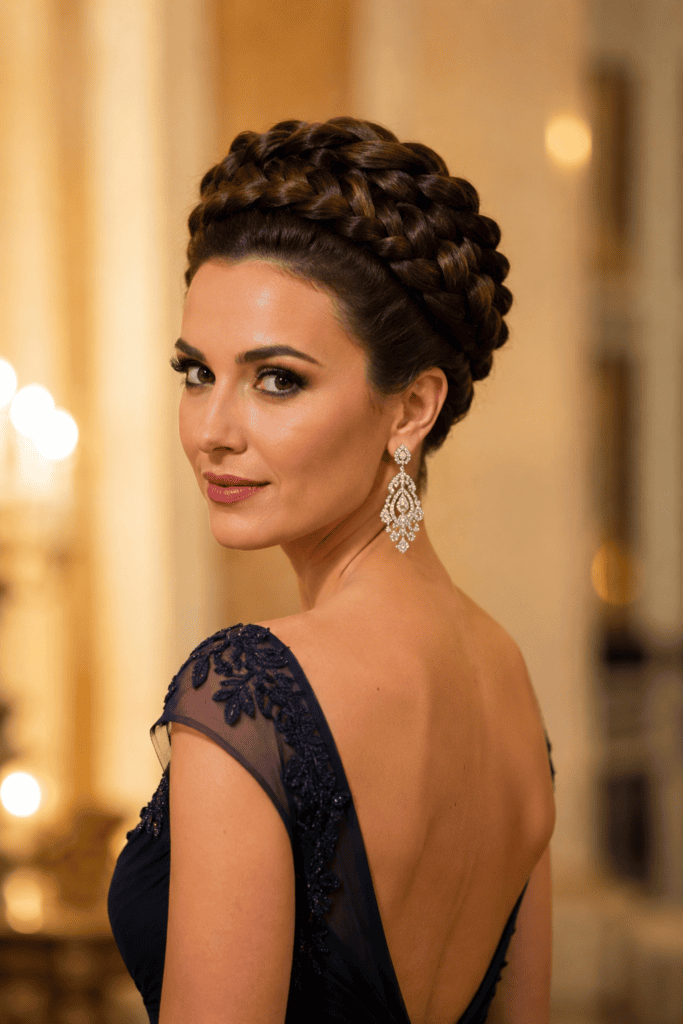
Wedding season always drains my bank account, so I refuse to pay $150 for a professional hair updo every time an invitation arrives. The Dutch crown updo looks wildly expensive, yet you can construct it yourself in ten minutes.
This style sits high on the head like a tiara, making it perfect for displaying statement earrings and high-neck formal gowns.
- Create a deep side part and Dutch braid along your hairline toward your ear.
- Continue braiding around the circumference of your head, picking up strands from the top and bottom.
- Once you loop back to the starting point, tuck the remaining tail inside the braid.
- Anchor the braid every two inches using heavy-duty u-shaped hairpins.
12. The Waterfall Braid for Long Waves
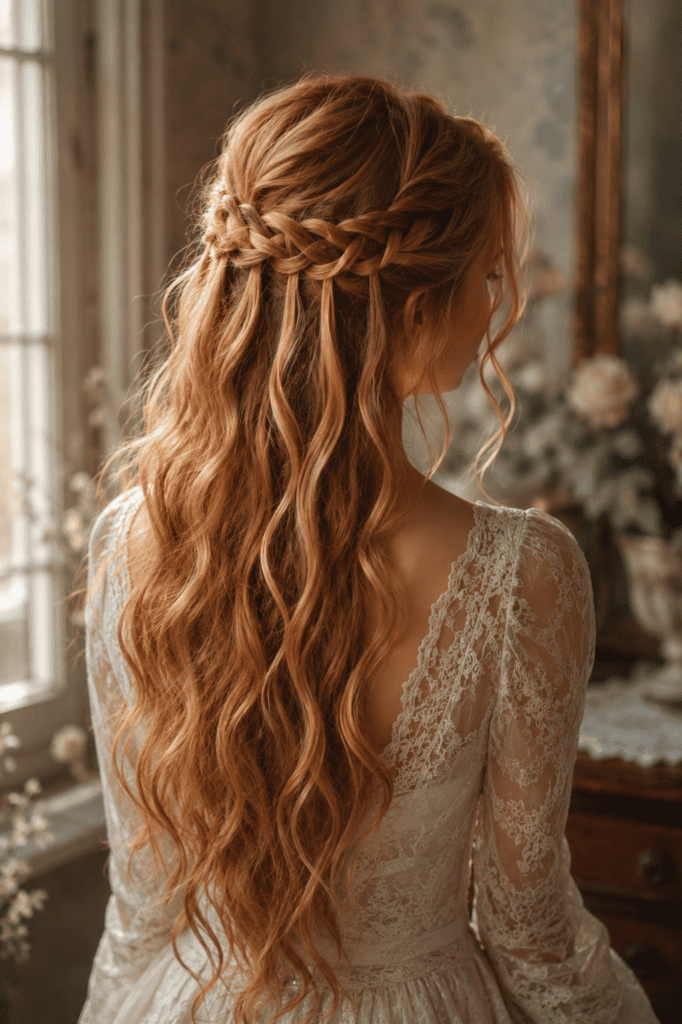
Who hasn’t struggled to find a hairstyle that shows off length while keeping strands out of your eyes? The waterfall braid gives you the perfect balance of an updo and cascading open hair.
It creates a horizontal braided banner across the back of your head while letting individual strands drop through like water. IMO, this is the most romantic hairstyle on this list!
- Take a three-inch section near your front temple and start a classic French braid.
- Drop the bottom strand completely after crossing it over the middle section.
- Pick up a brand-new strand directly behind the dropped one to replace it.
- Continue dropping and replacing strands as you braid horizontally across the back of your head.
- Pin the end securely behind your opposite ear.
13. The Romantic Mermaid Braid
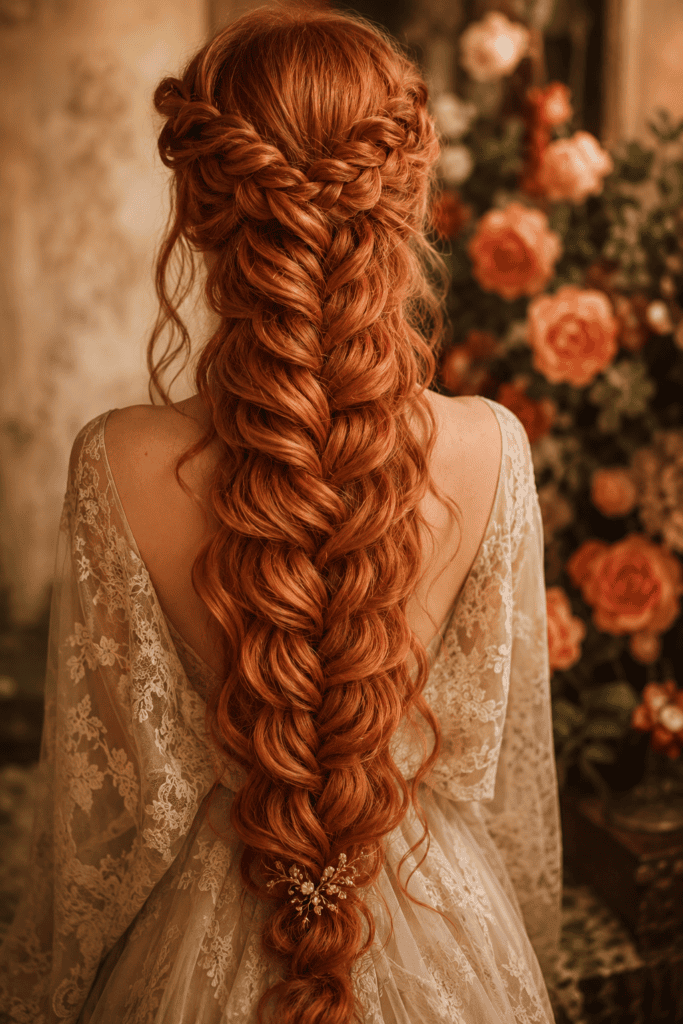
If you love full, dramatic hair that looks like it belongs in a fairy tale, the mermaid braid is your match. It combines two outer braids into a wide, intricate pattern across your back.
I recommend using a clip-in hair extension if your natural hair feels thin. The extra volume makes this dramatic braid pop off your back.
- Curl your entire head with a large-barrel curling wand to create soft base waves.
- Create two small French braids along your temples and bring them together at the back.
- Lace the two braids together using additional hair pins and small crisscross stitches.
- Pull strands apart wide to hide the central join and create a massive, singular braid.
14. The Loose Side-Swept Fishtail
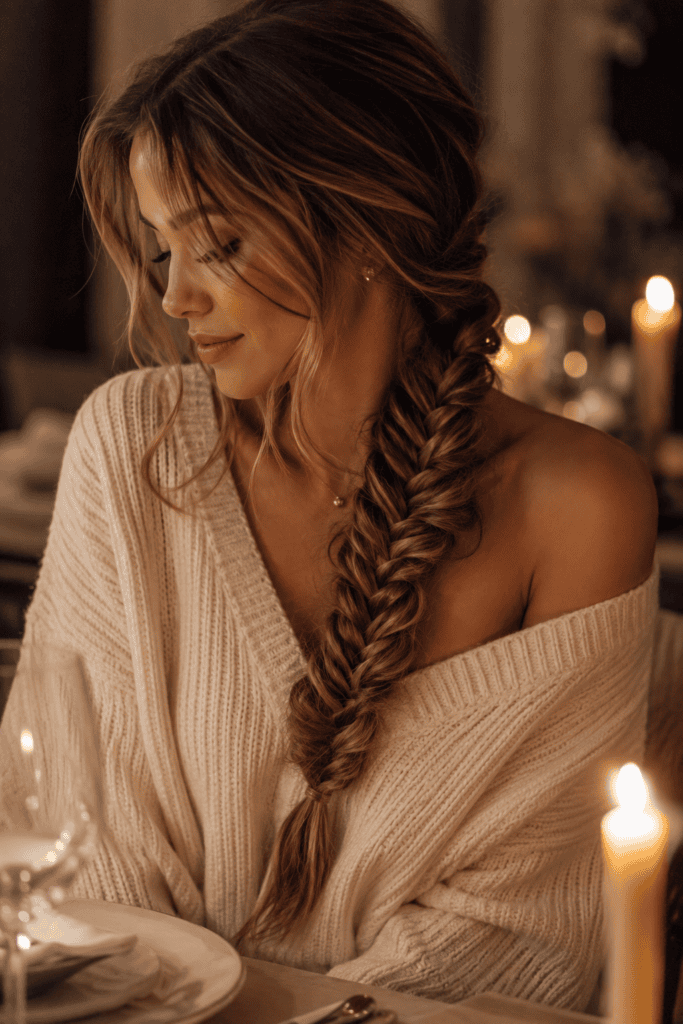
For a dinner date, you want hair that looks soft and touchable—not rock-solid from hairspray. A relaxed, low-slung fishtail braid draped over your shoulder hits that dreamy, undone note perfectly.
Pair this style with an off-the-shoulder sweater or an open-back dress to highlight your collarbones.
- Pull all your hair to your preferred side, leaving out soft face-framing tendrils.
- Braid a loose fishtail starting right below your jawline.
- Leave the top section intentionally loose to preserve natural wave texture.
- Secure the tip with an invisible clear elastic.
- Use a texturizing powder on the braid to plump up the weave.
15. The Braided Headband Half-Up Look
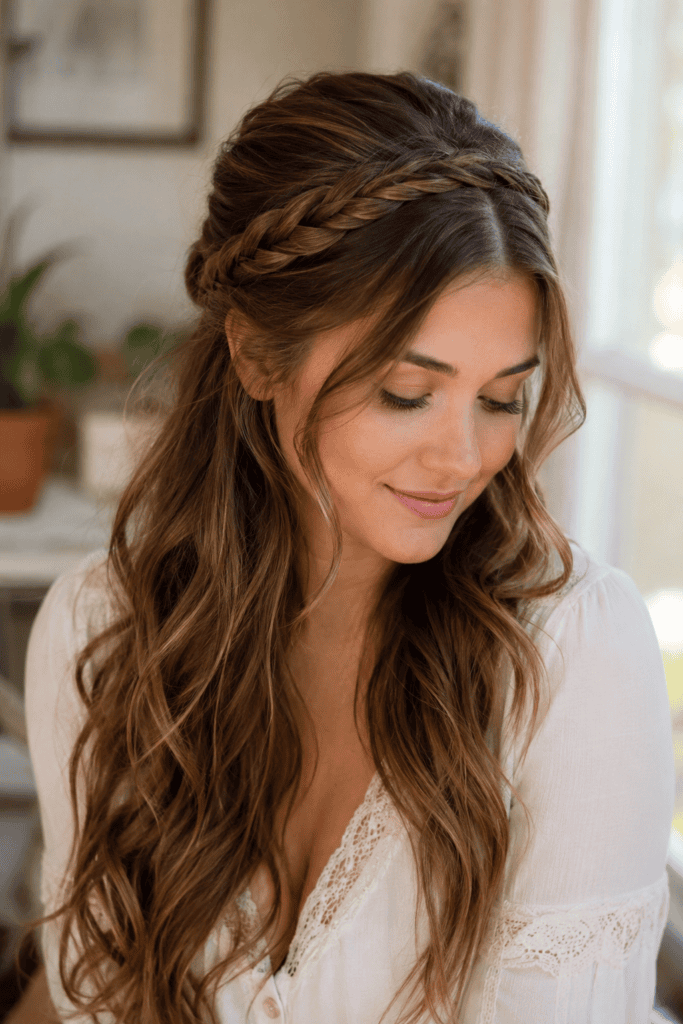
Do you love headband accessories, but hate the headache-inducing pinch behind your ears? Make a headband out of your own hair instead!
This style lifts your face, emphasizes your cheekbones, and leaves the back of your hair free to flow down your back in gorgeous waves.
- Grab a two-inch section of hair from right behind your ear on the lower left side.
- Braid that section tightly straight up to the ends.
- Flip the braid over the top of your head to the right side like a headband.
- Pin the end under the hair behind your right ear with two crossed bobby pins.
Essential Braid Tool Comparison Matrix
Before you start braiding, make sure you have the right products in your beauty kit. Here is my personal cheat sheet for the tools that actually matter:
| Product Type | Best For | Why You Need It | Freya’s Recommendation |
| Texturizing Spray | Slippery / Clean Hair | Gives grip so braids do not unravel instantly. | Drybar Triple Sec |
| Mini Silicone Elastics | Ends of Braids | Holds hair tight without bulk or visible color. | Goody Clear Mini Elastics |
| U-Shaped Hairpins | Updos & Crowns | Locks heavy braids down tighter than standard pins. | Kristin Ess French Pin |
| Edge Control Gel | Baby Hairs | Smooths down flyaways along your hairline. | Pattern Edge Control |
| Shine Serum | Polished Looks | Adds a glass-skin shine to tight French braids. | Olaplex No. 7 Bonding Oil |
How to Make Any Braid Look Professional: My 3 Rules
You do not need genetic luck or a personal hair team to get photo-ready braids. Follow my three golden rules whenever you style your hair at home:
Rule 1: Always Prep the Canvas
Never start braiding completely clean, bone-dry hair unless you applied a texturizing product first. Silky hair escapes from weaves instantly. Spritz a texturizing spray or swipe a tiny bit of matte styling paste through your lengths first.
Rule 2: Master the Art of “Pancaking”
Pancaking is the secret difference between a sad, thin braid and a thick, full braid. Hold the base of your braid with one hand, and use your other hand to pull the outer loops of the weave outward gently. This flattens the loop and doubles the apparent width of your braid!
Rule 3: Secure with the Right Pins
Standard bobby pins slide out of heavy braids within two hours. Switch to U-shaped hairpins for updos! Push the pin in direction opposite of the braid, flip it inward, and push it back under the braid. It anchors into your scalp hair and stays locked down all night long.
Final Thoughts
Switching up your look does not require a salon cut or a drawer full of damaging hot tools. These 15 braided hairstyles handle every single event on your calendar, whether you are sweating through a workout or drinking champagne at a wedding. 🙂
Which braid are you going to test out first? Try the classic side braid for your next coffee run, or challenge yourself to the Dutch crown updo for your next formal party. You will save time, protect your hair from heat damage, and look effortlessly stylish.