Gradient manicures are officially dominating the beauty circuit, proving that you do not need complex freehand line work to make a massive visual statement. By seamlessly blending two or more contrasting shades, this technique offers a sophisticated depth that a standard solid polish simply cannot replicate.
If you have ever tried to recreate this smooth, airbrushed look at home, you already know it is shockingly easy to end up with a muddy, textured mess instead of a flawless transition. Achieving that perfect, salon-quality blur requires a mix of the right color palettes, specific tool textures, and precise wet-blending formulas.
From understated monochromatic fades to high-contrast graphic transitions, mastering the art of the blend opens up endless styling possibilities. Let’s break down twelve stunning ombré and gradient nail designs, complete with the exact color blending techniques you need to replicate them flawlessly.
1. The Classic French Ombré Reimagined
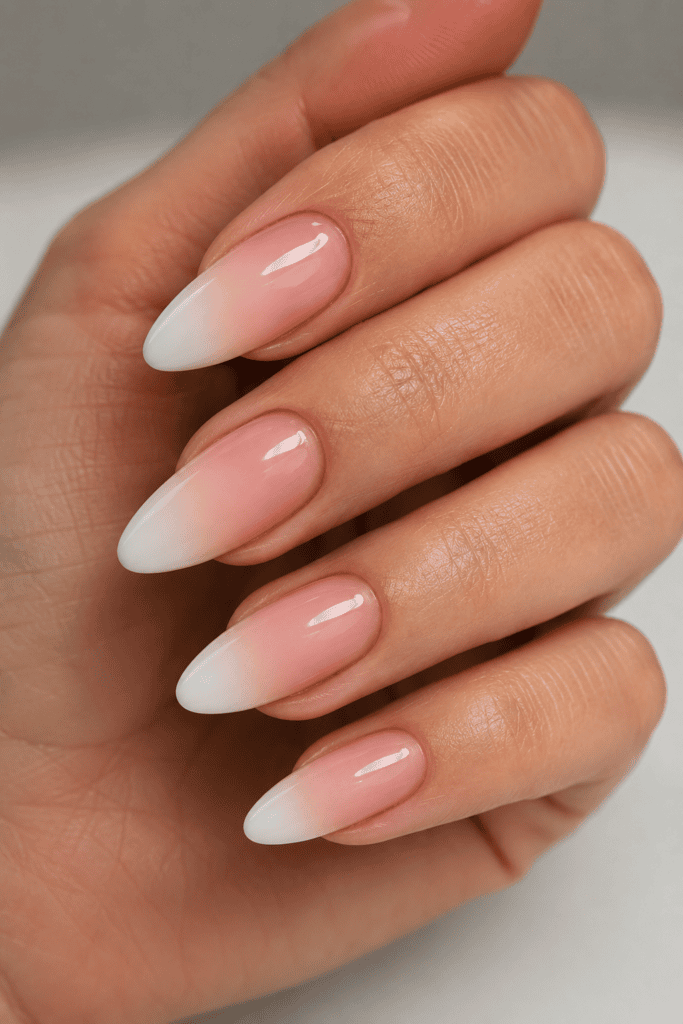
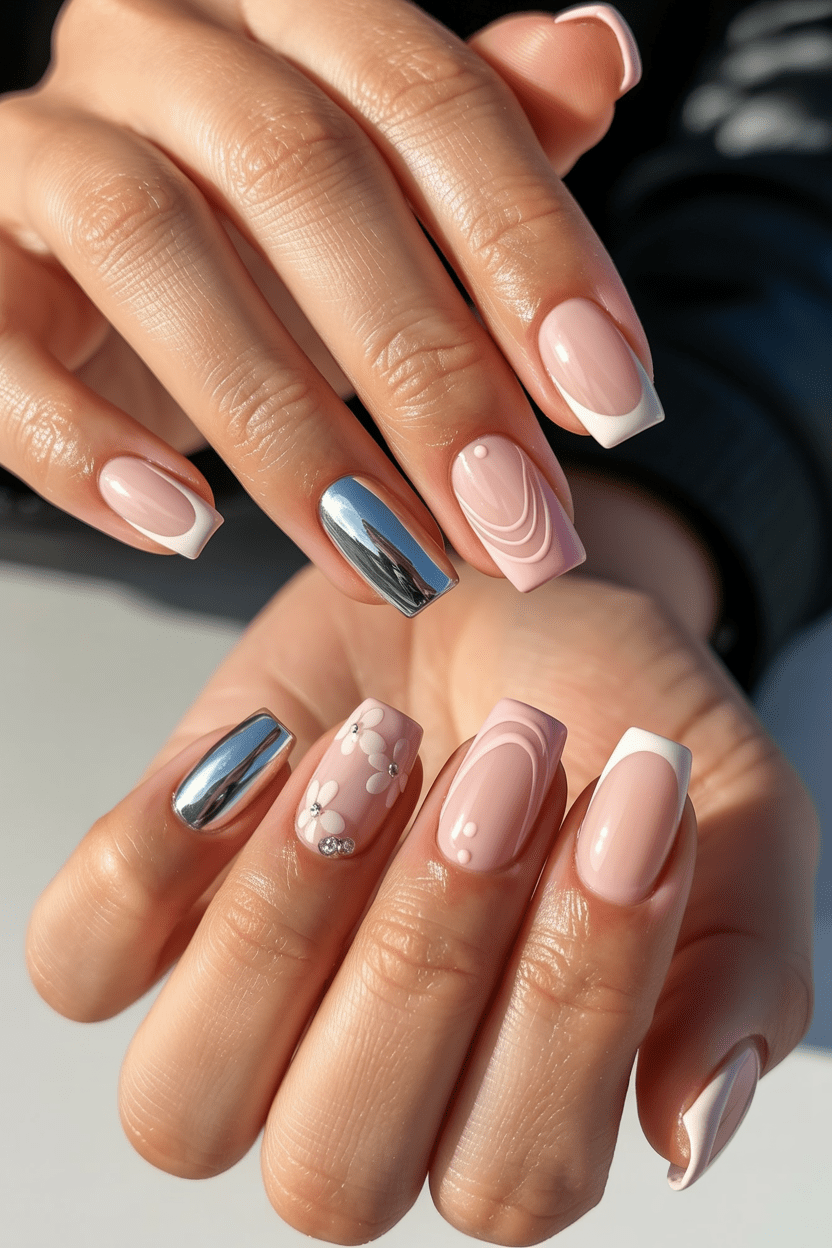
Forget the harsh, stark white lines of traditional early-2000s manicures. The modern French ombré—often called baby boomer nails—blends a soft, milky white tip into a sheer pink base. It creates an optical illusion that makes your nail beds look incredibly long and healthy.
To get this seamless transition, you need a latex makeup wedge and two specific polishes. I swear by a sheer, buildable pink base coat and a highly pigmented, cream-based white polish for the tips.
How to Master the Seamless Blend:
- Apply two coats of your favorite sheer pink polish and let them dry completely.
- Paint a stripe of the pink polish and a stripe of the white polish directly onto the makeup sponge, overlapping them slightly in the middle.
- Lightly dab the sponge onto your nail, moving it up and down a millimeter to blur the boundary line between the colors.
- Apply a thick layer of a plumping glossy top coat while the polish is still slightly wet to smooth out any texture from the sponge.
2. Horizontal Sunset Gradients
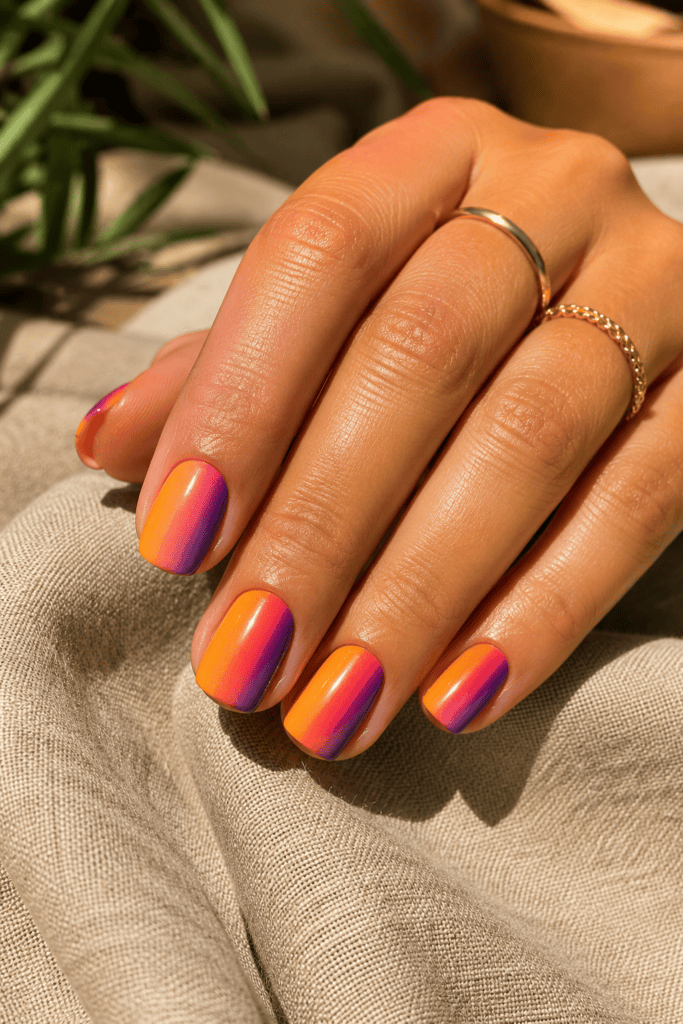
Ever stared at a summer twilight sky and wished you could wear it on your fingertips? A horizontal sunset gradient shifts colors from the left side of the nail bed to the right side, rather than from root to tip. It is an instant mood booster every time you look down at your keyboard.
For this look, I love pairing a rich marigold yellow, a vibrant coral, and a deep violet. It sounds chaotic, but when you blend them correctly, the transition looks incredibly sophisticated.
I wore this specific design to a music festival last summer, and three different baristas stopped me to ask where I got them done. The secret lies in using pigmented cream polishes rather than sheer formulas. Sheer polishes turn into a muddy brown mess when you try to mix these specific shades together.
3. The Multicolored Skittle Gradient
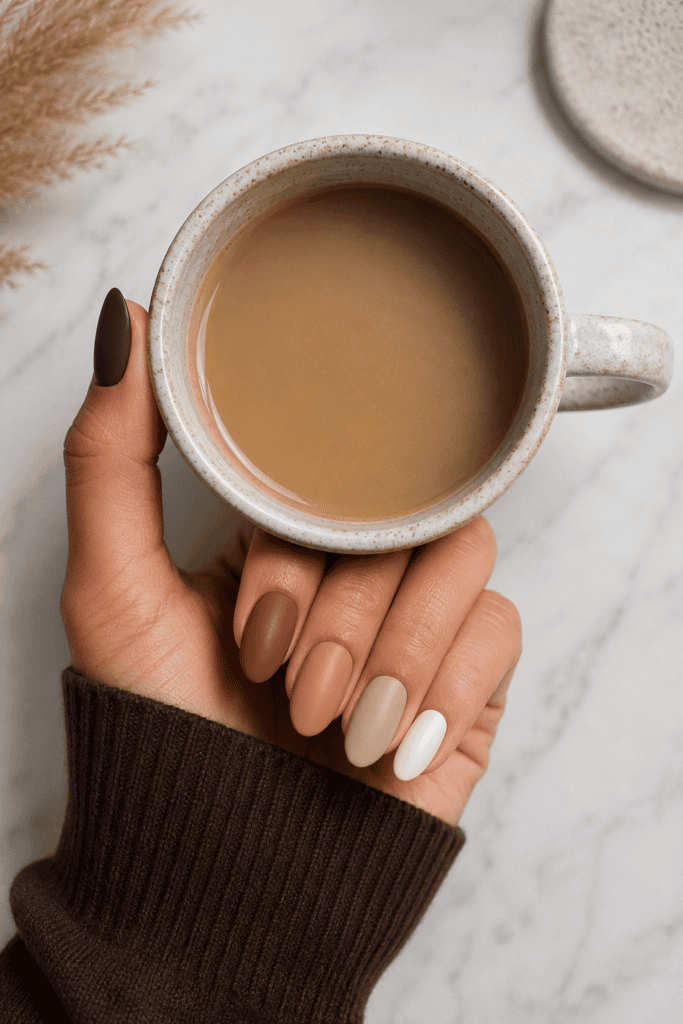
Who says you have to blend multiple colors on a single nail to get a gradient effect? The Skittle gradient manicure uses five distinct shades across your hand, moving from darkest to lightest. It is the absolute easiest way to try the trend if you lack patience or steady hands.
The key to making this look intentional, rather than messy, is staying within the exact same color family or tone profile. For example, choose five different shades of sage and olive green, or five warm, earthy terracotta tones.
My Go-To Earthy Autumn Palette:
- Thumb: Deep espresso brown
- Index Finger: Rich milk chocolate
- Middle Finger: Warm camel nude
- Ring Finger: Soft toasted almond
- Pinky: Creamy vanilla ivory
4. Moody Aura Nails
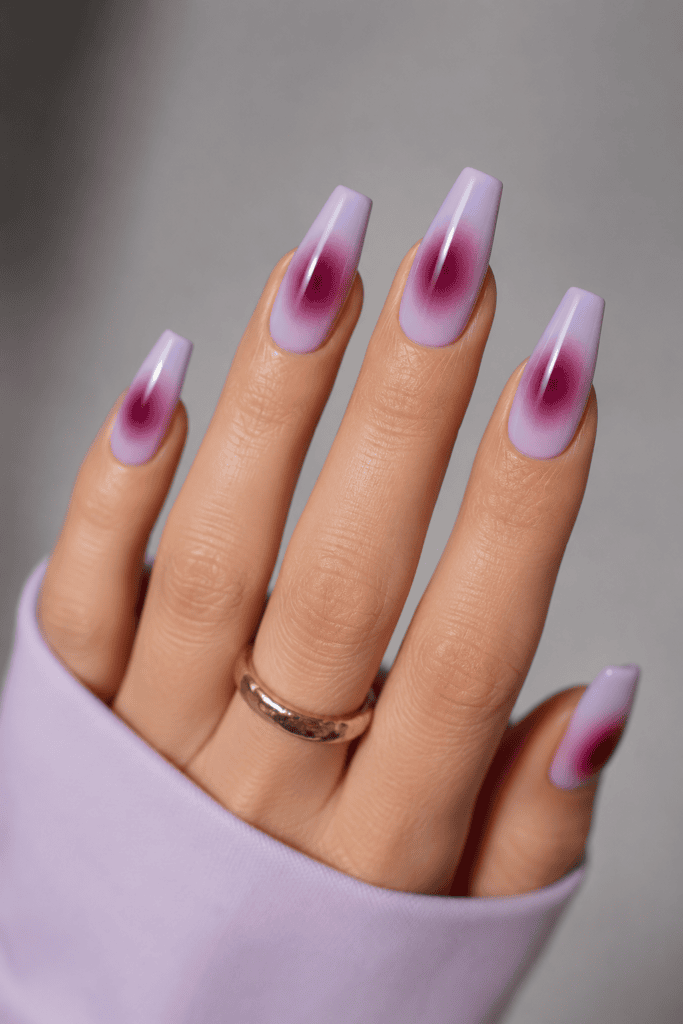
If you spend any time on social media, you have definitely seen aura nails dominating your feed. This design features a soft, glowing circle of color in the absolute center of the nail, mimicking a vibrant energy field.
Ever wondered how nail techs get that perfectly circular, airbrushed blur? They usually use an expensive airbrush gun, but you can achieve a nearly identical look at home using a dense eyeshadow blending brush and regular polish.
I love pairing a pale lavender base with a rich berry center. Apply your base color and let it dry. Then, dot a tiny bit of your center color onto a piece of foil, dip your eyeshadow brush into it, dab off the excess, and gently press it onto the center of your nail in a circular motion.
5. High-Contrast Neon Blends
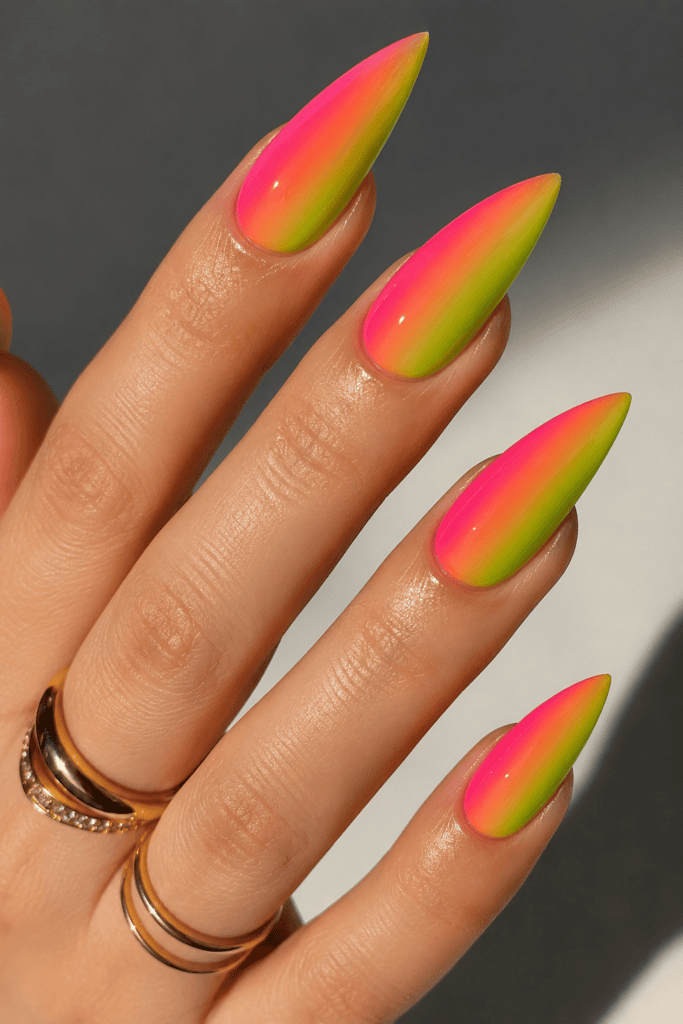
Neon polishes are notoriously difficult to work with because they often dry chalky or apply incredibly sheer. But when you couple two neons together in a vertical gradient, the result is pure electricity.
I highly recommend pairing a shocking electric pink with a vivid lime green. I know it sounds like a bad 1980s workout video, but hear me out! The overlapping section creates a gorgeous, unexpected coral shade that binds the two extreme colors together beautifully.
To make neons truly pop, always apply one thin coat of stark white polish as your base layer first. Neon pigments need that bright white background to show their true intensity; otherwise, your natural nail bed will dull the colors down completely.
6. Glitter Fade for Minimalists
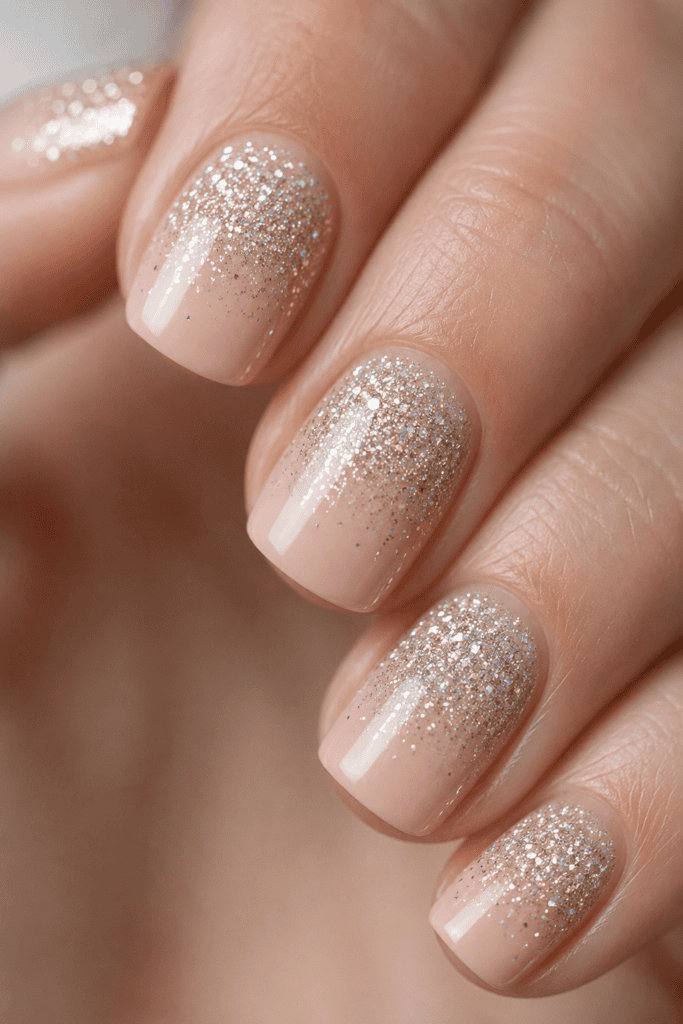
Maybe loud colors aren’t your vibe, and that is totally fine. A glitter fade manicure offers a festive, textured look without making you feel like you are wearing a costume. You can concentrate the glitter at the cuticles fading downward, or at the tips fading upward.
For this technique, skip the sponge entirely. You want to use a dry nail art brush or the polish brush itself to manually pull the glitter particles apart.
The Perfect Upward Glitter Fade Step-by-Step:
- Apply two coats of an opaque nude base coat that matches your skin tone.
- Take a high-density glitter polish and wipe most of the product off the brush until it is relatively dry.
- Dab the glitter heavily along the top third of your nail tip.
- Gently drag the brush downward toward the middle of your nail, applying less pressure as you move down to scatter the glitter pieces.
7. The Mood-Ring Thermal Illusion
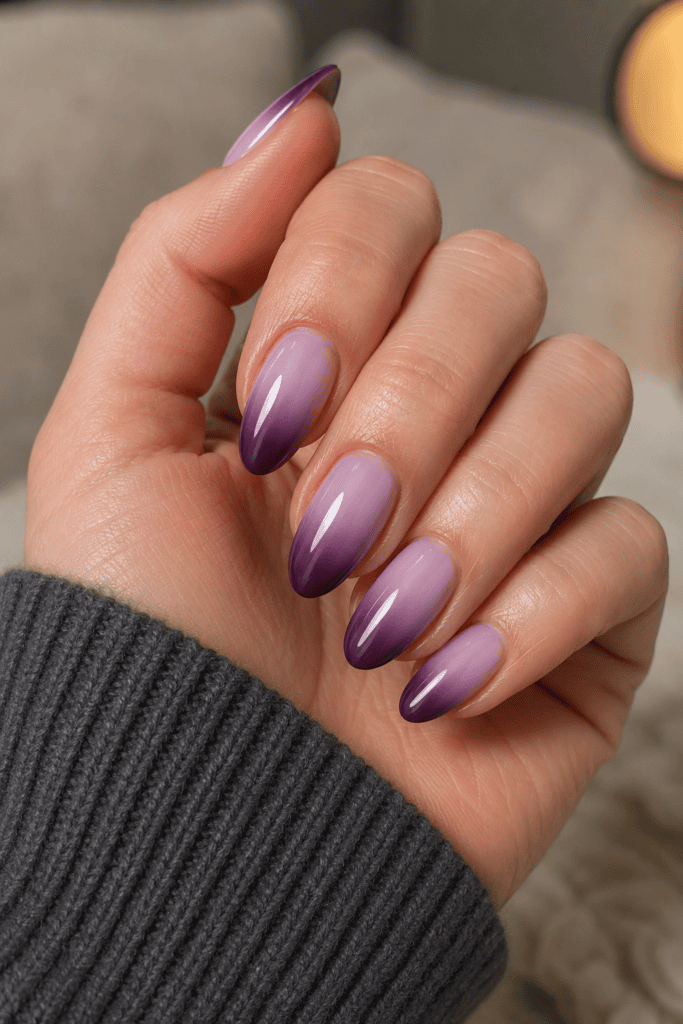
Want a gradient that literally changes throughout the day? Thermal temperature-changing polishes do all the hard work for you. These smart formulas react to your body heat and the ambient temperature around you.
When your hands are warm, the nail bed turns one color, while the free edge of your nail stays cool and displays the second color. This creates a natural, flawless ombré effect that shifts constantly.
IMO, this is the ultimate lazy-girl hack for flawless nail art. You get a perfect French-style gradient whenever you go outside or wash your hands, no sponges or cleanup brushes required. Look for formulas that shift from deep plum to pale lilac for a gorgeous, dramatic contrast.
8. Pastel Watercolor Bleed
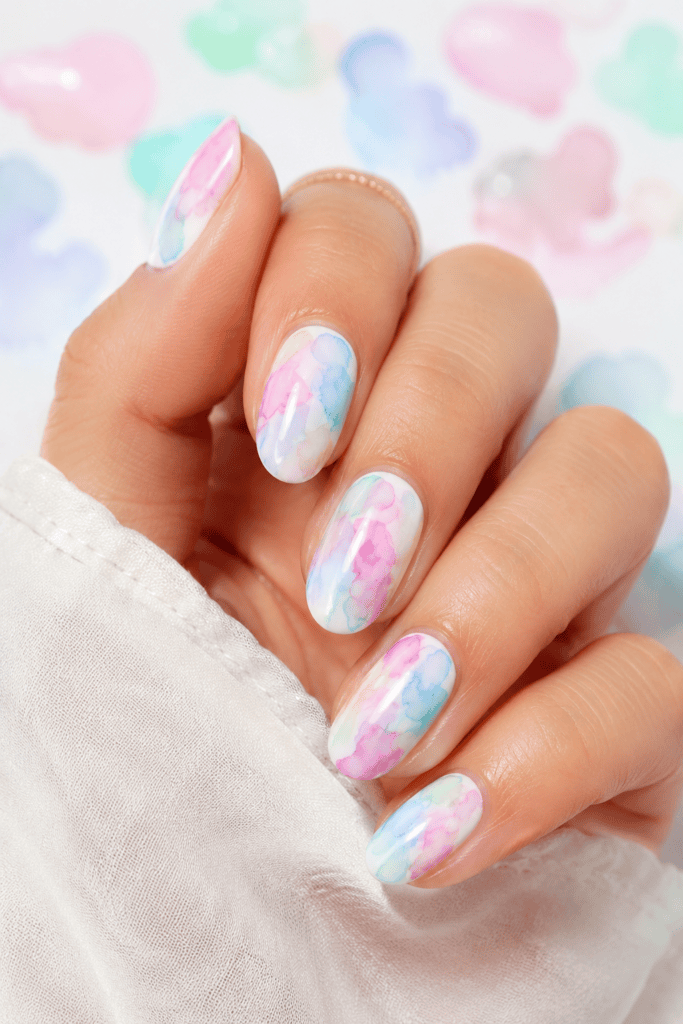
If you prefer a softer, more romantic aesthetic, a pastel watercolor gradient is exactly what you need. Instead of a linear blend, this technique involves placing random dots of pastel pink, baby blue, and mint green onto the nail and blurring the edges together.
For this method, we throw out the makeup sponges and reach for pure acetone and a small detail brush instead.
Apply a white base coat and let it dry completely. Then, place tiny dots of your pastel colors next to each other while they are still wet. Quickly dip your detail brush into acetone and lightly tap the borders of the colors. The acetone thins out the polish and causes the pigments to bleed into each other like real watercolor paints.
9. Monochromatic Matte Gradients
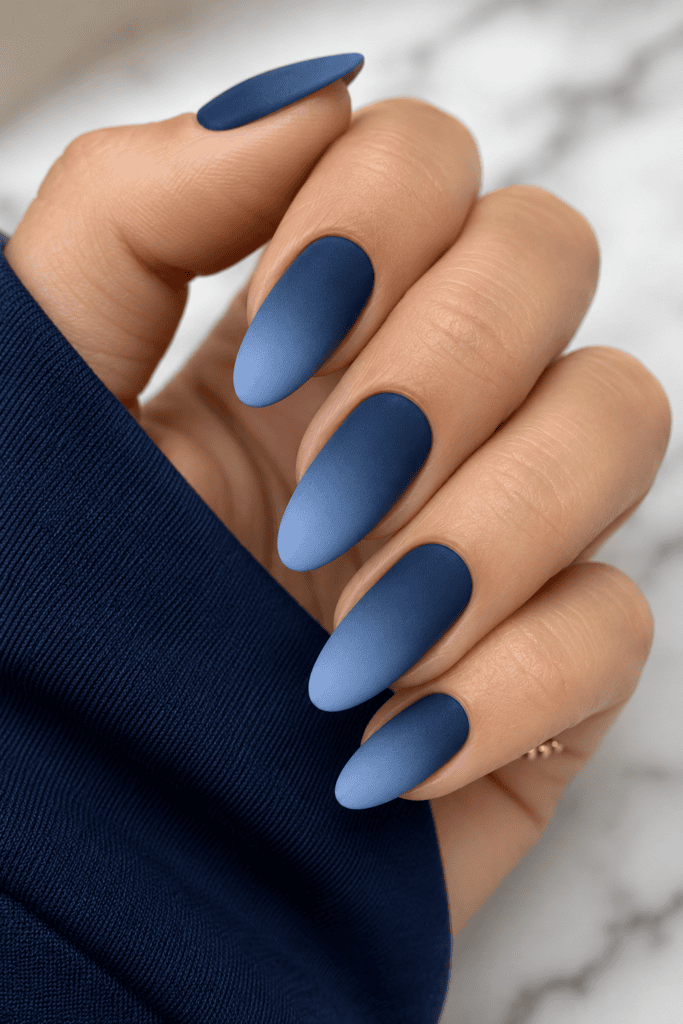
There is something incredibly chic about taking a single color, shifting it from light to dark, and stripping away all the shine. A monochromatic matte ombré looks instantly expensive and modern, especially in deep jewel tones like navy blue or emerald green.
To get the look, you will blend a deep navy polish into a soft sky blue. The magic really happens in the final step: the top coat.
A standard shiny top coat can sometimes highlight minor imperfections or texturing from your blending sponge. A velvet matte top coat, however, completely flattens the surface and diffuses the light. This diffusion makes your color transition look three times smoother than it actually is.
10. Vertical Chrome Transitions
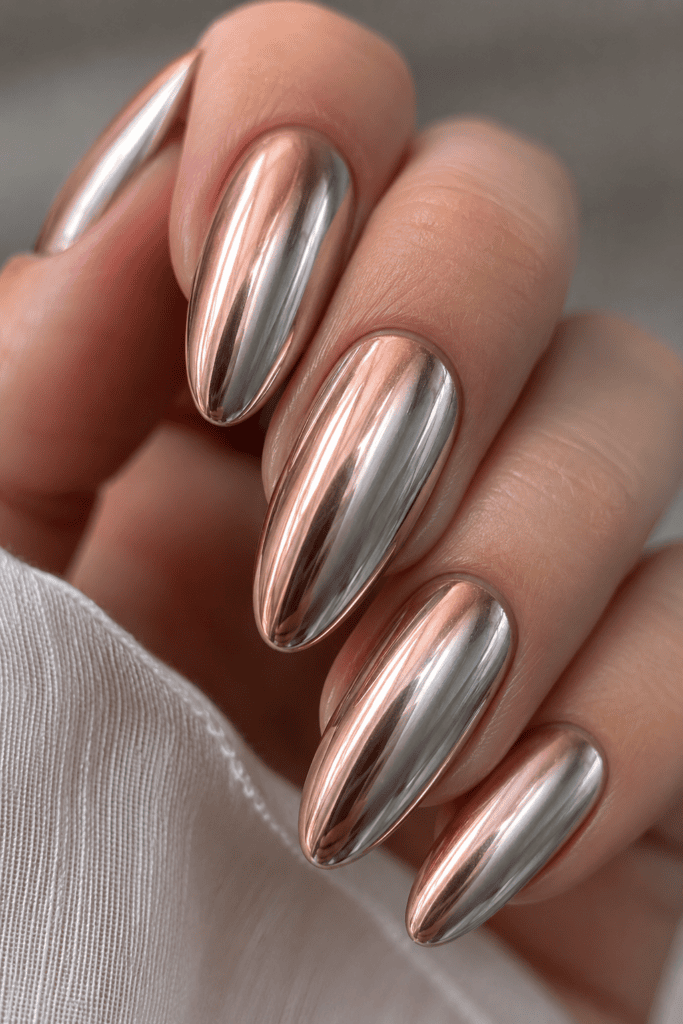
Chrome powder makes everything better, and gradient designs are no exception. A vertical chrome transition involves blending two different colored chrome powders over a dark gel base coat, creating a metallic, oil-slick effect.
You will need a no-wipe gel top coat for this one, as chrome powder won’t adhere properly to traditional air-dry polishes.
Apply a black gel base, cure it, and then apply your no-wipe top coat and cure again. Take a small eyeshadow applicator and buff a rose gold chrome powder onto the left half of the nail. Then, take a silver chrome powder and buff it onto the right half, gently overlapping the two powders right down the center line.
11. Jelly Sandwich Gradients
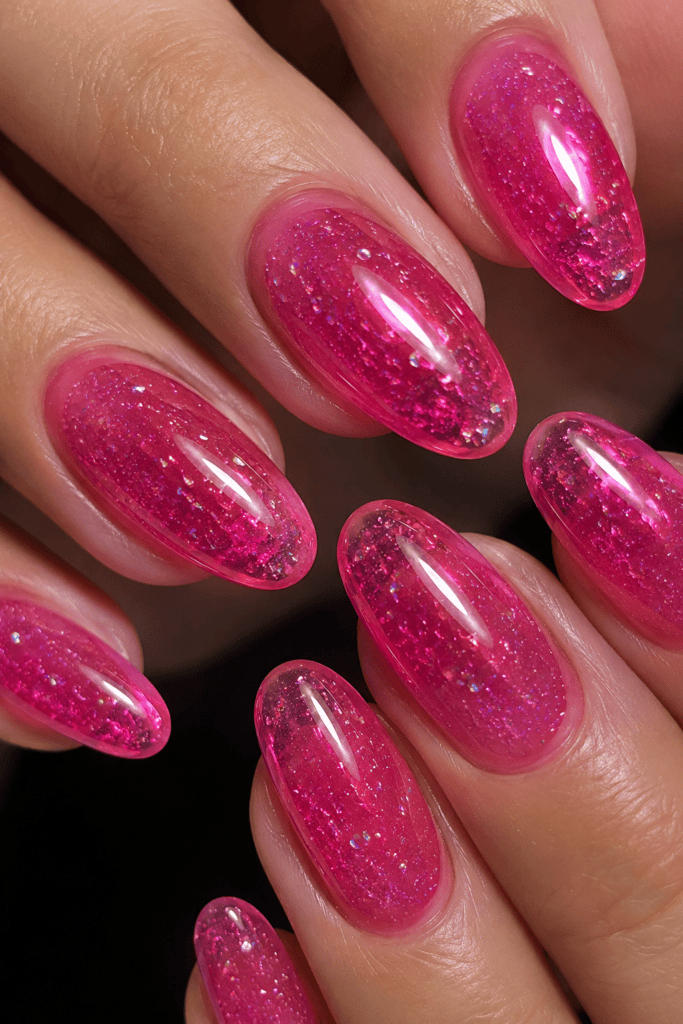
If you haven’t discovered jelly polishes yet, you are seriously missing out. These sheer, translucent formulas look like colorful stained glass or hard candy. Because they are naturally see-through, they are incredibly forgiving for creating soft gradients.
The “jelly sandwich” technique involves layering sheer color over a glitter base to create incredible depth.
You apply a layer of sheer pink jelly polish, then sponge a darker pink jelly onto the tips. Add a layer of fine silver iridescent glitter over the entire nail, and then cap it off with another layer of the sheer pink jelly polish. The glitter looks like it is floating deep inside the nail rather than sitting bluntly on top of it.
12. Tortoiseshell Edges

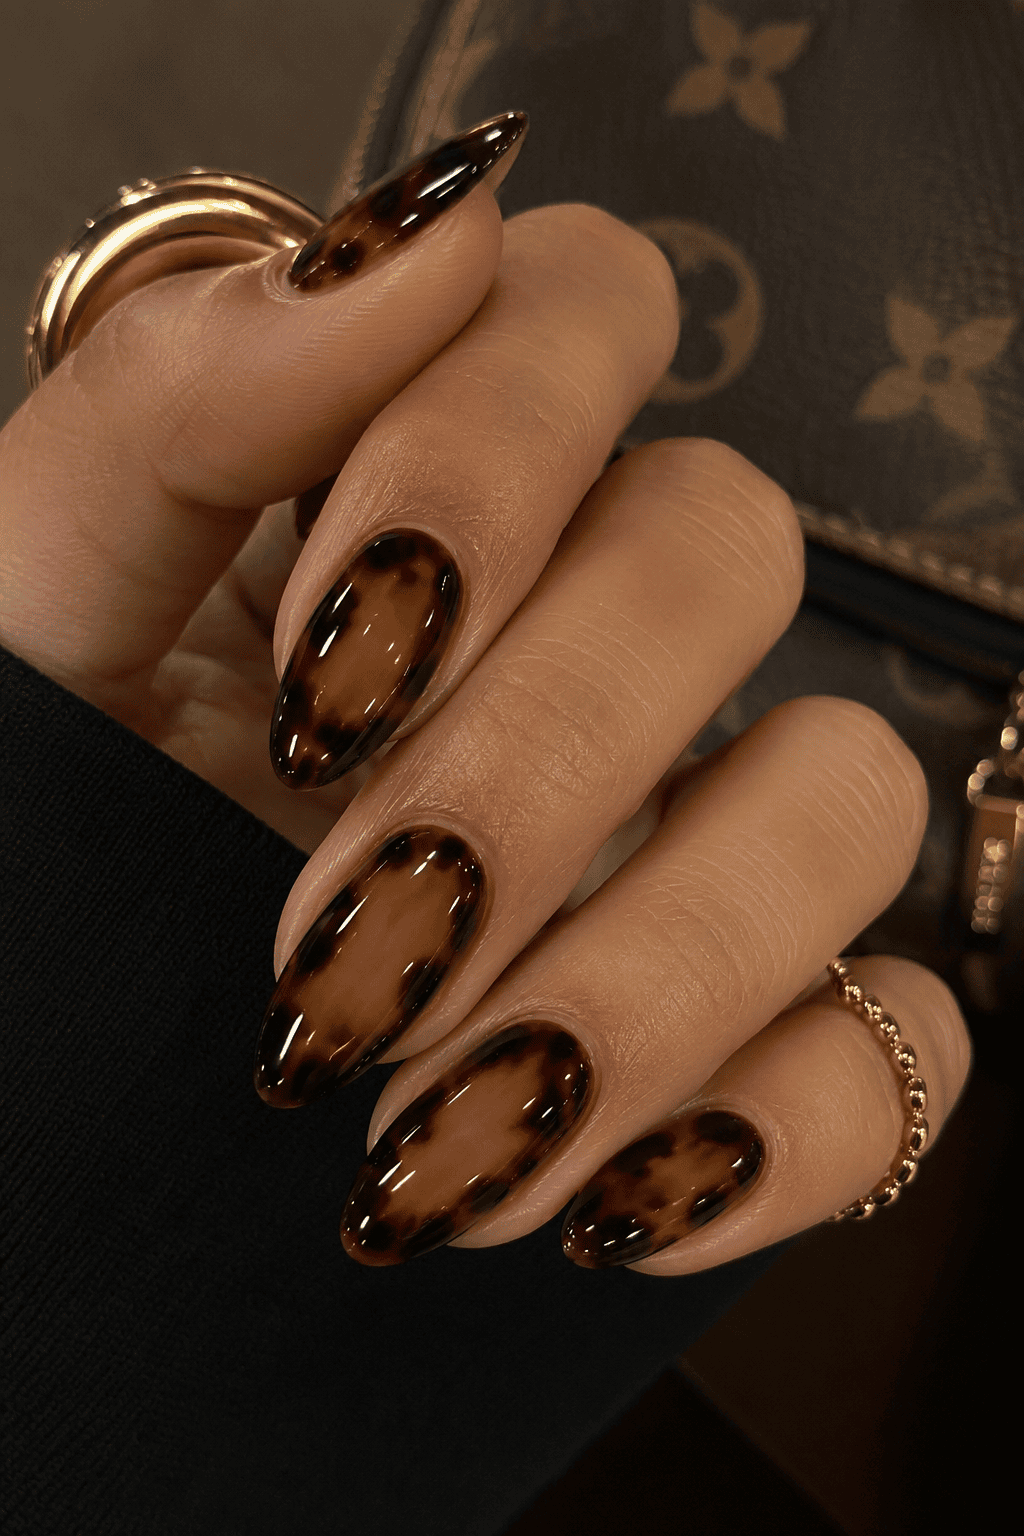
For the ultimate fashion-forward manicure, look no further than gradient tortoiseshell nails. Instead of covering the whole nail in the heavy print, you confine the amber and black pattern to the outer edges, blending it seamlessly into a warm caramel base.
This look relies on the wet-on-wet blending technique. You cannot let the polish dry between steps, or you will lose that rich, organic, melty look that makes tortoiseshell look so realistic.
Recreating the Luxury Print:
- Apply a semi-sheer caramel brown base and do not cure or dry it.
- While the base is wet, drop tiny blobs of a deep chocolate brown polish onto the outer edges of the nail.
- Use a toothpick or fine brush to gently swirl the edges of the brown blobs into the caramel background.
- Add tiny, precise dots of black polish directly into the center of the chocolate blobs to give the pattern its signature depth, then seal it immediately with a high-shine top coat.
Essential Clean-Up Tips for Flawless Results
Let’s be completely real: sponging polish onto your nails is a messy business. If you don’t protect your skin, you will end up with more polish on your knuckles than on your actual nail plates.
Before you even open a bottle of polish, apply a layer of liquid latex or simple school glue around your cuticles and sidewalls. Let it dry completely into a clear, rubbery film. Once you finish all your messy sponging and blending, you can simply peel the latex away with tweezers, revealing perfectly clean, salon-crisp edges.
If you happen to get polish past the barrier, don’t use a cotton swab to clean it up. Cotton swabs are too bulky and will ruin your gorgeous gradient work. Instead, invest in a cheap, angled makeup eyeliner brush dipped in pure acetone to clean up your cuticle lines with absolute precision.