
Red nails at Christmas feel almost mandatory, right? But here’s the thing: I’m so over plain red polish. Like, we can do better than slapping on the same shade our moms wore in the ’90s. This year, I spiraled into the world of red Christmas nail designs, and wow, I’ve been missing out. From glitter situations that photograph like a dream to minimalist vibes that somehow still scream “festive,” I found 20 designs that’ll make you actually excited about your holiday manicure. Whether you’re a DIY queen or someone who lives at the nail salon (no shame), there’s something here that’ll make your fingers look absolutely chef’s kiss this season.
Classic Red with a Twist
The Cherry Red French Tip
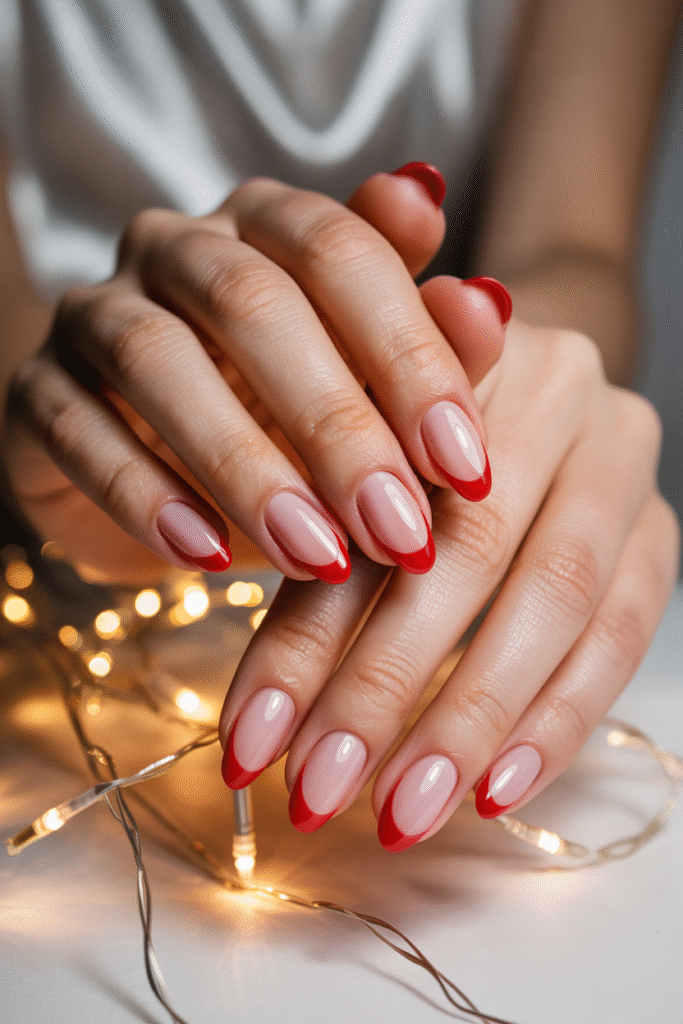
Why does everyone assume French tips have to be white or nude? I tried cherry red French tips last Christmas, and the compliments didn’t stop. Instead of the traditional white edge, you’re flipping the script with a bold red tip on a nude or sheer pink base.
Here’s what makes this work:
- The nude base keeps it classy enough for family dinners
- The red tips add just enough festive energy without screaming “LOOK AT MY NAILS”
- It’s surprisingly office-appropriate (if your office isn’t totally boring)
The key is keeping the red crisp and clean. I use tape as a guide because my freehand skills are… questionable. TBH, even if you mess up slightly, the contrast is so striking that minor wobbles disappear.
Deep Burgundy Elegance
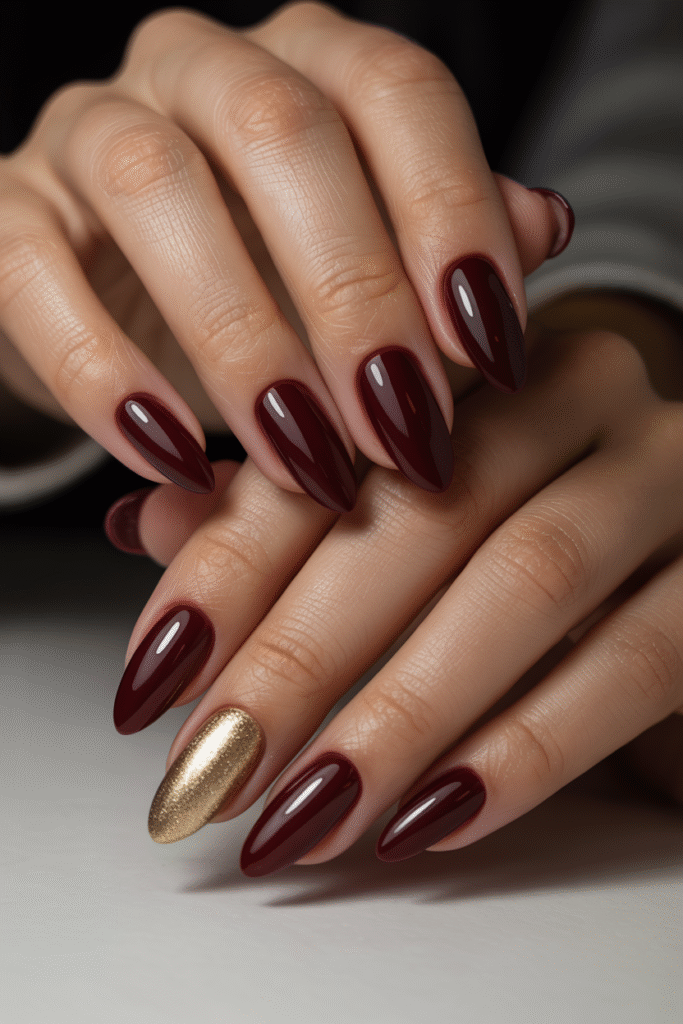
Okay, deep burgundy nails might sound basic, but hear me out. This isn’t your bright candy-cane red—it’s richer, moodier, and honestly more sophisticated. I wore this shade to a holiday wedding last year, and it photographed beautifully.
The shade works because it’s festive without trying too hard. Burgundy has those wine-colored undertones that make it feel expensive. I always go for a glossy finish here because matte burgundy can look a bit too goth-funeral for Christmas vibes (unless that’s your thing—no judgment).
Pro tip: Add a gold accent nail on your ring finger. Just trust me on this one.
Glitter & Sparkle Game
Red Glitter Ombre
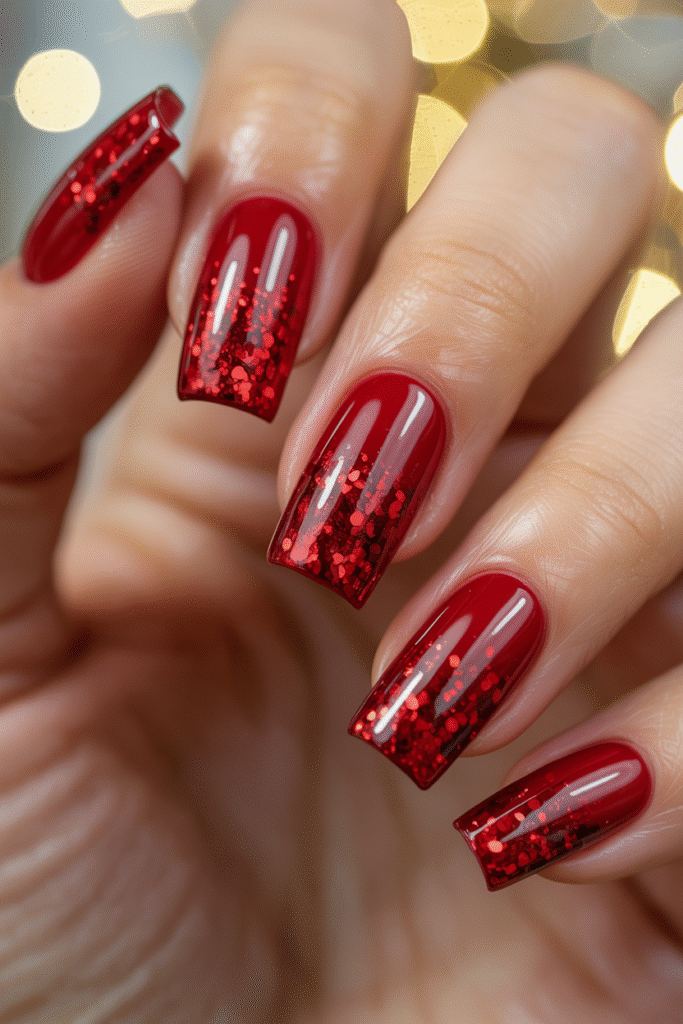
Remember when ombre nails were everywhere? Well, red glitter ombre brings that trend back but makes it actually appropriate for the holidays. You start with a deep red at the base and fade into a sparkly, glittery red at the tips.
I won’t lie—this one’s trickier to DIY. The blending needs to be gradual, and if you rush it, you’ll end up with a harsh line that looks more “accident” than “intentional gradient.” But when it’s done right? Chef’s kiss. The glitter catches every light at holiday parties, and you’ll find yourself waving your hands around way more than necessary.
Full Glitter Red Nails
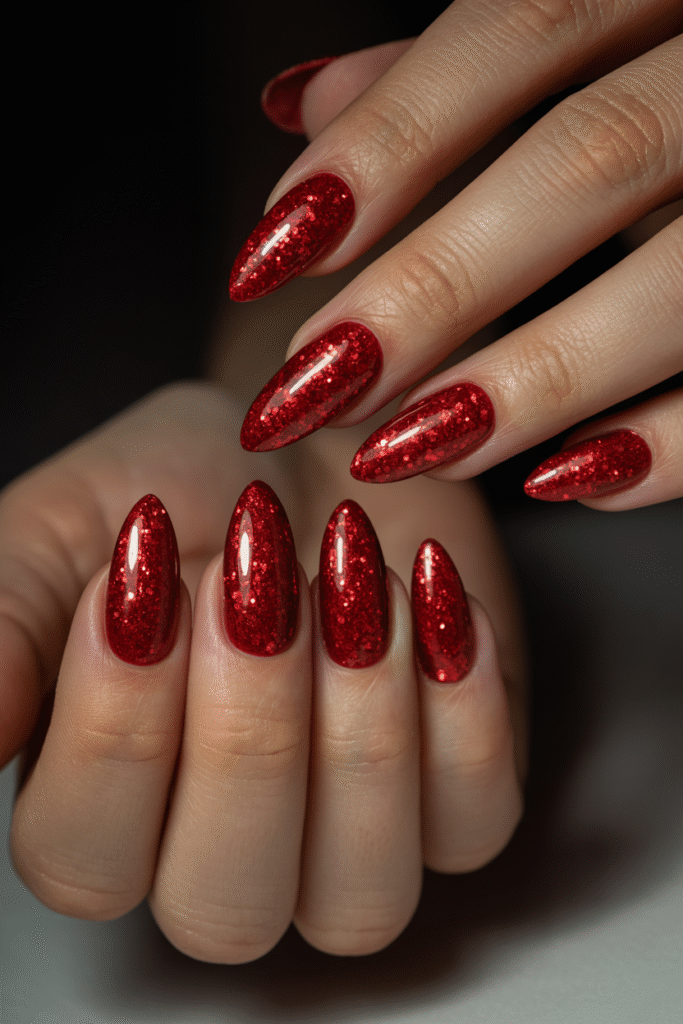
Sometimes you need to go all in. Full red glitter nails are for those moments when subtlety can take a backseat. I’m talking complete coverage, every nail, maximum sparkle.
Fair warning: Removal is a nightmare. You’ll need acetone, patience, and probably a good nail strengthener afterward. But for that one perfect holiday party? Worth it. I recommend getting this done professionally because achieving even glitter coverage at home is like trying to distribute sprinkles evenly on cupcakes—theoretically possible, practically frustrating.
Festive Patterns & Details
Candy Cane Stripes
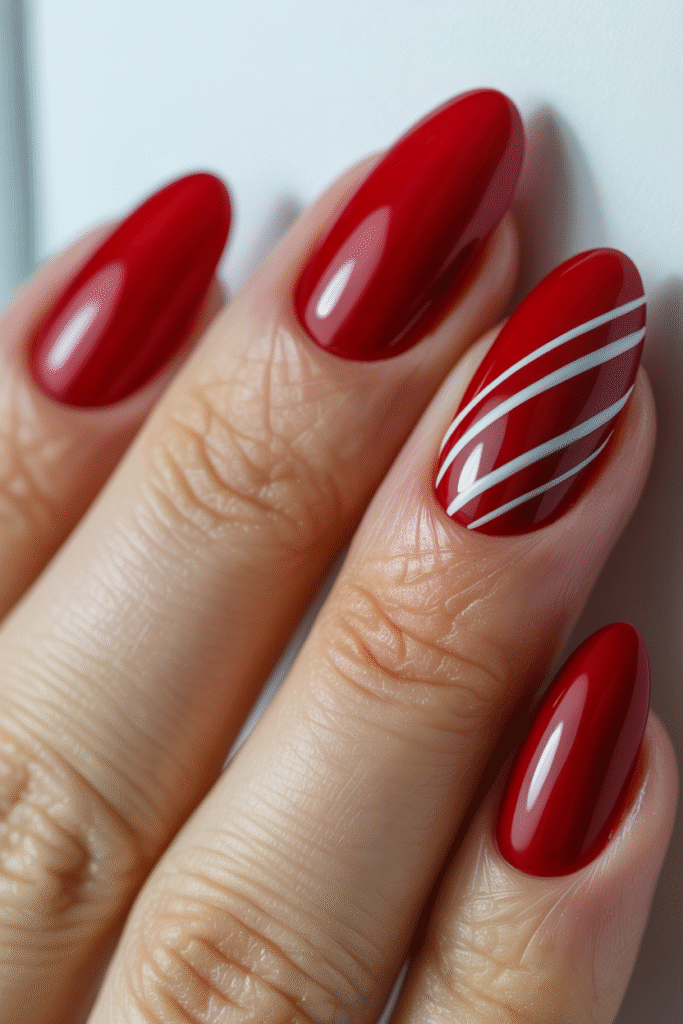
Candy cane striped nails sound cheesy, right? I thought so too until I saw a version that wasn’t cartoonish. The trick is using thin, elegant stripes rather than thick, bold ones.
Here’s my method:
- Start with a red base (classic or bright, your choice)
- Use white nail striping tape or a thin brush
- Create diagonal stripes on just one or two accent nails
- Keep the other nails solid red
This approach keeps it festive without looking like you raided a children’s craft kit. The diagonal angle makes it more modern than straight horizontal stripes, which can read a bit too literal “candy cane” if you know what I mean.
Snowflake Accent Nails
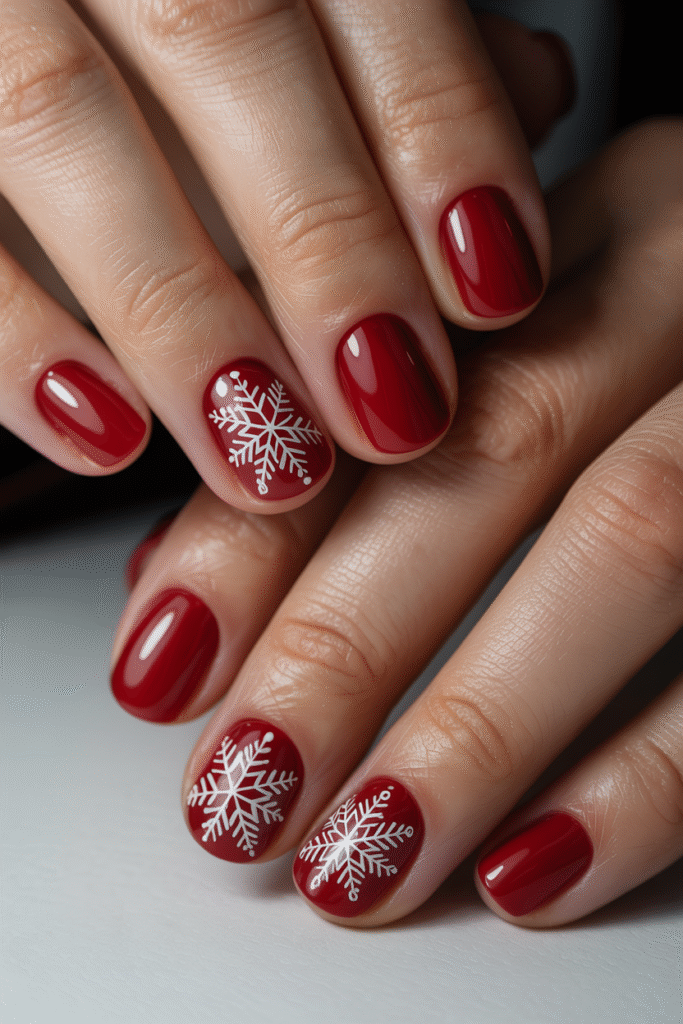
Who says snowflakes need a white or blue base? Red nails with white snowflake details flip the expected color scheme, and the result is surprisingly chic. I paint my nails red and then add delicate white snowflakes to one or two accent nails.
You can use:
- Nail stamping plates (easiest option)
- A dotting tool to create snowflake patterns
- White nail polish with a fine detail brush
- Snowflake nail stickers (no shame in shortcuts)
The contrast between the bold red and delicate white creates this really pretty balance. Plus, snowflakes are basically the one universally acceptable nail art during winter.
Matte Magic
Matte Red with Glossy Details
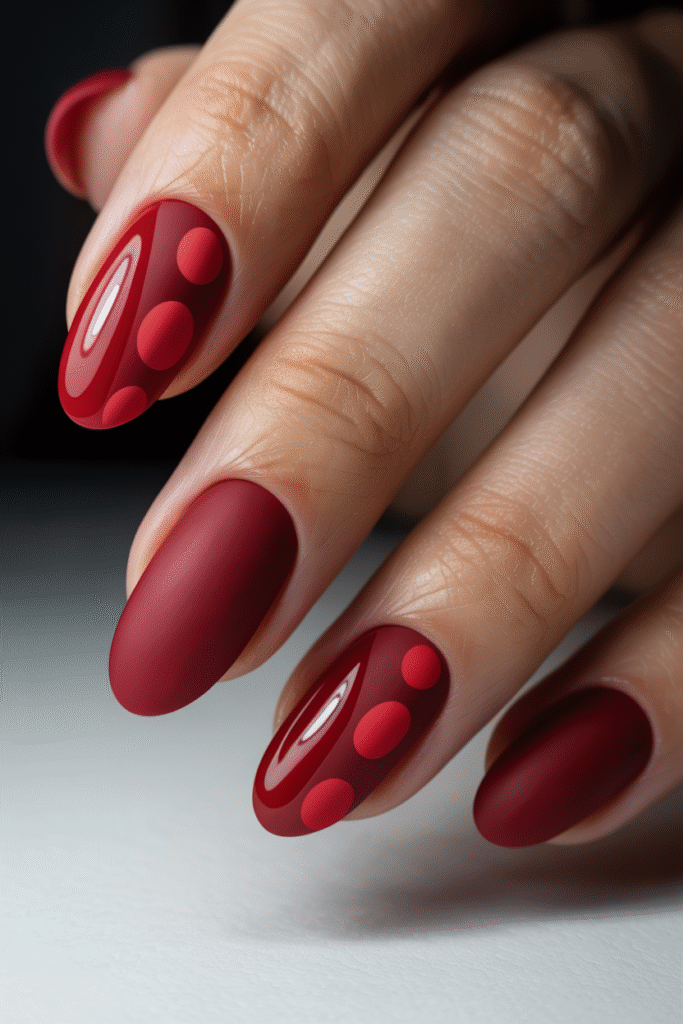
I never understood matte nails until I tried this combo. You paint all your nails in a matte red finish, then add glossy red details or patterns on top. The texture contrast is everything.
Think matte red base with glossy red polka dots. Or matte red with a glossy red stripe. Same color family, completely different finish, and somehow it works beautifully. The glossy parts catch the light while the matte provides this velvety backdrop.
Application tip: Let the matte polish dry completely before adding glossy details, or you’ll mess up the matte finish. Yes, I learned this the hard way.
Matte Red with Gold Foil
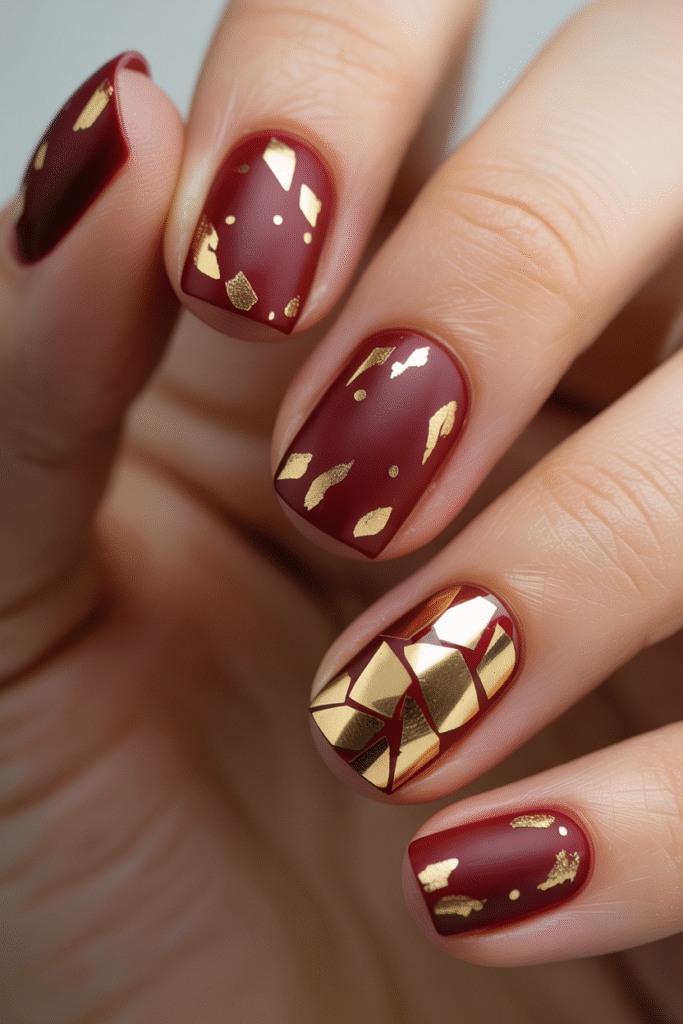
Matte red nails with gold foil accents might be my favorite discovery this year. The matte finish makes the nails feel modern and sophisticated, while the gold foil adds that necessary festive touch.
You can apply gold foil in several ways:
- Random foil flakes for an abstract look
- Foil tips for a modern French manicure
- Foil accent on just the ring finger
- Geometric foil shapes
The foil applies easily with nail glue or a foil adhesive, and the contrast against the matte red is stunning. Fair warning though—foil can chip, so apply a glossy top coat over it to seal everything in.
Metallic Moments
Chrome Red Nails
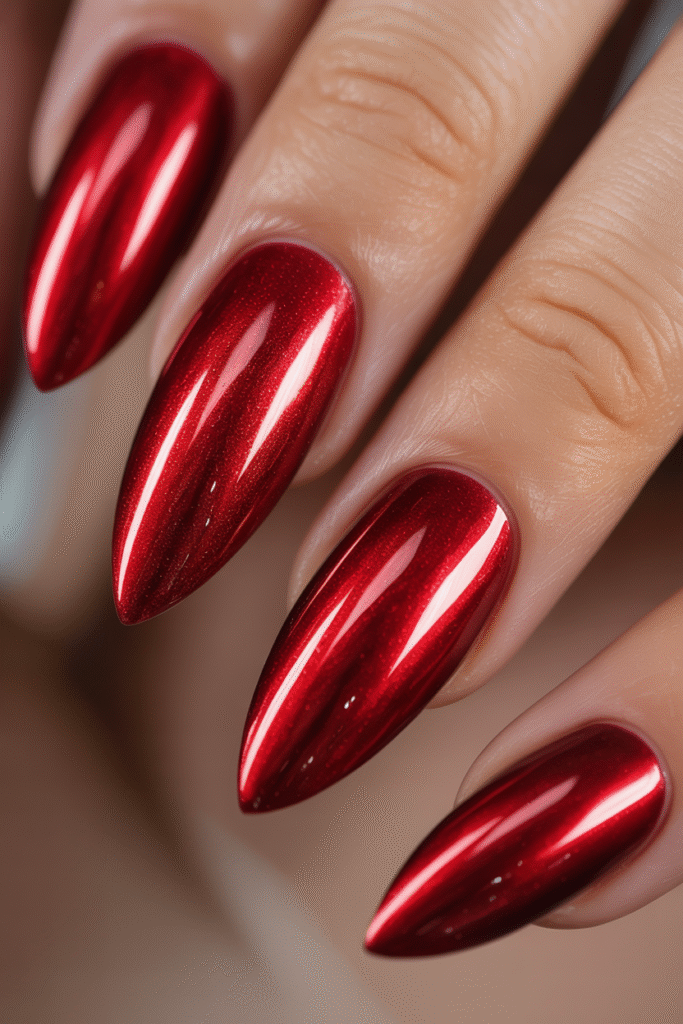
Chrome red nails are basically the mirror finish version of your regular red polish, and they’re incredibly eye-catching. The chrome powder creates this reflective, almost metallic surface that changes with the light.
I’ll be honest—getting chrome nails means visiting a salon unless you’re really skilled with chrome powders. The application requires specific techniques (rubbing the powder onto gel polish at just the right moment), and I’ve botched it enough times at home to just surrender to the professionals.
But the result? Absolutely worth the salon visit. These nails photograph beautifully and give you that futuristic-meets-festive vibe.
Rose Gold and Red Combo

Not all Christmas nails need to be traditional colors. Rose gold and red together creates this unexpectedly gorgeous combination that feels both festive and fashion-forward.
Try alternating nails: red, rose gold, red, rose gold. Or keep most nails red with just your ring fingers in rose gold. The warmth of rose gold complements the boldness of red without clashing, and it adds a softer, more romantic element to the traditional Christmas palette.
Minimalist Festive
Red Negative Space Nails

Negative space nail art uses your natural nail as part of the design, and it’s surprisingly chic when done with red polish. I love this style because it feels modern and artistic without being over-the-top festive.
Some ideas:
- Red half-moon at the cuticle, leaving the tip bare
- Red geometric shapes with natural nail showing through
- Red outline with negative space in the center
- Diagonal red stripe across otherwise bare nails
This style works great if you want something festive but need to keep it professional. The negative space keeps it from feeling too bold or demanding attention.
Single Red Accent Nail

Sometimes less really is more. Keep nine nails in a nude or soft pink shade and paint just one nail per hand in bold red. Usually the ring finger works best, but honestly, any finger can be your accent nail.
I love this approach when I want a hint of Christmas spirit without committing to a full festive manicure. It’s subtle enough for work but still adds that pop of holiday color when you need it. Plus, if you mess up one nail, you only have to fix one nail. (See? Practical and pretty.)
Intricate Details
Red Plaid Nails
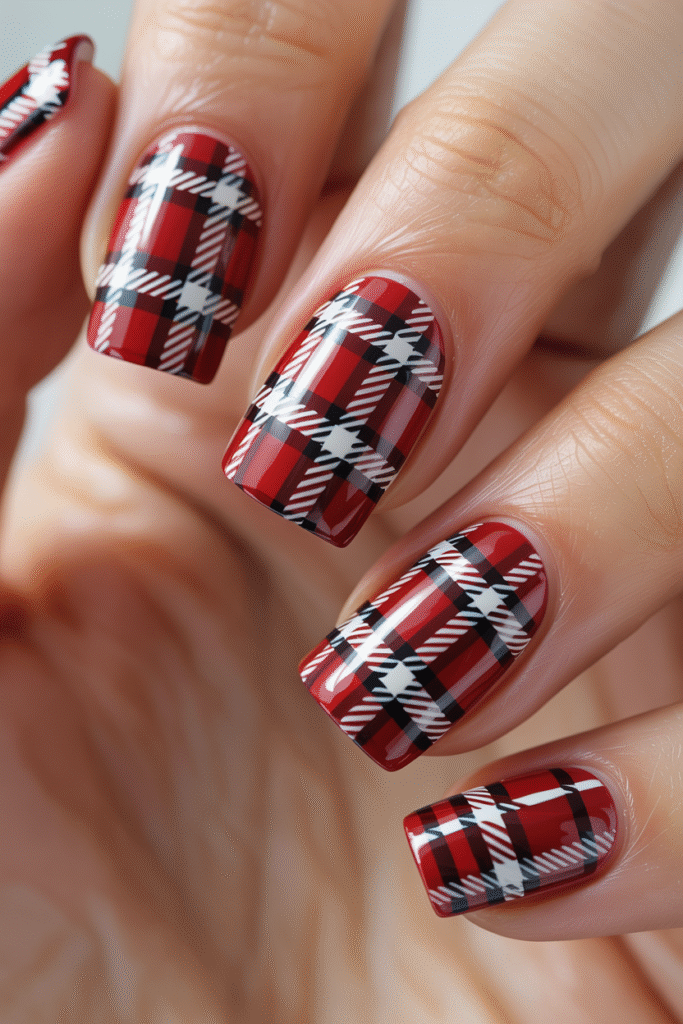
Plaid nail art is having a moment, and red plaid specifically screams cozy Christmas vibes. You create intersecting lines in different shades of red, white, and sometimes green to mimic a plaid pattern.
Full disclosure: This one’s complicated. You need:
- A steady hand or striping tape
- Multiple shades in the same color family
- Patience (so much patience)
- A detail brush or thin striper
I’ve only successfully done this twice, and both times took me an entire evening. But the compliments made it worth the effort. If you’re not confident in your nail art skills, this is definitely one to hand over to a professional.
Christmas Sweater Nails
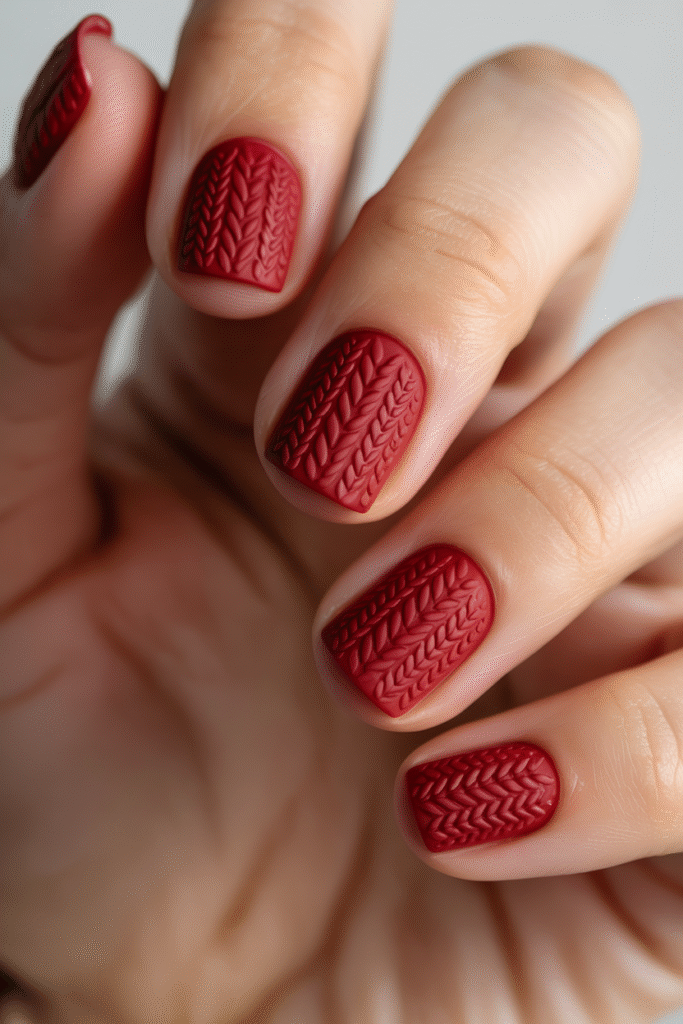
You know those chunky knit sweaters everyone wears in December? Christmas sweater nail art recreates that cozy texture on your nails, and it’s adorable. You use textured polish or a special technique to create a knit appearance in red.
The easiest method involves:
- Red base coat
- Textured or sand-finish red polish
- Optionally, tiny white or gold details for “knit” patterns
This one photographs really well and gives major cozy-winter vibes. Just be aware that textured polish can catch on things more easily than smooth polish, so maybe skip this if you type a lot for work.
Bold & Modern
Red Stiletto Nails
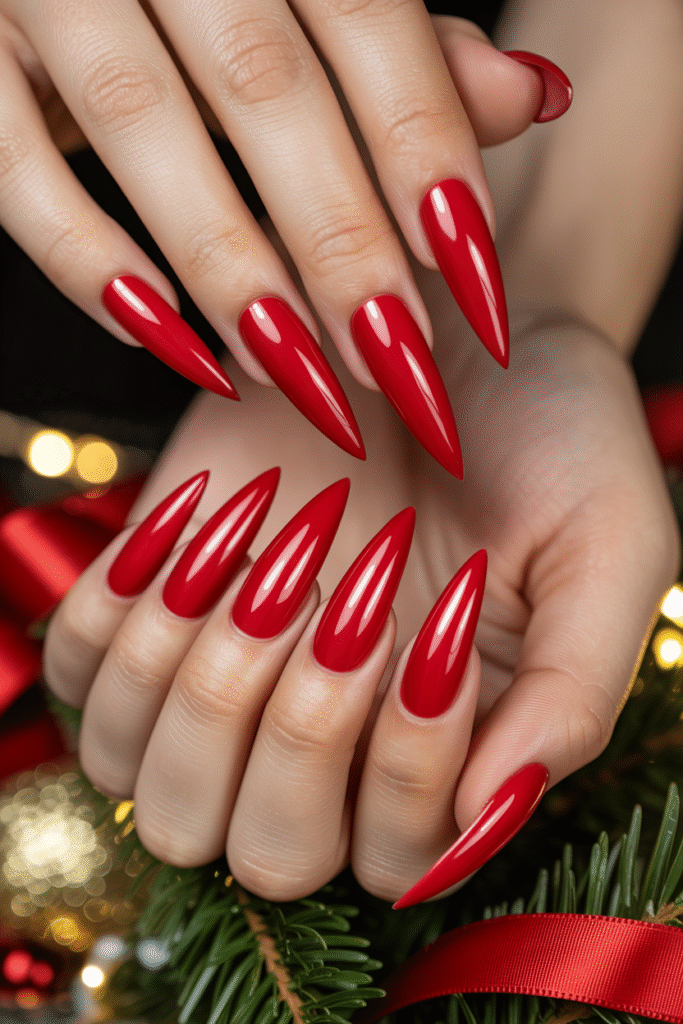
Stiletto nails (those super pointy ones) in Christmas red are bold, dramatic, and not for everyone—which is exactly why I love them. These nails make a statement, and if you’re going for maximum impact, this is your look.
Going this bold requires either really strong natural nails or acrylics/gel extensions. I can’t grow my nails long enough naturally for a true stiletto shape, so I get extensions when I want this look. The shape itself makes any color look more dramatic, and red specifically looks incredibly powerful.
Just remember: everyday tasks become interesting with stiletto nails. Typing, opening cans, putting in contacts—all require new techniques. But you’ll feel like an absolute queen, so there’s that trade-off.
Ombre Red to Gold
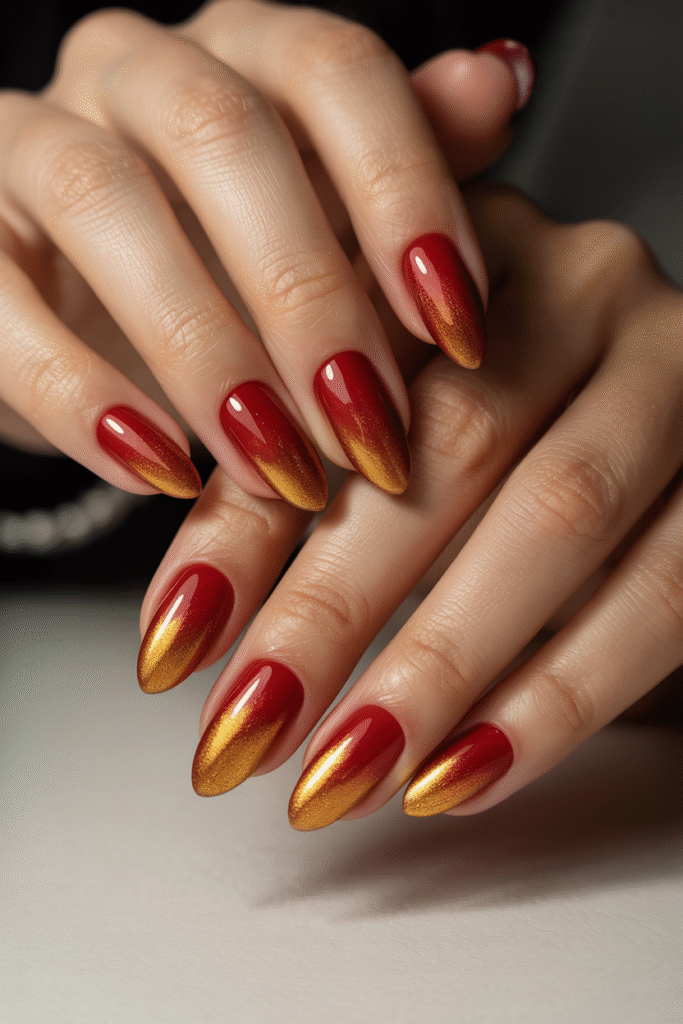
Red to gold ombre nails combine two of the most festive colors in a gradient that’s both elegant and eye-catching. You start with deep red at the cuticle and fade to gold at the tips (or vice versa).
The color transition should be seamless, which means you’ll need:
- A makeup sponge for blending
- Both red and gold polish
- Top coat to smooth the texture
- Patience for multiple thin layers
I tried this for a New Year’s Eve party, and the way it caught the light was incredible. The gold adds that celebratory sparkle while the red keeps it grounded in Christmas tradition.
Luxe & Detailed
Red with Rhinestone Accents
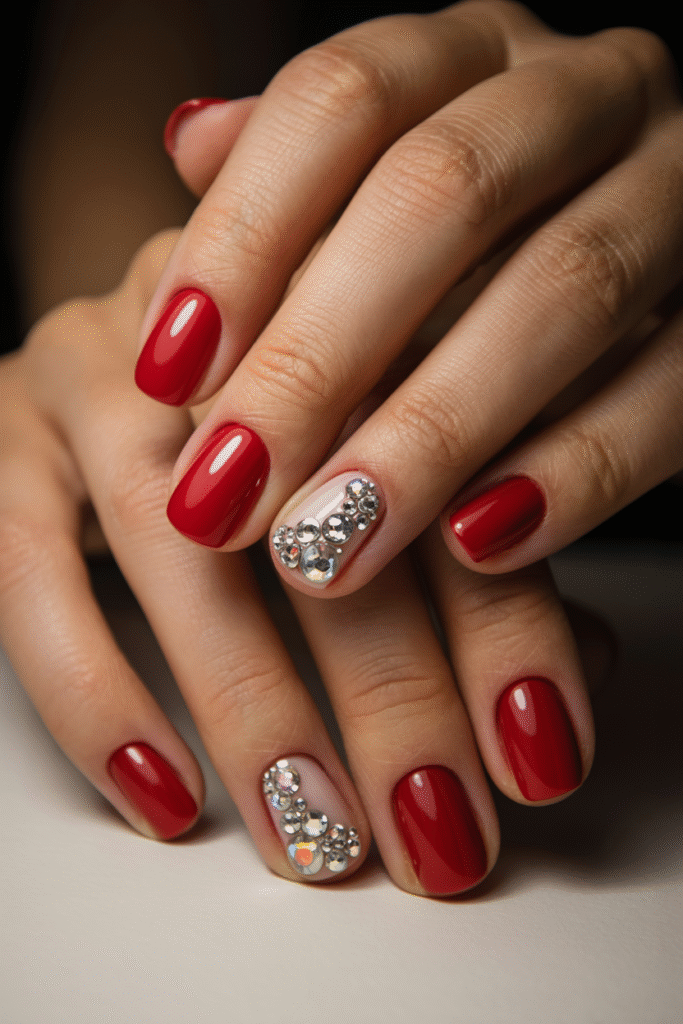
Rhinestones on red nails can go wrong quickly (too many, and you look like a disco ball), but when done right, they’re stunning. I typically add just a few strategically placed rhinestones—usually on accent nails only.
My favorite placements:
- Single rhinestone at the base of the cuticle
- Line of tiny rhinestones along the smile line
- Cluster of rhinestones on one accent nail
- Rhinestone “snowflake” pattern
Use proper nail glue, not just top coat, to secure them. I learned this after losing three rhinestones within two hours of application. Real nail glue keeps them in place for weeks.
Red and Pearl Combination
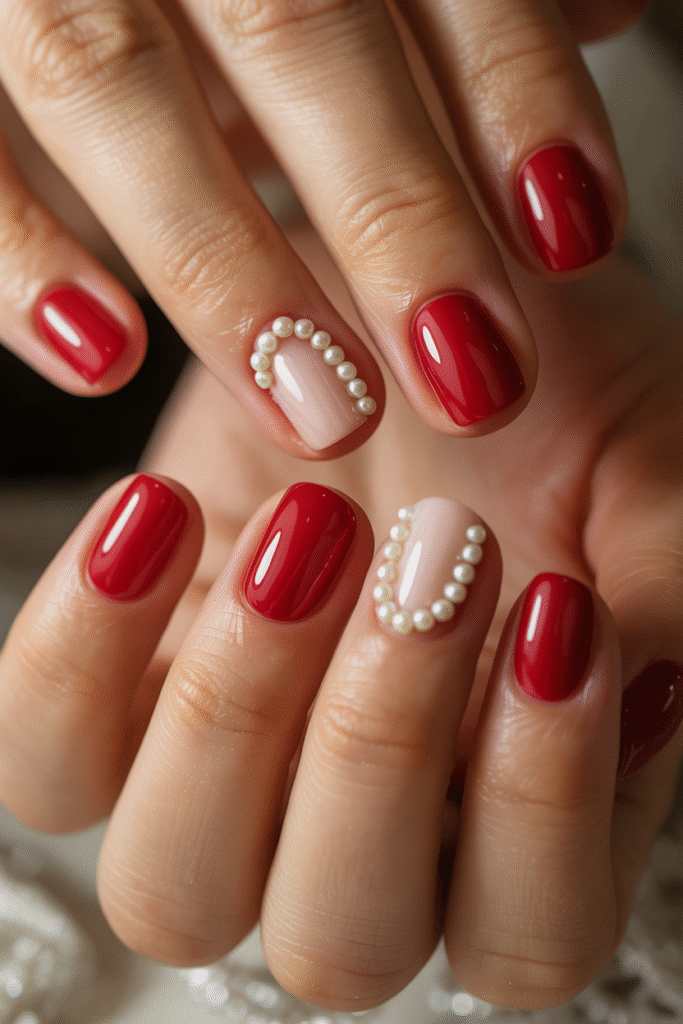
Pearls on red nails might sound old-fashioned, but trust me, it’s making a comeback. Small pearl embellishments on a red base create this vintage-glam look that’s perfect for holiday parties.
You can use:
- Actual tiny pearls (available at craft stores)
- Pearl nail art decorations
- Pearl powder mixed into clear polish
I usually place just a few pearls on one or two accent nails. Too many pearls, and you risk looking like you raided your grandmother’s jewelry box (and not in the cool vintage way).
Quick & Easy Options
Classic Red with Gold Stripes
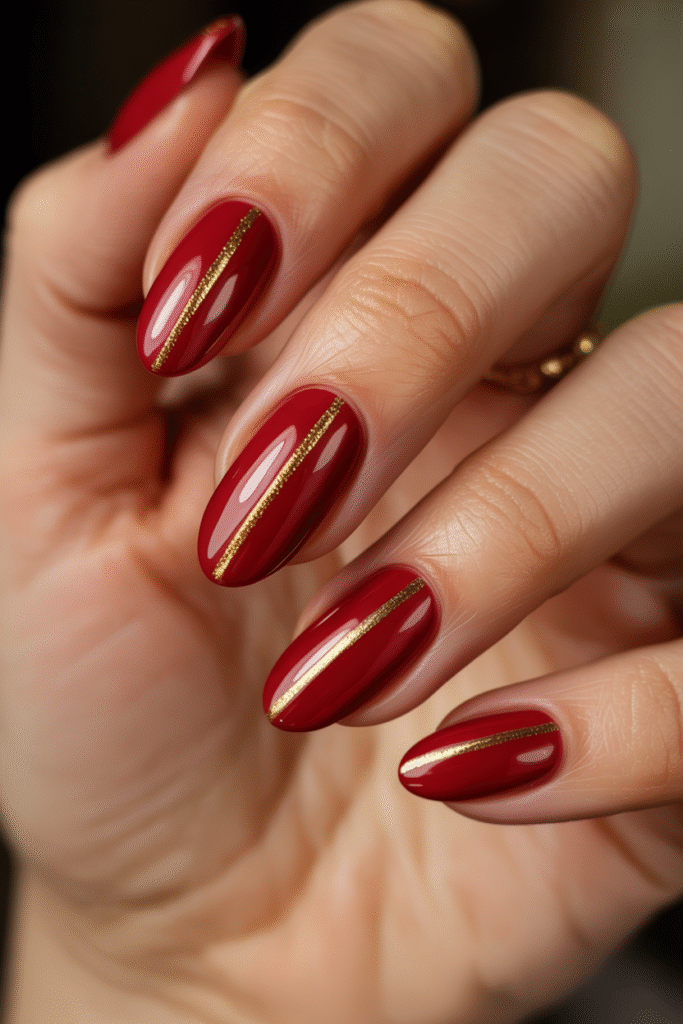
When you need something festive but don’t have three hours for nail art, red nails with gold stripe details deliver maximum impact with minimum effort. Paint your nails red, let them dry, then add a single thin gold stripe down the center or diagonally across.
You can use:
- Gold striping tape (peel and stick—easiest option)
- Gold nail polish with a striping brush
- Gold nail art pen
This takes maybe 15 extra minutes beyond a regular manicure, and the gold instantly elevates basic red polish to “holiday special” status. I keep gold striping tape in my nail kit specifically for last-minute festive upgrades.
Red Tips on Nude Nails
Another quick option: red tips on a nude base. This is basically a reverse French manicure but in Christmas colors. The nude base keeps it wearable for everyday, while the red tips add that festive pop.
The great thing about this design is that it grows out nicely. Unlike a traditional French tip where growth shows immediately, this style looks intentional even as your nails grow. Plus, if you chip a tip, it’s less noticeable than chipping an entire nail of solid color.
Final Thoughts
Here’s what I’ve learned after trying way too many red Christmas nail designs: the “perfect” festive manicure is whichever one makes you feel good. Some people want maximum sparkle and drama. Others prefer subtle nods to the season. Both are completely valid.
My personal rotation this year includes the burgundy with gold accent (for work events), full glitter red (for actual Christmas day), and the negative space design (for everything else). I’m probably overthinking my nail choices, but honestly, if you can’t go a little extra during the holidays, when can you?
Whatever design you choose, remember that red nail polish—in any form—is basically a festive mood boost. Even on those gray December days when everything feels chaotic, looking down at your perfectly festive nails can make you feel just a bit more pulled together. And isn’t that really what we’re all trying to achieve during the holidays anyway? 🙂
Now go forth and paint those nails red. Your fingers deserve their moment in the holiday spotlight.
—Freya