When a plain manicure starts to feel a little too plain, simple nail art ideas can fix that fast. You do not need a salon appointment, a giant nail kit, or loads of patience to make your nails look polished, pretty, and a bit more interesting. Sometimes the smallest detail a tiny heart, a clean stripe, a soft ombré tip, completely changes the look.
That’s why easy nail designs stay so popular. They add personality without looking overdone, and they work whether you love classic neutrals, soft pastels, or a little sparkle now and then. If you want nail art that feels stylish, wearable, and actually doable, these ideas give you plenty of inspiration without the drama.
Below, I’m sharing 15 simple nail art ideas that feel current, wearable, and beginner-friendly. Some look clean and minimal, some bring a little color, and all of them work whether you love short natural nails or slightly longer almond shapes. Ready to make your nails look like you have your life together, even if your handbag says otherwise? Let’s do it.
1. Classic Micro French Tips
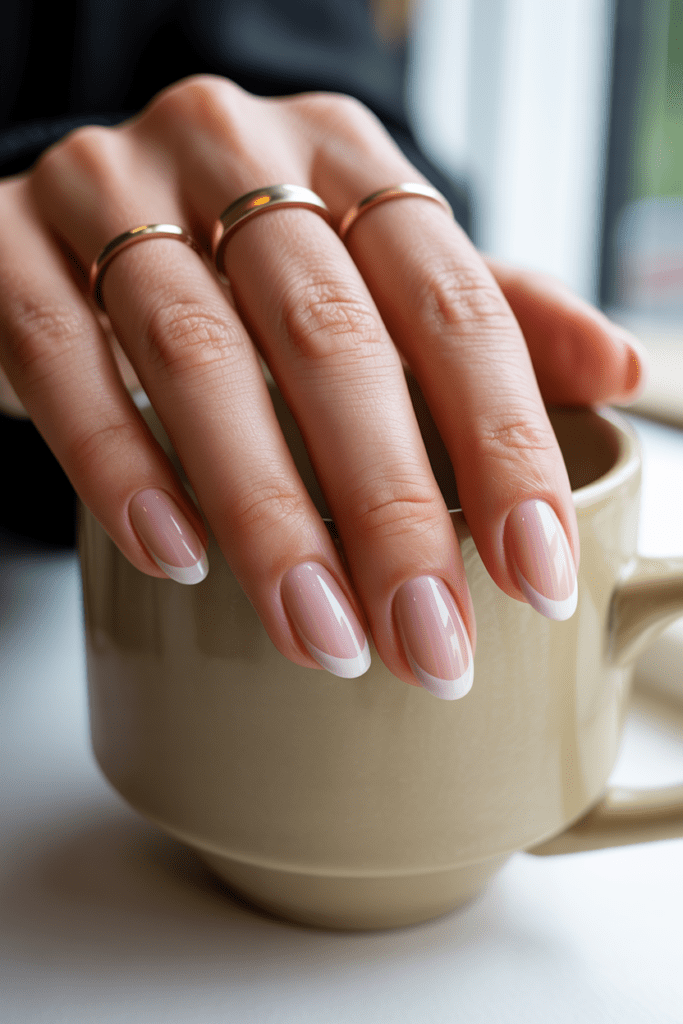
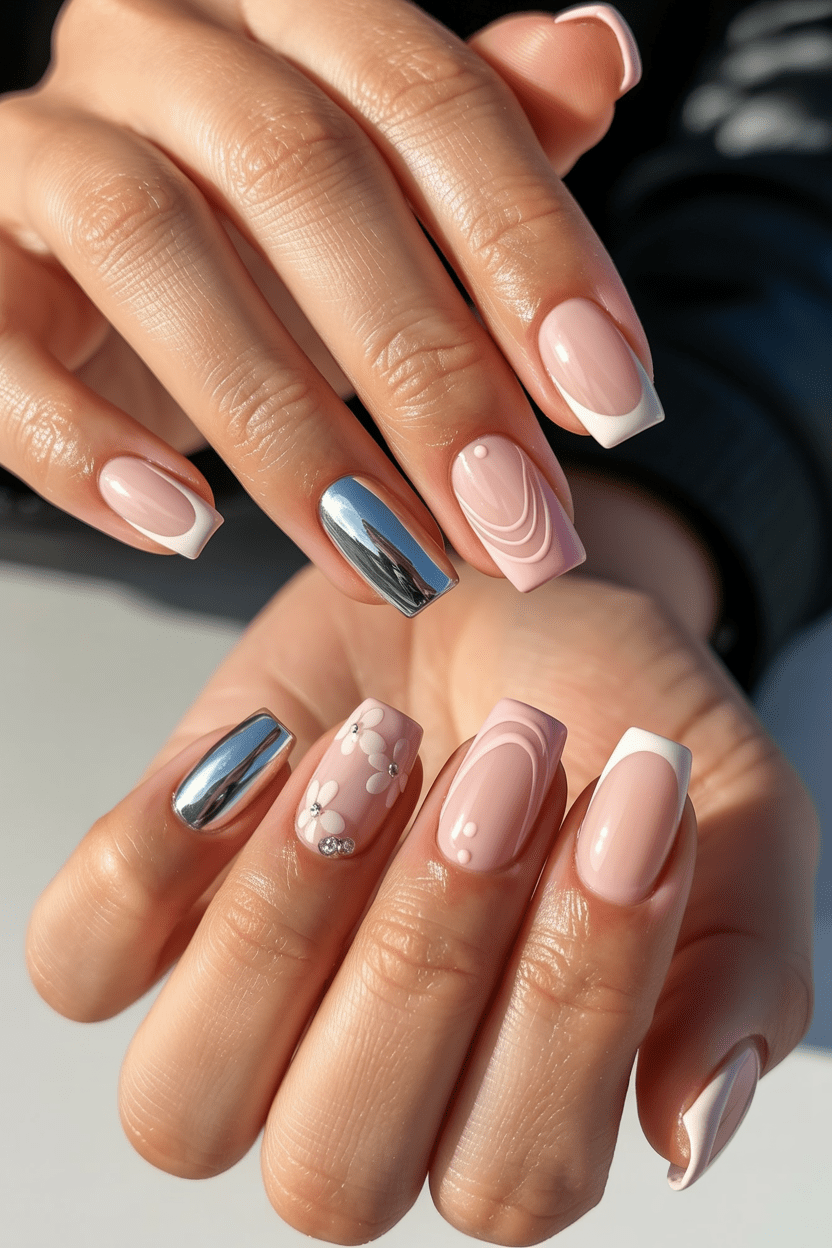
If you want a nail look that always works, start with micro French tips. They feel cleaner and cooler than the chunky French manicures we all saw everywhere years ago. I wear this style when I want my hands to look polished but not fussy.
Use a sheer pink or nude base, then paint an ultra-thin white line across the tip. You can use a striping brush, but I’ve also cheated with the edge of a bobby pin before, and honestly, it worked better than expected. Who says you need a pro kit for cute nails?
Why this one works
- Looks neat on short nails
- Matches every outfit
- Feels timeless without looking boring
For a softer finish, swap the white tip for cream, soft beige, or pale pink.
2. Tiny Polka Dot Nails
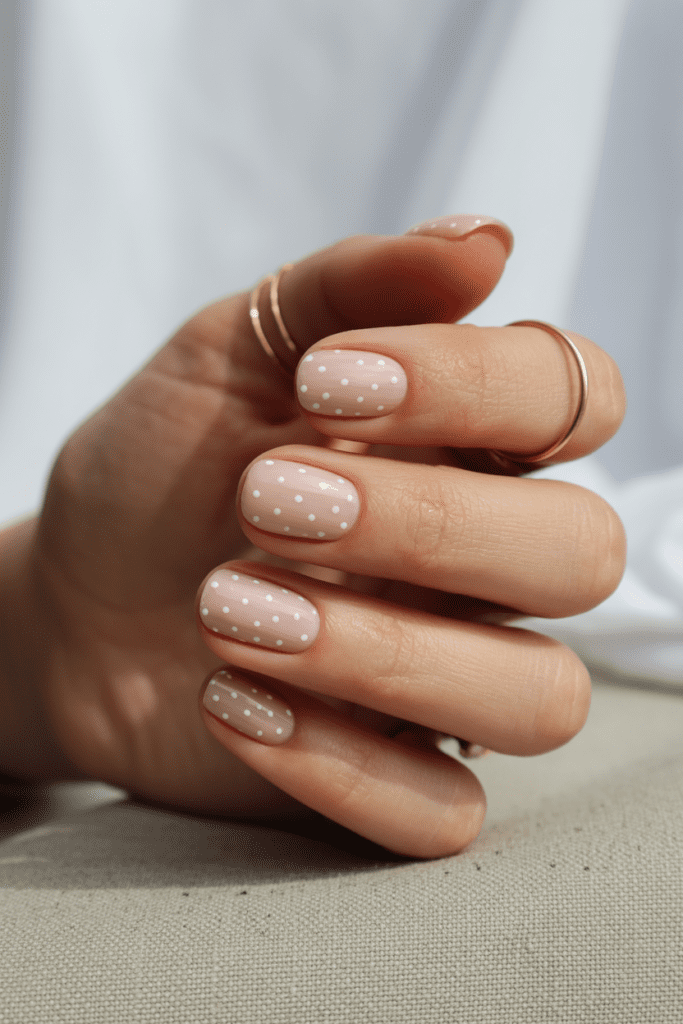
Polka dots save lives. Fine, maybe not lives, but definitely boring manicures. This is one of the easiest DIY nail art ideas because you only need a dotting tool, a toothpick, or even the end of a hairpin.
Start with one solid color, then add a few small dots near the cuticle or across the whole nail. I prefer scattered dots because they look playful without turning your nails into a craft project from primary school. IMO, less really does more here.
Best color combos
- Nude base + white dots
- Pale pink + red dots
- Black base + gold dots
- Milky white + pastel dots
Keep the dots small and spaced out. That tiny detail makes the whole look feel more stylish.
3. Accent Nail Glitter
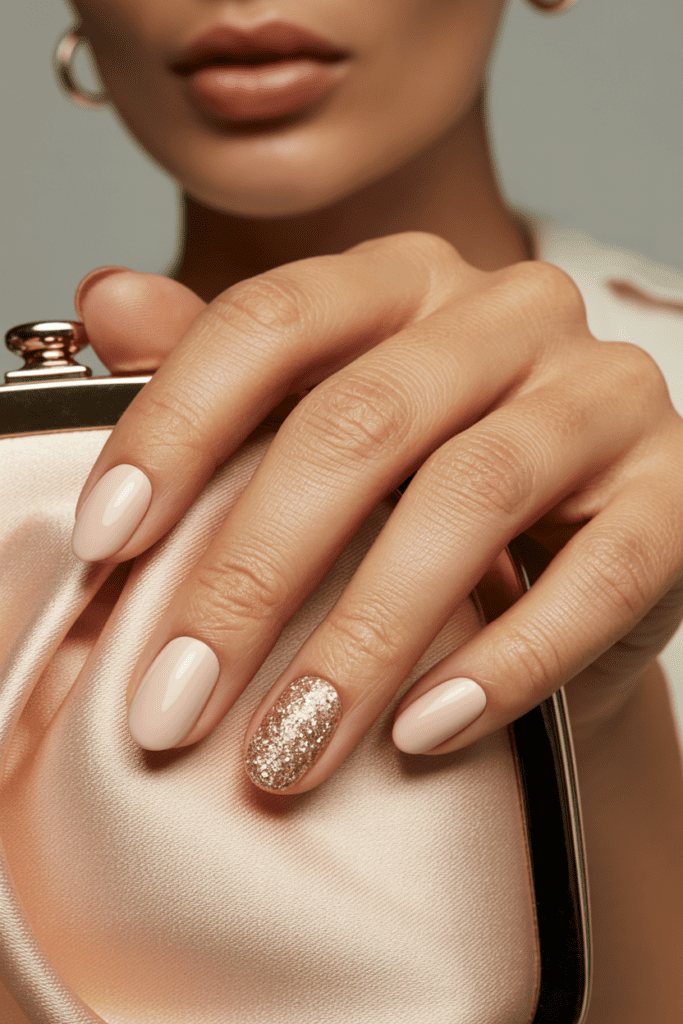
If you love sparkle but hate the full glitter commitment, go for an accent nail. Paint all your nails one shade, then add glitter to just one finger on each hand. It gives you shine without making you feel like a disco ball before noon.
I usually pick the ring finger, but the thumb also looks surprisingly good, especially if you hold your phone a lot and want that flash of sparkle in every mirror selfie. Yes, that’s a real strategy. No, I won’t apologize.
How to keep it chic
- Choose fine glitter instead of chunky glitter
- Stick with one glitter nail per hand
- Pair glitter with neutral polish for balance
Try rose gold glitter, champagne shimmer, or silver sparkle over beige, blush, or soft grey.
4. Minimalist Heart Nails

Tiny hearts look adorable when you keep them simple. You do not need a full Valentine’s Day moment to wear them either. A single little heart on one or two nails adds charm without looking too themed.
Use a nude or pale pink base, then place one small heart near the center or corner of the nail. I’ve done this with a dotting tool and a toothpick, and while my first attempt looked slightly wonky, top coat covered a lot of sins. Bless top coat, honestly.
Placement ideas
- One heart on each ring finger
- A tiny heart near the cuticle
- A small red heart on a milky nude base
- White hearts on a sheer pink manicure
This is one of my favorite cute simple nail art ideas because it feels sweet, light, and wearable.
5. Soft Ombre Nails
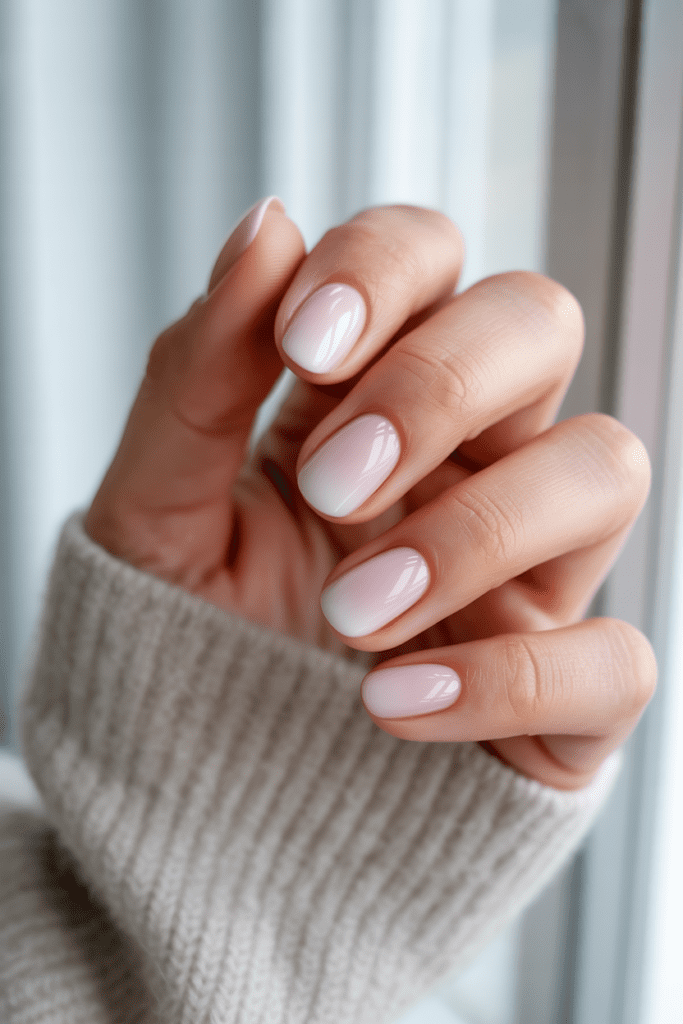
If you want something a bit prettier than a basic polish but still easy on the eye, go for soft ombre nails. This style blends one shade into another, usually from the base to the tip. It looks delicate and slightly fancy, even though the technique can stay pretty simple.
Use a makeup sponge to dab two polish shades together over a light base. I know, it sounds messy, and yes, it can get a little chaotic around the edges. But once you clean it up with a brush and remover, the final look feels very worth it.
Good ombre pairings
- Baby pink + white
- Nude + peach
- Lavender + pale lilac
- Sky blue + white
Choose shades in the same color family so the blend looks soft instead of streaky.
6. Nude Nails With Gold Foil
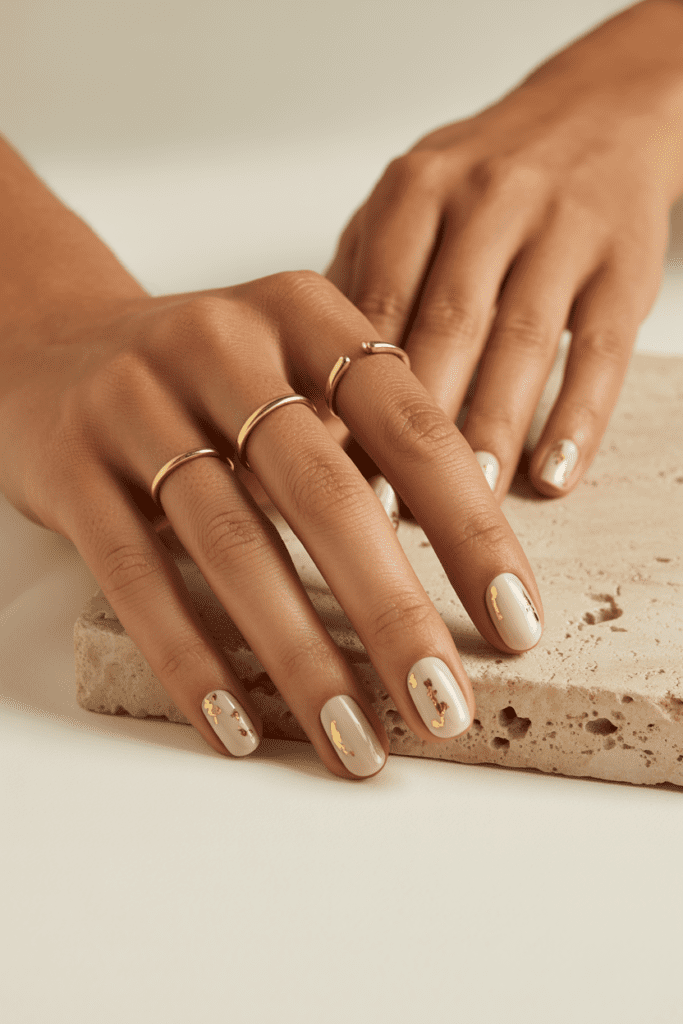
This one looks expensive. That’s always a win. Nude nails with gold foil give you that glossy, editorial feel without asking for much effort.
Paint your nails a nude or sheer beige shade, then press tiny flakes of gold foil onto still-tacky polish or nail glue. Finish with top coat and you’re done. I wore this look to a dinner once and got more compliments on my nails than my actual outfit, which felt rude but fair.
Why people love it
- Looks luxe
- Works for events and everyday wear
- Takes very little skill
Stick to a few foil pieces on each nail. Too much foil can tip the look from elegant to “I attacked a craft drawer.”
7. Pastel Mismatched Nails
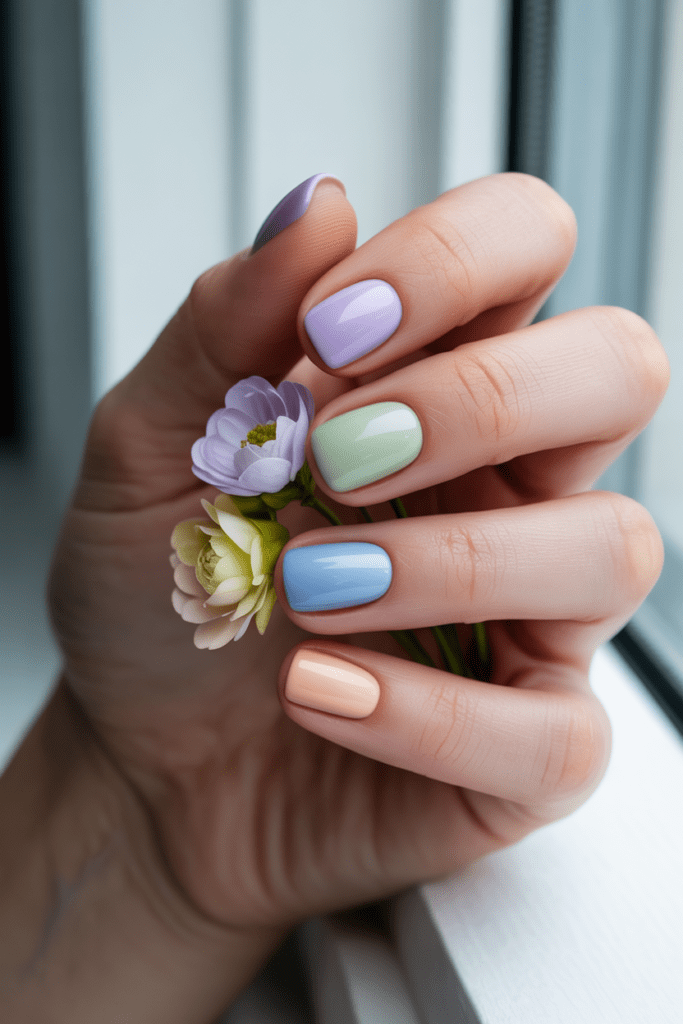
Can’t choose one color? Don’t. Mismatched pastel nails look fresh, cheerful, and surprisingly put together when you stick to soft tones. This idea works especially well in spring and summer, but honestly, I’d wear it any time I needed a mood boost.
Paint each nail a different pastel shade like mint, lilac, butter yellow, baby blue, or blush. The trick is to keep the finish similar across every nail. Glossy shades together look cohesive, while random textures can feel messy fast.
Best pastel shades to mix
- Lilac
- Soft mint
- Powder blue
- Pale peach
- Butter yellow
TBH, this is one of the easiest ways to make your manicure look fun without drawing tiny daisies for two hours.
8. Diagonal Color Block Tips
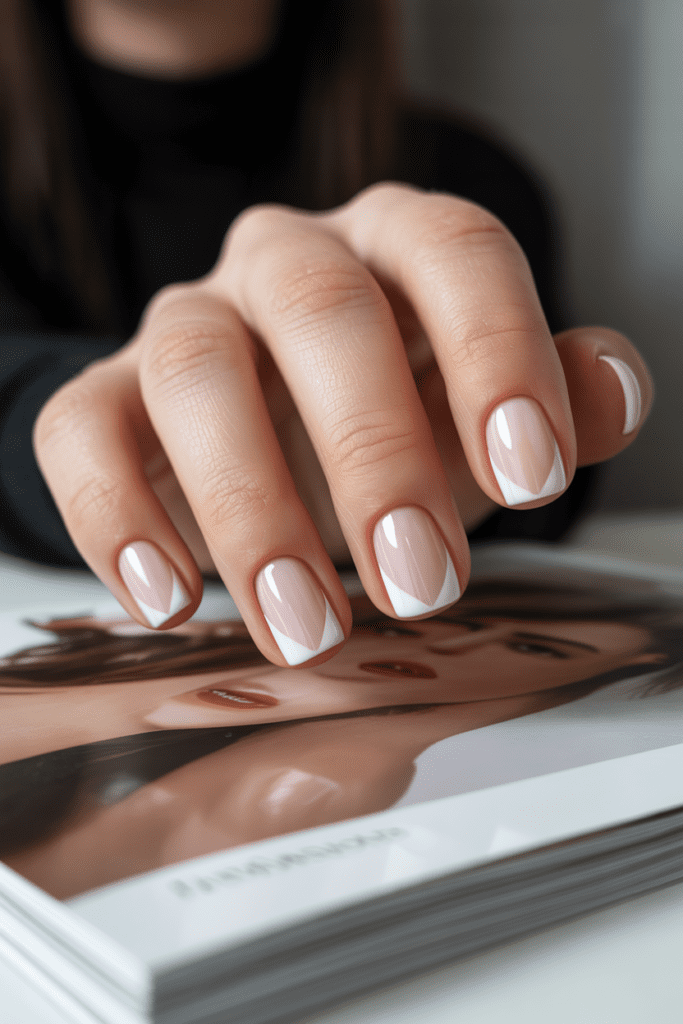
If standard French tips feel too safe, try diagonal color block tips. Instead of painting the very edge straight across, sweep the color at an angle. That one change gives the whole manicure a modern edge.
Use nail tape if you want crisp lines, or freehand it if you trust yourself more than I usually trust myself with polish. I like this look in neutral tones, but bold color pairings can work too if you keep the rest of your styling simple.
Color pairings to try
- Nude + white
- Blush + burgundy
- Beige + black
- Cream + sage green
This style flatters short nails because the diagonal line creates a slightly elongated look.
9. Daisy Accent Nails
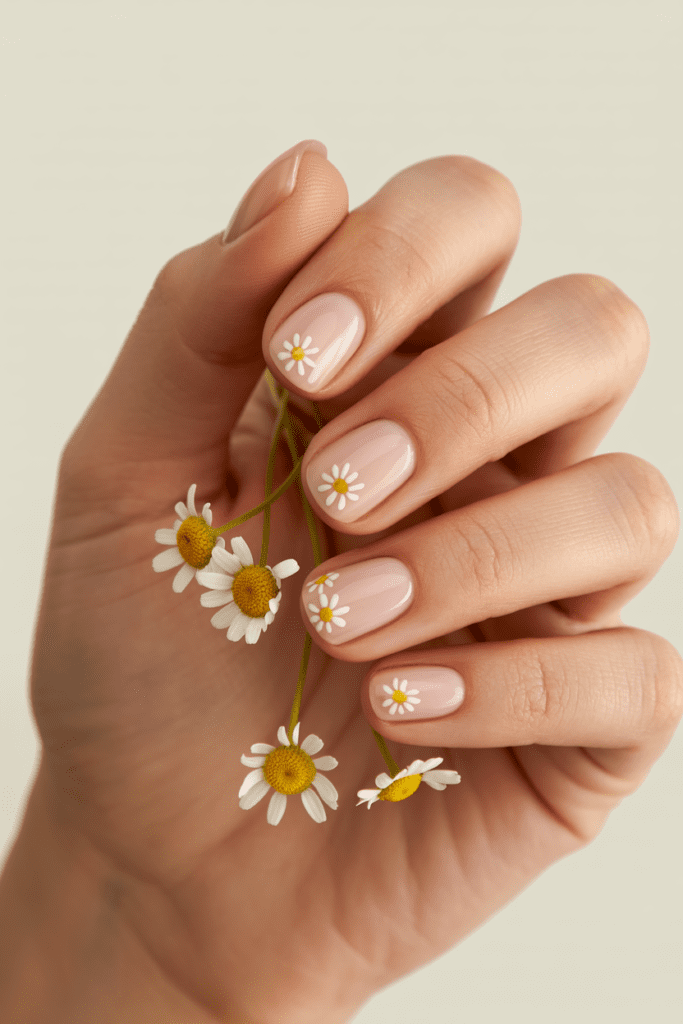
Daisy nails had a major moment, and I completely understand why. They look cheerful, light, and just a little retro. The best part? You only need to paint a few small petals and a dot in the middle.
Keep most nails plain, then add daisies to one or two accent nails. I prefer a clear, nude, or pale pink base because it lets the flower stand out without making the look too busy. Ever notice how the cutest nail designs usually stop before they overdo it?
Easy daisy formula
- Paint a sheer or nude base
- Add five tiny white dots in a circle
- Place a yellow dot in the center
- Seal with glossy top coat
This works beautifully on short, rounded nails.
10. Single Stripe Nail Art
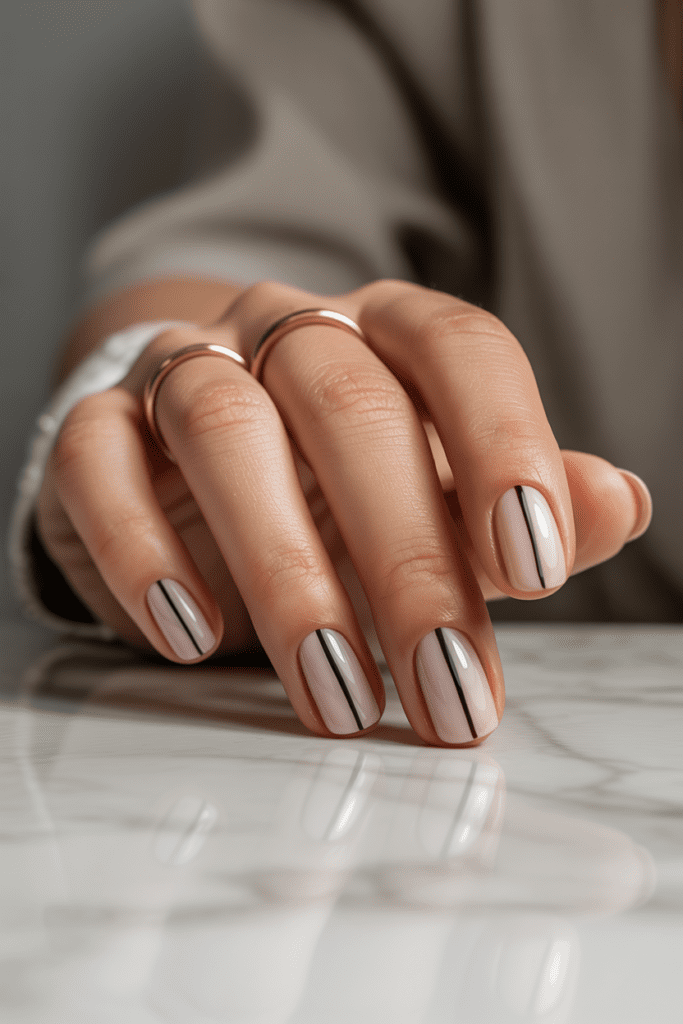
Sometimes one clean line does the job better than a whole design. Single stripe nail art feels modern, minimal, and slightly artsy without trying too hard. I reach for this one when I want my nails to look intentional but grown-up.
Paint your base shade first, then add one vertical or horizontal stripe in a contrasting color. You can place the stripe down the center, along one side, or near the tip. A fine brush helps, but striping tape also works if your hands get shaky after coffee, which, let’s be honest, happens.
Stripe ideas
- Nude base + black stripe
- White base + gold stripe
- Pink base + burgundy stripe
- Clear base + silver stripe
Keep the stripe thin. Thick lines can make the nail look heavy.
11. Negative Space Half Moons
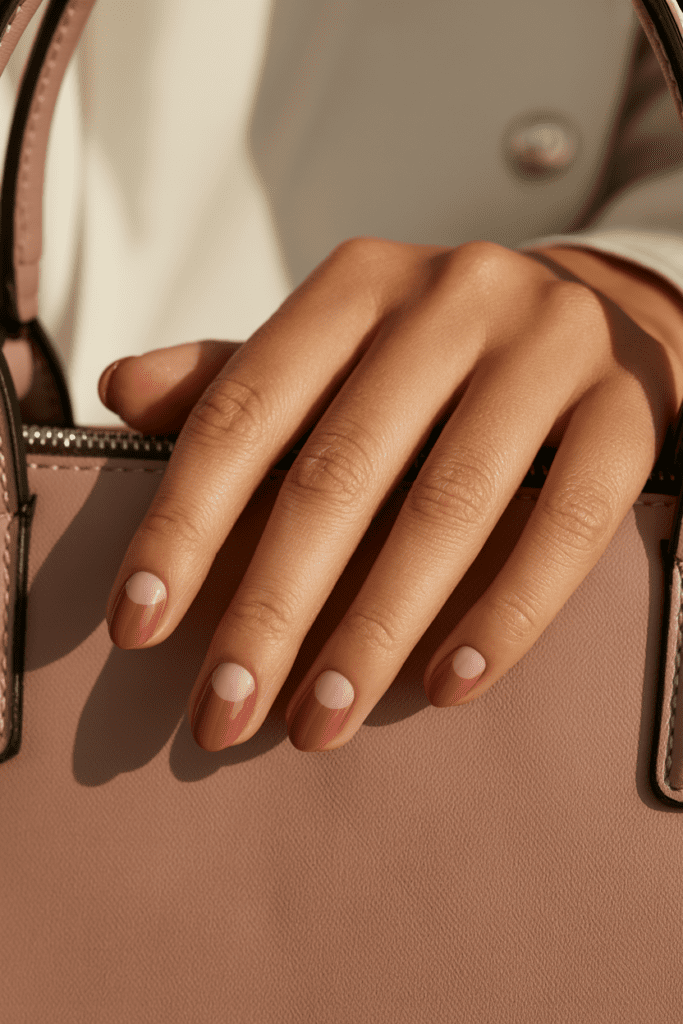
Negative space nails sound complicated, but this version stays very simple. The half-moon design leaves the base of the nail bare or sheer while the rest of the nail gets color. It creates contrast and gives your manicure a cool, editorial twist.
You can use a reinforcement sticker or a curved guide to mark out the moon shape near the cuticle. Then paint the rest of the nail and peel the guide away once the polish sets slightly. It looks smart, clean, and more expensive than it actually is, which feels very on brand for all of us.
Best shades for this look
- Dusty rose
- Deep navy
- Soft taupe
- Classic red
I especially love this one for autumn because darker shades make the half moon pop.
12. Tiny Star Details
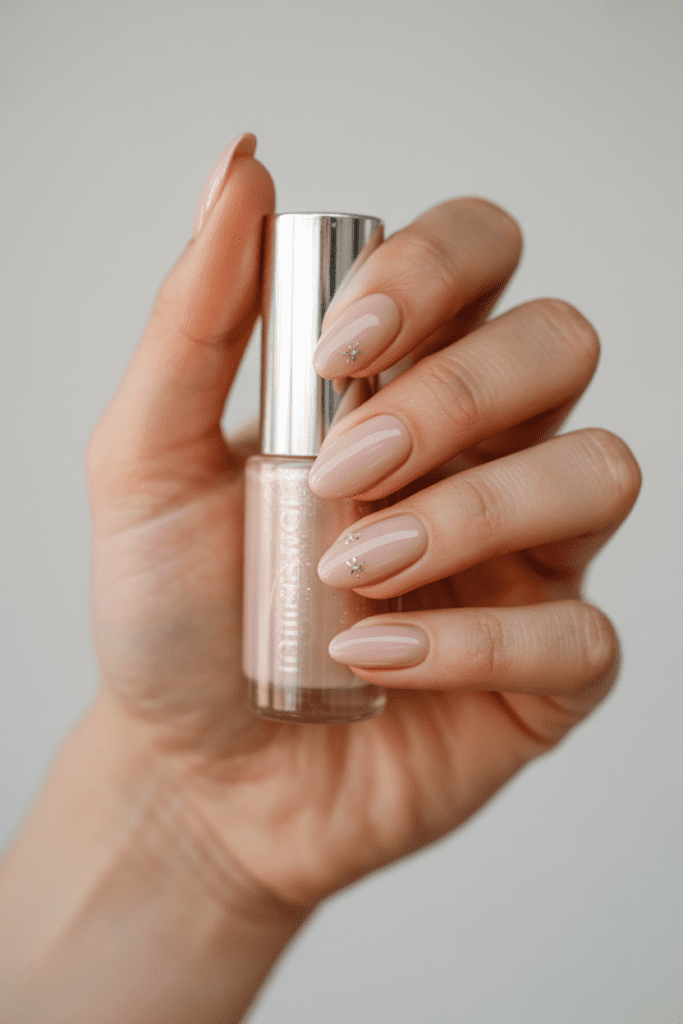
If hearts feel too sweet and florals feel too obvious, go for tiny star nails. A single little star on each nail or just one accent nail adds a playful touch without going full festival mode. Cute, but not chaotic. That’s the goal.
Use star decals if you want a clean finish, or draw tiny stars with a fine brush if you enjoy a challenge. I usually choose silver or white stars on a sheer base because the result looks soft and wearable. FYI, this style looks ridiculously nice under flash photos 🙂
Best ways to wear star nails
- One silver star on each ring finger
- Tiny white stars over sheer nude polish
- Gold stars on a soft pink base
- A mix of stars and tiny dots on one accent nail
13. Matte Nude Nails With Glossy Tips
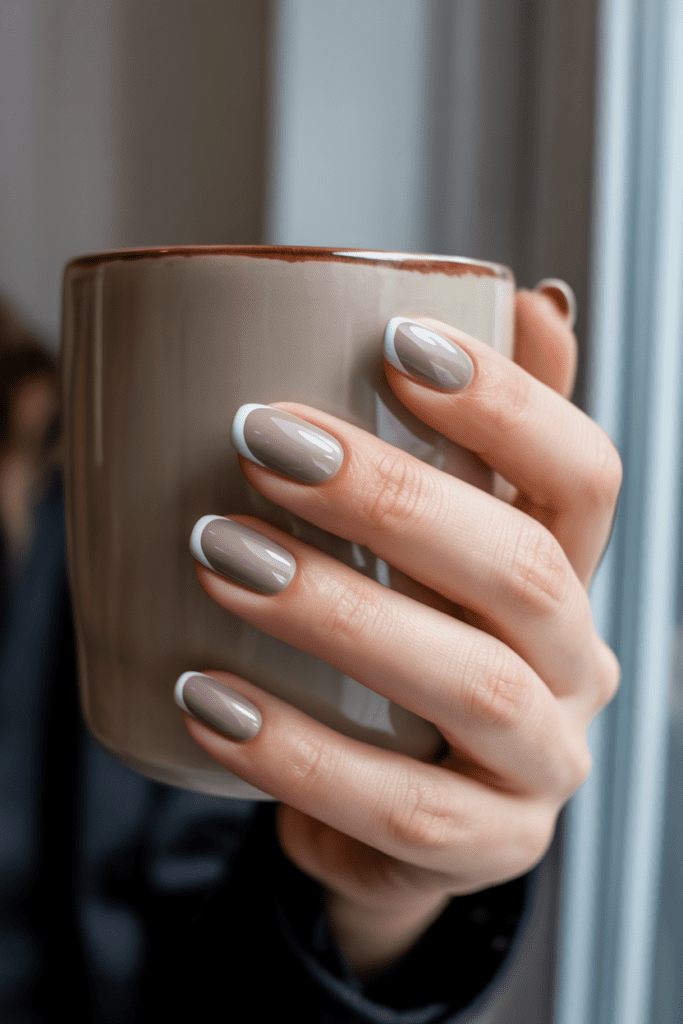
This idea feels subtle, but it makes people look twice. Start with a nude matte manicure, then add glossy tips in the same color family. You get contrast without relying on bright color or heavy design.
I love this look for everyday wear because it feels polished and slightly different, especially if you wear lots of neutral outfits. It’s also perfect if you want nail art that still passes the “I need to look put together in meetings” test. Why choose between simple and interesting when you can have both?
What makes it work
- Tone-on-tone finish
- Minimal effort
- Sophisticated result
If you cannot find a matte polish you like, use a regular nude shade and finish with a matte top coat, then paint glossy tips over it.
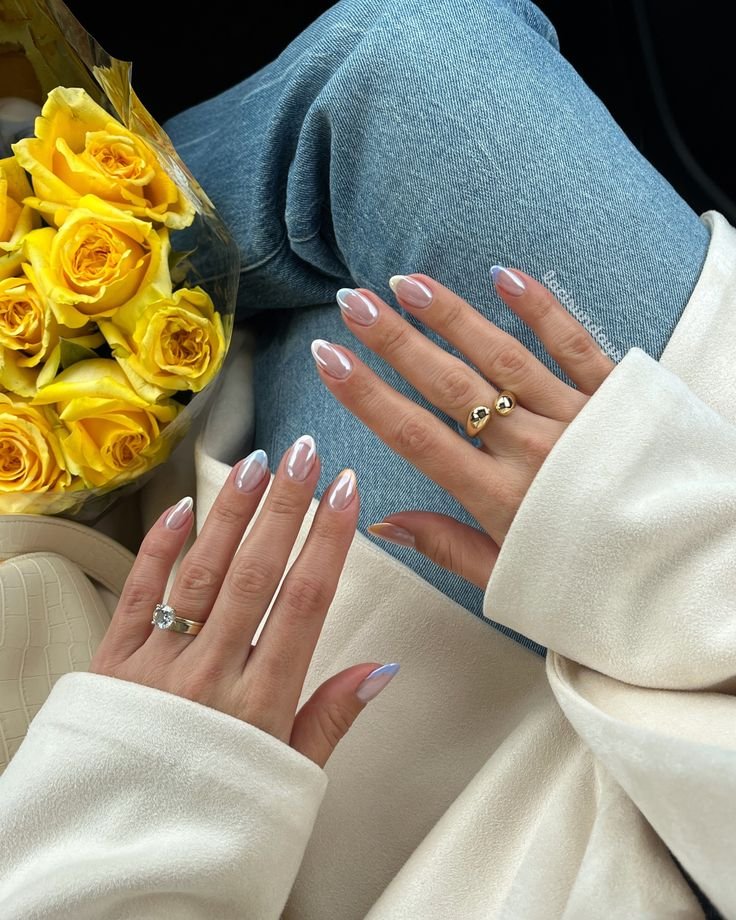
14. Two-Tone French Manicure
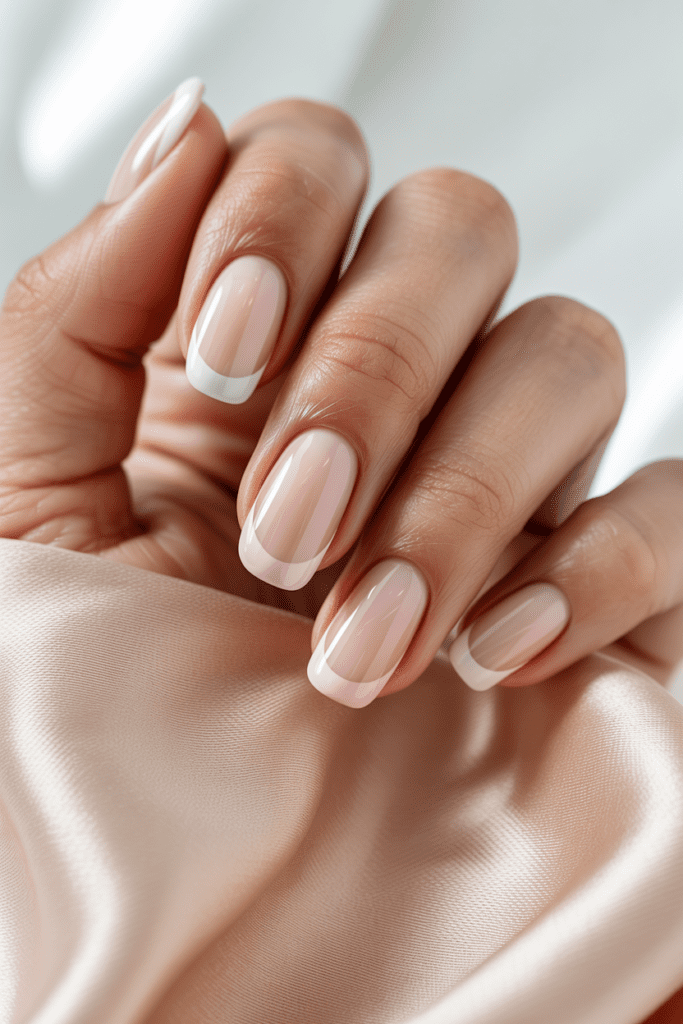
The classic French manicure got an update, and thank goodness for that. Two-tone French tips layer two colors at the tip instead of one. The effect looks fun, modern, and a little more fashion-forward than the standard white line.
Use a neutral base, then paint one thin tip color followed by a second line just beneath or beside it. I love this in soft shades, but brighter combinations can look amazing for holidays or weekends. Think of it as the French mani’s cooler younger cousin.
Chic two-tone combos
- White + baby pink
- Lilac + sky blue
- Red + blush
- Brown + cream
Choose colors that complement each other instead of compete. That keeps the design clean.
15. Barely-There Milky Nails With Tiny Gems
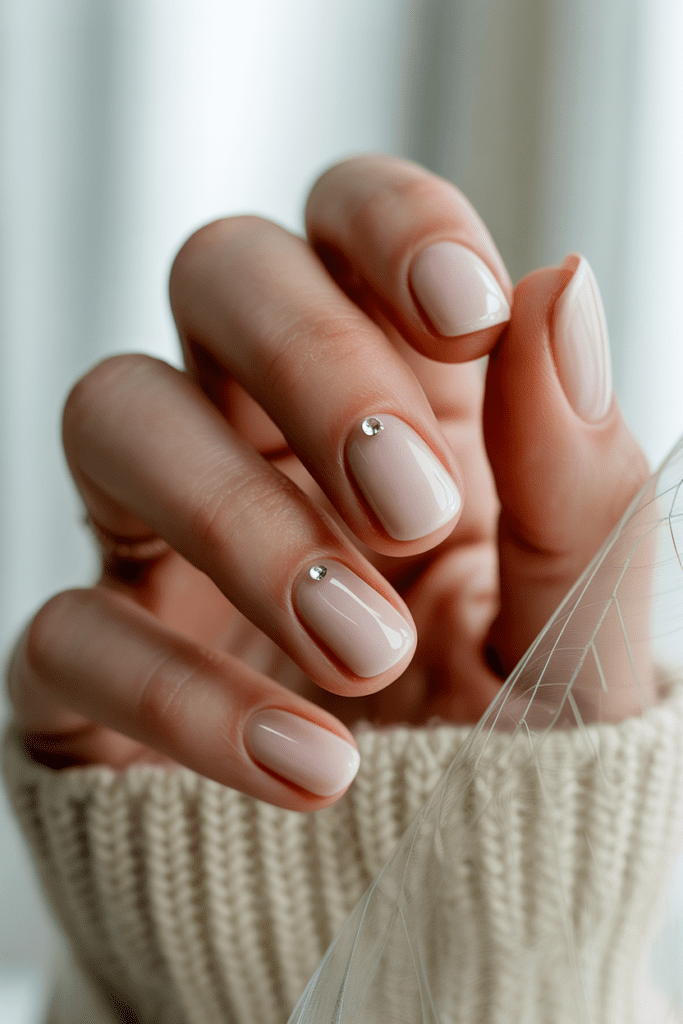
If you love understated manicures, save this one immediately. Milky nails already look clean and glossy, but tiny gems add that little extra detail without pushing things too far. One gem near the cuticle can completely change the vibe.
Use a milky white or sheer pink polish, then place one small gem on one or two nails only. I learned the hard way that five gems per hand can start looking like a craft emergency :/ One or two well-placed details always look better.
How to keep gems secure
- Apply gems while polish or nail glue feels tacky
- Press gently with tweezers
- Finish with top coat around the gem, not over it if you want extra sparkle
This is one of the prettiest simple nail art ideas for short nails because it keeps everything clean and delicate.
How To Make Simple Nail Art Last Longer
Cute nails lose their charm very quickly when they chip after one day. I always prep my nails properly now because the difference shows immediately. You do not need a salon routine, but you do need a few basics.
My go-to prep routine
- Remove old polish completely.
- File nails into a neat, even shape.
- Push back cuticles gently.
- Wipe nails with remover to clear oil.
- Apply a good base coat.
- Finish every manicure with a top coat.
I also reapply top coat after two or three days if I want extra wear. It sounds annoyingly responsible, but it works.
Best Colors For Easy Nail Designs
Some colors make simple nail art look better instantly. Soft neutrals and classic shades give small details room to shine. Loud neon can work, but it often steals attention from the actual design.
Nail polish shades worth keeping around
- Milky white
- Sheer pink
- Nude beige
- Classic red
- Soft lilac
- Sage green
- Black
- Gold or silver metallic
If you only buy a few shades, start with nude, white, soft pink, and red. Those four cover a shocking number of looks.
Simple Nail Art Tools That Actually Help
You do not need a giant nail kit with 47 mysterious tools you’ll never touch. A few basics make home manicures much easier and less messy.
Useful tools for beginners
- Dotting tool or hairpin for dots and hearts
- Thin nail art brush for lines and tips
- Makeup sponge for ombre nails
- Tweezers for gems and foil
- Nail tape for crisp edges
- Top coat for shine and staying power
I started with a toothpick, a sponge, and sheer stubbornness, so trust me, you can absolutely keep this low-maintenance.
Final Thoughts
The best simple nail art ideas do not demand perfection. They just need a steady-ish hand, a little patience, and a design that feels like you. Some days that means a tiny heart, some days that means glossy nude nails with one gold foil accent, and some days that means accepting that your left hand did its best.
Start with one or two styles from this list and see what fits your mood, your wardrobe, and your actual skill level. Nail art should feel fun, not like an exam. And if you smudge a tip or place a dot slightly crooked, welcome to the club that’s what top coat and confidence are for.